
Peanut butter brownies
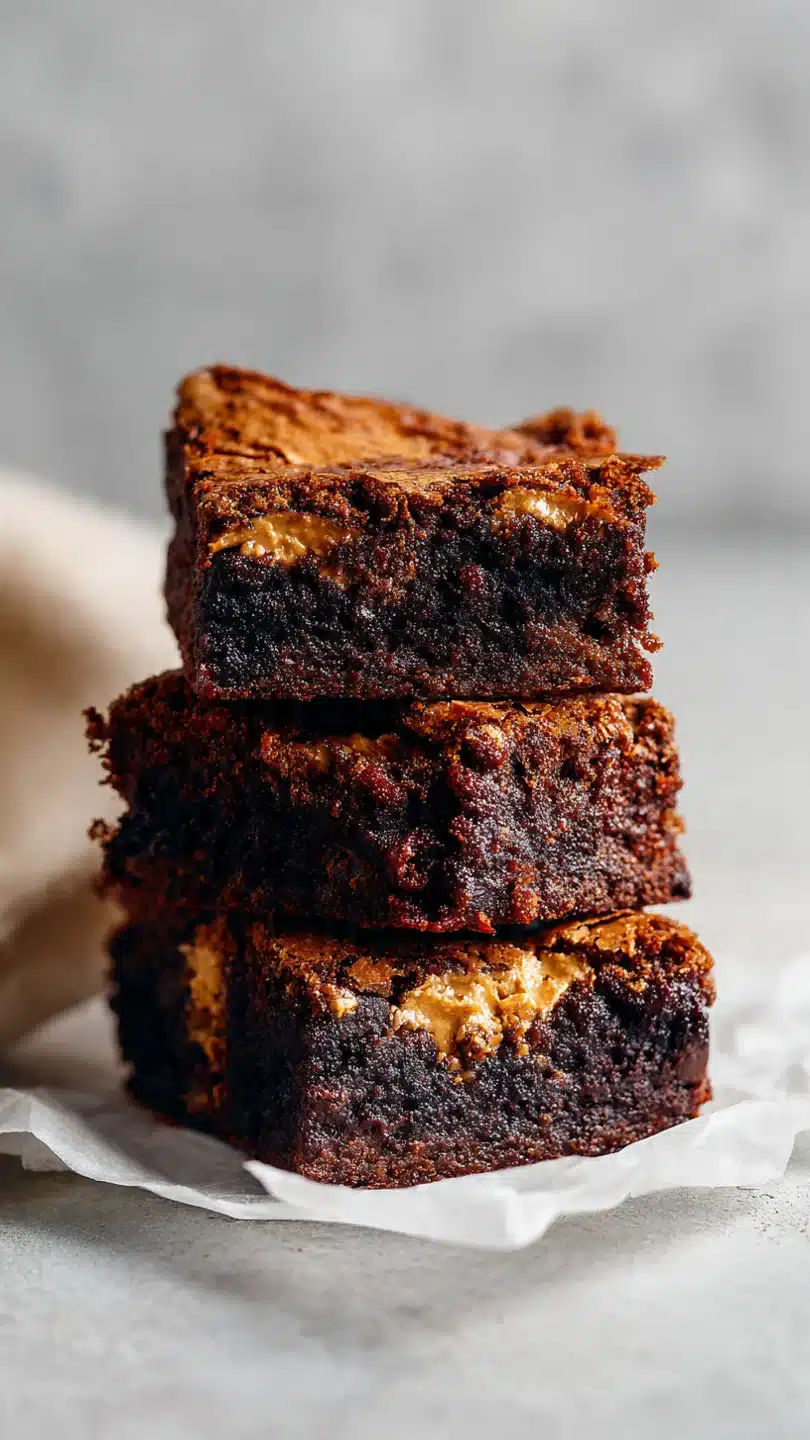
There’s a special kind of magic that happens when rich, fudgy chocolate meets creamy, salty-sweet peanut butter. It’s a combination that feels like a warm hug in dessert form. As a chef, I’ve made countless brownies, but this peanut butter swirl version is the one I keep coming back to for potlucks, bake sales, and those “I need chocolate now” moments.
It’s a deceptively simple recipe that yields bakery-worthy results: a dense, intensely chocolatey base ribboned with a peanut butter that bakes into soft, flavorful streaks. The contrast in textures and flavors is absolutely irresistible. Let’s make a batch that will have everyone asking for the recipe.
- Professional-Quality Results: This isn’t a box mix hack. Using real melted butter and a careful balance of leaveners creates a brownie with a crisp, paper-thin top and an interior that’s the perfect definition of fudgy.
- The Perfect Swirl: Many recipes have the peanut butter sink or disappear. My tested peanut butter mixture is slightly sweetened and thinned just enough to create beautiful, distinct marbling that stays visible and delicious after baking.
- One-Bowl Simplicity: The brownie batter comes together in minutes with minimal dishes. You don’t even need a mixer—just a whisk and a spatula. It’s the ideal low-effort, high-reward dessert.
- Endlessly Customizable: This is a fantastic base recipe. Once you master the swirl, you can add nuts, different chips, or even a caramel layer. I’ll share my favorite variations later.
- Crowd-Pleasing Guarantee: Chocolate and peanut butter is a universally loved duo. These brownies are always the first dessert to disappear from any table, pleasing both kids and adults alike.
Ingredients You’ll Need
Let’s gather our ingredients—this is where simple pantry staples transform into something extraordinary. Using quality components makes a noticeable difference, so I’ll share my pro picks.
For the ultimate fudgy brownie base, you’ll need unsalted butter. I prefer it for controlling salt levels. Melting it gives us that dense, chewy texture we’re after.
Granulated sugar sweetens and helps create that shiny, crackly top. Eggs and vanilla extract provide structure and depth of flavor.
The dry ingredients are simple but specific: all-purpose flour (measured correctly by spooning and leveling!), unsweetened cocoa powder (I often use Dutch-processed for a deeper chocolate flavor, but natural works too), a pinch of salt to balance the sweetness, and a small amount of baking powder for just a slight lift. Don’t skip the semi-sweet chocolate chips folded into the batter; they create little pockets of molten chocolate.
For the signature swirl, you need creamy peanut butter. I recommend a standard, no-stir variety like Jif or Skippy for consistent results. Natural peanut butter can separate and oil out.
We’ll mix it with a little powdered sugar to stabilize it and a splash of milk to make it perfectly swirly.

Note: You’ll find the complete list of ingredients, along with their exact measurements, in the printable recipe card at the bottom of this post.
Kitchen Equipment Needed
You don’t need any fancy gear for this recipe. An 8×8-inch square baking pan is the ideal size for the perfect brownie thickness. Lining it with parchment paper is non-negotiable for clean, easy removal.
You’ll need a large mixing bowl for the batter, a medium bowl for the dry ingredients and peanut butter swirl, a whisk, and a flexible spatula for folding. A wire cooling rack is essential for letting the brownies cool evenly and preventing a soggy bottom. An oven thermometer is my secret weapon to ensure your 350°F is accurate, as oven calibration drift is a common cause of baking fails.
How to Make Peanut Butter Brownies Recipe
Step 1: Combine the Wet Ingredients
Start by preheating your oven to 350°F (175°C) and lining your pan. In your large bowl, whisk the melted, slightly cooled butter and granulated sugar together vigorously for a full minute. This isn’t just mixing; you’re dissolving the sugar into the butter, which is the first step to that shiny, crackly top.
Then, whisk in the eggs and vanilla until the mixture is smooth, slightly pale, and thickened. You’re building your foundation here.
Step 2: Prepare the Dry Mix
In your separate bowl, sift together the flour, cocoa powder, salt, and baking powder. Trust me, sifting is worth the extra minute. It breaks up any lumps in the cocoa, aerates the flour, and ensures everything is evenly distributed.
This guarantees a uniform, tender texture in your finished brownie without any dry pockets of flour or bitter clumps of cocoa.
Step 3: Fold It All Together
Now, add the sifted dry ingredients to the wet ingredients. Use your spatula to gently fold them together. The goal is to mix just until the last streak of flour disappears.
Overmixing at this stage develops the gluten in the flour, which can make your brownies tough and cakey instead of fudgy. Once combined, fold in the chocolate chips. Your batter will be gloriously thick and glossy.
Step 4: Create the Peanut Butter Swirl
In the now-empty medium bowl, stir the peanut butter, powdered sugar, and milk together until completely smooth. The powdered sugar sweetens it slightly and, more importantly, stabilizes the fat in the peanut butter so it swirls beautifully without melting into the batter. The milk gives it the perfect piping consistency.
You should have a thick but dollop-able mixture.
Step 5: Swirl and Bake
Spread the thick brownie batter evenly into your prepared pan. Now for the fun part! Drop spoonfuls of the peanut butter mixture all over the surface.
Take a knife or toothpick and gently drag it through the dollops, creating a marbled pattern. Tip from me: make an “S” shape or a few figure-eights, but stop before it looks blended. You want defined swirls.
Sprinkle a few extra chocolate chips on top for good measure.
Step 6: Cool and Slice with Precision
Bake for 30-35 minutes. The true test of doneness is the toothpick test: insert it into the center, and it should come out with a few moist crumbs clinging to it, not wet batter. The edges will look set.
Believe me, taking them out at this point is key for fudginess. Let them cool completely in the pan on a wire rack. This patience is crucial for clean slicing.
Once cool, use the parchment paper to lift them out and cut into squares.
- Temperature is Key: Use room temperature eggs. They incorporate more easily into the butter-sugar mixture, creating a better emulsion for a smoother batter. Your melted butter should be warm, not hot, to avoid accidentally cooking the eggs.
- The Swirl Secret: If your peanut butter mixture is too stiff to swirl, add another teaspoon of milk. If it’s too runny, add a bit more powdered sugar. The ideal consistency is like soft-serve ice cream.
- Don’t Overbake: Ovens vary, so start checking at the 28-minute mark. The brownies will continue to cook from residual heat as they cool. A perfectly fudgy brownie will have a center that looks just-set, not wet but not completely dry.
- For Clean Cuts: For picture-perfect squares, chill the entire pan of cooled brownies in the refrigerator for 20-30 minutes before slicing. Use a sharp chef’s knife, wiping it clean with a hot, damp cloth between each cut.
Recipe Variations & Customizations
- Nutty Crunch: Fold 1/2 cup of chopped roasted peanuts or pecans into the brownie batter along with the chocolate chips for added texture.
- Double Chocolate: Use peanut butter chips instead of, or in addition to, the chocolate chips in the batter for an even more intense peanut butter flavor throughout.
- Salted Caramel Swirl: Before adding the peanut butter swirl, drizzle 1/3 cup of thick salted caramel sauce over the batter. Then add the peanut butter and swirl everything together for a decadent triple-threat dessert.
- Gluten-Free Adaptation: Substitute the all-purpose flour with a 1:1 gluten-free baking blend. The texture will be slightly more delicate but still deliciously fudgy.
- Dark Chocolate Version: Replace the semi-sweet chocolate chips with dark chocolate chips and use Dutch-processed cocoa powder for a more sophisticated, less sweet brownie base.
What to Serve With This Recipe
These brownies are a star on their own, but they can be elevated for special occasions. For a classic diner-style dessert, serve a warm square à la mode with a big scoop of high-quality vanilla bean ice cream. The hot-cold contrast is sublime.
For a dinner party, plate a smaller square with a drizzle of chocolate sauce, a sprinkle of flaky sea salt, and a few fresh raspberries to cut through the richness. They pair wonderfully with a glass of cold milk, a rich stout beer, or a cup of strong black coffee. They’re perfect for picnics, lunchboxes, or as the grand finale to a casual weeknight meal.
Storage & Make-Ahead Instructions
- Room Temperature Storage: Once completely cooled, store brownies in an airtight container at room temperature for 3-4 days. Place a sheet of parchment between layers if stacking.
- Freezing for Later: These brownies freeze exceptionally well. Wrap individual squares or the whole block tightly in plastic wrap, then in foil or a freezer bag. Freeze for up to 3 months. Thaw at room temperature or warm gently in the microwave.
- Make-Ahead Strategy: You can prepare the batter, spread it in the pan, add the swirl, cover tightly, and refrigerate for up to 24 hours before baking. You may need to add 2-3 extra minutes to the baking time if baking straight from the fridge.
- Reheating Tip: To recapture that fresh-from-the-oven feel, warm a square in the microwave for 10-15 seconds. This slightly softens the interior and makes the chocolate chips gooey again.
Frequently Asked Questions
Q: Can I use natural peanut butter?
A: I don’t recommend it for this specific swirl technique. Natural peanut butters often have a thinner consistency and separate, which can cause the swirl to oil out and bake unevenly into the brownie. A stabilized, no-stir peanut butter gives reliable, perfect results every time.
Q: My brownies are cakey, not fudgy. What happened?
A: The most common culprits are overmixing the batter (which develops gluten) or overbaking. Remember to fold just until combined and use the moist crumb test for doneness. Also, ensure you’re using the correct amount of flour by spooning it into the cup and leveling it off, not scooping.
Q: Can I double this recipe?
A: Absolutely! Double all ingredients and bake in a 9×13-inch pan. The baking time may increase to 35-40 minutes.
Always rely on the toothpick test rather than the timer.
Q: How do I get a shiny, crackly top on my brownies?
A: The key is dissolving the sugar into the warm, melted butter at the beginning. Whisking them together thoroughly for a full minute creates a glossy mixture that bakes up into that classic shiny, papery crust.
Q: Can I make these without eggs?
A: I haven’t tested an egg-free version of this specific recipe. For a reliable vegan brownie, I would recommend seeking out a recipe designed from the ground up with egg substitutes like flax eggs, as the structure and texture can vary significantly.
Q: Why did my peanut butter swirl disappear?
A: This usually means the peanut butter mixture was too thin or was over-swirled into the batter. Make sure your mixture is thick like soft-serve ice cream and swirl gently—you want to marble, not mix.
Q: Can I use a different nut butter?
A: Yes! Almond butter or cashew butter would work beautifully using the same method. The flavor will be different but equally delicious.
Final Thoughts
This peanut butter brownie recipe is a testament to how a few quality ingredients and simple techniques can create something truly spectacular. It’s the dessert I’m most proud to share because it consistently delivers: that dense, fudgy bite, the sweet-salty ribbon of peanut butter, and the joy of seeing that beautiful swirl come out of the oven. It’s approachable enough for a beginner baker yet impressive enough for any seasoned cook’s repertoire.
I encourage you to make this recipe your own. Try the variations, master the swirl, and most importantly, share them with someone you care about. Food is connection, and these brownies are a delicious way to connect.
If you make them, I’d love to hear how it went! Leave a comment or tag me on social media. Now, go preheat that oven and get ready for your kitchen to smell amazing.
Happy baking
Ultimate Peanut Butter Brownies
Ingredients
Equipment
Method
- Preheat your oven to 350°F (175°C). Line an 8×8-inch baking pan with parchment paper, leaving an overhang on two sides for easy removal. In a large bowl, whisk together the melted butter and granulated sugar for about a minute until well combined. Whisk in the eggs and vanilla extract until the mixture is smooth and slightly thickened.
- In a separate medium bowl, sift together the flour, cocoa powder, salt, and baking powder. This step is crucial for a lump-free, tender crumb. Tip from me: Sifting aerates the dry ingredients, which helps create that perfect fudgy texture, not a cakey one.
- Gently fold the dry ingredients into the wet ingredients using a spatula. Mix just until no streaks of flour remain—overmixing develops gluten and leads to tough brownies. Fold in the 1/2 cup of chocolate chips. The batter will be thick and glossy.
- In a small bowl, stir together the peanut butter, powdered sugar, and milk until smooth. This creates a slightly sweet, pipeable swirl that won’t sink completely into the batter. Trust me, this ratio is key for that beautiful marbled effect.
- Spread the brownie batter evenly into your prepared pan. Drop dollops of the peanut butter mixture all over the top. Use a knife or a toothpick to gently swirl the peanut butter into the brownie batter. Don’t over-swirl! You want distinct ribbons. Sprinkle a few extra chocolate chips on top.
- Bake for 30-35 minutes, or until a toothpick inserted into the center comes out with a few moist crumbs attached (not wet batter). The edges should be set. Believe me, slightly underbaking is the secret to fudgy brownies. Let them cool completely in the pan on a wire rack before lifting out and slicing.


