
Strawberry Earthquake Cake
- Easy to Make: With simple ingredients and straightforward steps, this cake is perfect for bakers of all skill levels.
- Bursting with Flavor: The combination of sweet strawberries and creamy cheese swirl creates a delightful taste experience.
- Visually Stunning: The marbled effect and vibrant strawberries make this cake a showstopper at any gathering.
- Customizable: Easily adapt the recipe with different fruits or add-ins to suit your preferences.
- Perfect for Any Occasion: Whether it’s a family dinner or a special event, this cake is sure to impress.
Ingredients You’ll Need
Let’s gather our ingredients—these simple pantry staples create magic together, resulting in a delicious Strawberry Earthquake Cake.
For the Cake:- White cake mix: A convenient base that ensures a light and fluffy texture.
- Water: To prepare the cake mix.
- Vegetable oil: Adds moisture to the cake.
- Eggs: For structure and richness.
- Cream cheese: Softened, for a creamy and tangy swirl.
- Butter: Softened, to blend smoothly with the cream cheese.
- Powdered sugar: For sweetness and smooth texture.
- Vanilla extract: Enhances the flavor of the swirl.
- Strawberries: Fresh, sliced, for bursts of fruity flavor.
- Sweetened shredded coconut: Optional, for added texture and sweetness.
When selecting your ingredients, opt for high-quality cream cheese and fresh strawberries to maximize flavor. If you prefer, you can use frozen strawberries, but be sure to thaw and drain them first to avoid excess moisture. For the white cake mix, any reputable brand will do, but I recommend Betty Crocker or Duncan Hines for consistent results.
[INGREDIENTIMAGEPLACEHOLDER]Kitchen Equipment Needed
To make this Strawberry Earthquake Cake, you’ll need a few essential pieces of equipment:
- 9×13 inch baking dish: For baking the cake.
- Mixing bowls: To prepare the cake batter and cream cheese mixture.
- Electric mixer: For blending the cream cheese mixture until smooth.
- Measuring cups and spoons: For accurate ingredient measurements.
- Spatula: To spread and swirl the batter and cream cheese.
- Toothpick: To test the cake for doneness.
How to Make Strawberry Earthquake Cake Recipe
Step 1: Prepare the Cake Batter
Start by preheating your oven to 350°F (175°C) and greasing a 9×13 inch baking dish. Prepare the white cake mix according to the package instructions using the water, vegetable oil, and eggs. Pour the batter into the prepared baking dish.
Trust me, a well-greased dish ensures easy removal of your delicious cake.
Step 2: Mix the Cream Cheese Swirl
In a separate bowl, beat together the softened cream cheese, butter, powdered sugar, and vanilla extract until smooth and creamy. This mixture will be your delicious swirl in the cake. Believe me, it’s worth taking the extra time to get it smooth.
A smooth cream cheese mixture ensures a perfect marbled effect in your cake.
Step 3: Assemble the Cake
Drop spoonfuls of the cream cheese mixture randomly over the cake batter. Then, scatter the sliced strawberries and shredded coconut (if using) over the top. Use a knife to gently swirl the cream cheese mixture into the cake batter, creating a marbled effect.
Tip from me: Don’t over-swirl, as you want to maintain distinct swirls for visual appeal and flavor.
Step 4: Bake to Perfection
Bake the cake in the preheated oven for about 35-40 minutes, or until the edges are golden brown and the center is set. You’ll know it’s done when a toothpick inserted into the center comes out clean or with a few moist crumbs. Now comes the fun part—watching your cake transform into a delicious dessert.
Step 5: Cool, Slice, and Serve
Allow the cake to cool completely in the pan on a wire rack. Once cooled, slice and serve. Step back and admire your delicious Strawberry Earthquake Cake before enjoying a slice!
For an extra touch, serve with a dollop of whipped cream or a scoop of vanilla ice cream.
Pro tip: When preparing the cream cheese mixture, ensure all ingredients are at room temperature. This helps achieve a smooth, lump-free consistency that will swirl beautifully into the cake batter. Temperature matters: Allow the cake to cool completely before slicing. Cutting into a warm cake can cause it to crumble, and you want those neat, beautiful slices to showcase your creation. Visual cues: Look for a golden brown edge and a set center as signs of doneness. The cake should spring back slightly when touched in the center, and a toothpick should come out clean or with a few moist crumbs. Common mistake: Avoid overmixing the cream cheese mixture, as it can become too runny and won’t hold its shape when swirled into the cake batter.Recipe Variations & Customizations
- Blueberry Twist: Substitute fresh blueberries for the strawberries to create a delightful Blueberry Earthquake Cake. The tartness of the blueberries pairs well with the sweet cream cheese swirl.
What to Serve With This Recipe
The Strawberry Earthquake Cake pairs wonderfully with a variety of beverages and side dishes. For a refreshing contrast, serve it with a glass of sparkling wine or a cup of herbal tea. If you’re planning a dessert spread, consider pairing it with a fruit salad or a scoop of vanilla ice cream for an indulgent treat.
This cake is perfect for summer picnics, birthday parties, or as a sweet ending to a family dinner.
Storage & Make-Ahead Instructions
- To store your Strawberry Earthquake Cake, place it in an airtight container and refrigerate for up to 3 days. For longer storage, wrap the cake tightly in plastic wrap and freeze for up to 2 months. To reheat, thaw in the refrigerator overnight and serve at room temperature or warm slightly in the oven. When making ahead, prepare the cake as instructed, cool completely, and refrigerate until ready to serve. This allows the flavors to meld together for an even tastier experience.
Nutritional Benefits
- Strawberries in this cake provide a boost of vitamin C and antioxidants, which contribute to overall health. While desserts should be enjoyed in moderation, this cake can be part of a balanced diet, offering a source of energy and enjoyment. For a lighter version, consider using low-fat cream cheese and reducing the amount of butter.
Frequently Asked Questions
Q: Can I make this ahead of time?
Yes, you can make the Strawberry Earthquake Cake ahead of time. Prepare and bake the cake, then cool completely and refrigerate until ready to serve. This allows the flavors to meld together for an even tastier experience.
Q: Can I use frozen strawberries?
Yes, you can use frozen strawberries. Thaw and drain them well to remove excess moisture before adding them to the cake.
Q: How can I tell when the cake is done?
The cake is done when the edges are golden brown, the center is set, and a toothpick inserted into the center comes out clean or with a few moist crumbs.
Q: Can I freeze this cake?
Yes, you can freeze the Strawberry Earthquake Cake. Wrap it tightly in plastic wrap and freeze for up to 2 months. Thaw in the refrigerator overnight before serving.
Q: What can I substitute for the cream cheese?
For a dairy-free option, you can use a vegan cream cheese substitute. Ensure it’s softened before mixing to achieve a smooth consistency.
Q: How can I adjust the sweetness?
To reduce the sweetness, you can decrease the amount of powdered sugar in the cream cheese mixture. Taste and adjust as needed.
Q: Can I add other fruits?
Absolutely! Feel free to experiment with other fruits like blueberries, raspberries, or even diced apples for a seasonal twist.
Q: What if my cream cheese mixture is too runny?
If your cream cheese mixture is too runny, try chilling it for a few minutes before swirling it into the cake batter. This will help it hold its shape better.
Recipe Origin or History
The concept of an “Earthquake Cake” originated in the Southern United States, known for its rich, indulgent desserts. Traditionally, these cakes feature a swirled cream cheese topping that cracks and separates during baking, resembling an earthquake’s effect. My version adds fresh strawberries for a fruity twist, making it a delightful and refreshing dessert perfect for any occasion.
Final Thoughts
The Strawberry Earthquake Cake is a delightful dessert that combines the ease of a boxed cake mix with the indulgence of a homemade cream cheese swirl and fresh strawberries. Its vibrant appearance and delicious flavor make it a perfect choice for any gathering or special occasion. I encourage you to give this recipe a try and experience the joy of creating a dessert that’s both easy to make and impressive to serve.
Don’t forget to share your results on social media and leave a rating below. Enjoy your Strawberry Earthquake Cake with a scoop of ice cream for an extra treat, and explore more recipes on my blog for additional culinary inspiration!
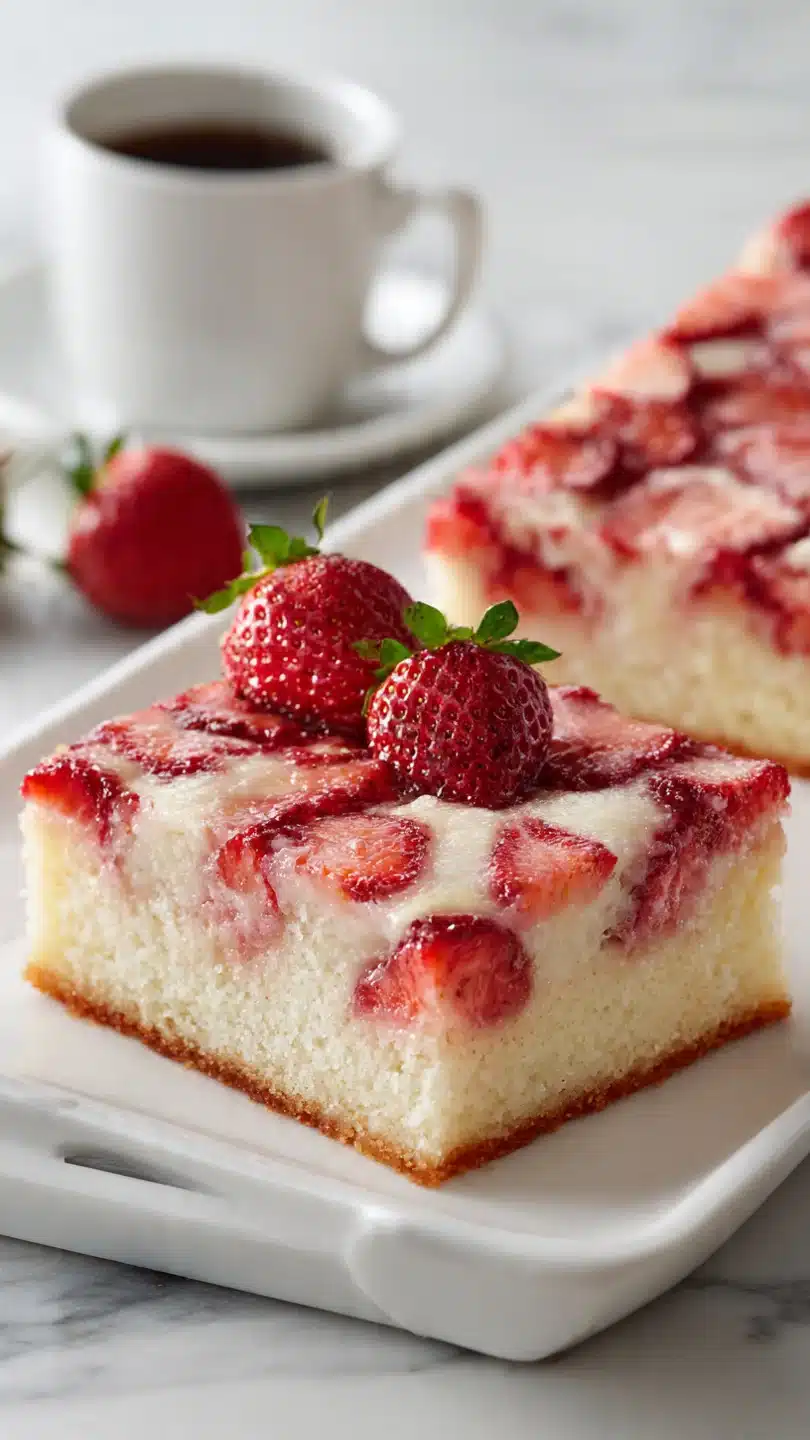
Strawberry Earthquake Cake
Ingredients
Equipment
Method
- Preheat your oven to 350°F (175°C). Grease a 9×13 inch baking dish to ensure your cake doesn’t stick. Prepare the white cake mix according to the package instructions using the water, vegetable oil, and eggs. Pour the batter into the prepared baking dish.
- In a separate bowl, beat together the softened cream cheese, butter, powdered sugar, and vanilla extract until smooth and creamy. This mixture will be your delicious swirl in the cake. Trust me, it’s worth taking the extra time to get it smooth.
- Drop spoonfuls of the cream cheese mixture randomly over the cake batter. Then, scatter the sliced strawberries and shredded coconut (if using) over the top. Use a knife to gently swirl the cream cheese mixture into the cake batter, creating a marbled effect.
- Bake the cake in the preheated oven for about 35-40 minutes, or until the edges are golden brown and the center is set. You’ll know it’s done when a toothpick inserted into the center comes out clean or with a few moist crumbs.
- Allow the cake to cool completely in the pan on a wire rack. Once cooled, slice and serve. Step back and admire your delicious Strawberry Earthquake Cake before enjoying a slice!


