
Brownies dessert table
There’s something universally joyful about a brownie. That dense, fudgy texture, the intense chocolate hit, the satisfying crack of the top crust—it’s a dessert that needs no introduction. But when you transform that single treat into an interactive, customizable dessert table?
You create a centerpiece that sparks conversation and delight. As a chef who has planned countless events, I can tell you that a well-executed brownie bar is the ultimate crowd-pleaser. It’s approachable, endlessly customizable, and, with the right foundation, absolutely foolproof.
Let’s build a dessert table that’s as delicious as it is beautiful, starting with a brownie recipe I’ve refined over hundreds of batches.
- The Ultimate Crowd-Pleaser: Offers something for everyone, from classic chocolate lovers to adventurous flavor combiners, ensuring no guest feels left out.
- Surprisingly Simple Setup: The brownies can be baked days ahead, and the topping stations require minimal last-minute assembly, taking the stress out of entertaining.
- Sturdy and Serve-Friendly: This specific fudgy brownie recipe is engineered to hold its structure under a mountain of toppings without becoming soggy or falling apart.
- Visually Stunning Impact: A tiered display of brownies, sauces, and toppings creates a beautiful, abundant focal point that feels special and celebratory.
- Perfect for Any Occasion: Easily scales from an intimate birthday party to a large wedding shower by simply adjusting quantities and topping varieties.
- Interactive and Fun: Guests love the creative freedom to build their own perfect dessert, making the experience memorable and engaging.
Ingredients You’ll Need
Let’s gather our ingredients—this is where quality truly shines. For a dessert table centerpiece, you need a brownie that can stand on its own but also play well with others. This recipe uses a high ratio of butter and chocolate to flour, creating a dense, moist crumb that won’t dry out on your table.
For the Brownie Base:
- Unsalted butter: I insist on European-style butter (like Kerrygold or Plugrá) for its higher fat content. It creates a richer mouthfeel and more pronounced flavor.
- High-quality semi-sweet chocolate: This is your primary flavor agent. Don’t use chocolate chips meant for cookies; look for a baking bar with around 60% cocoa solids. Guittard, Callebaut, or Ghirardelli are excellent choices.
- Granulated sugar: It sweetens, but more importantly, when whisked with the eggs and warm chocolate, it creates that signature shiny, crackly top we all love.
- Eggs: Room temperature is non-negotiable. Cold eggs can cause the warm chocolate butter to seize, and they won’t incorporate as smoothly, affecting the texture.
- All-purpose flour: Spoon it into your measuring cup and level it off. Packing the flour is a surefire way to end up with dry, cakey brownies.
- Dutch-process cocoa powder: This cocoa is treated with an alkali, giving it a darker color and a smoother, less acidic chocolate flavor that complements the melted chocolate perfectly.
- Fine sea salt: It heightens all the chocolate flavors and balances the sweetness. If you only have table salt, use half the amount.

Note: You’ll find the complete list of ingredients, along with their exact measurements, in the printable recipe card at the bottom of this post.
Kitchen Equipment Needed
You don’t need any fancy gadgets for perfect brownies. A few key tools will set you up for success. First, a 9×13-inch metal baking pan is essential.
Metal heats quickly and evenly, giving you those coveted crispy edges. Glass or ceramic pans bake differently and often lead to undercooked centers. Parchment paper is your best friend for clean removal.
A large heatproof bowl for your one-bowl mixing method, a sturdy whisk, and a flexible spatula are all you need for the batter. Finally, a sharp chef’s knife—heated under hot water and dried—will give you those pristine, crumb-free cuts for a professional presentation.
How to Make Professional Fudgy Brownies Recipe
Step 1: Prepare Your Pan
Preheat your oven to 350°F (175°C). Generously butter a 9×13-inch metal baking pan, then line it with parchment paper, leaving an overhang on two sides. This creates a sling for easy removal.
Trust me, this step is non-negotiable for clean cuts. A well-prepared pan ensures your beautiful brownies come out in one perfect slab, ready for topping.
Step 2: Melt Chocolate and Butter
In a large, heatproof bowl, combine the chopped chocolate and butter. Melt them together using a double boiler or in 30-second bursts in the microwave, stirring until completely smooth. Let this mixture cool for about 5 minutes—you don’t want to scramble the eggs in the next step.
This gentle melting method ensures the fats and cocoa butter blend seamlessly for that ultra-rich base.
Step 3: Build the Batter Base
Whisk the granulated sugar into the warm chocolate mixture. Then, add the eggs one at a time, whisking vigorously after each addition until fully incorporated. The mixture will become thick, pale, and glossy.
This step is key for that crackly top. Stir in the vanilla extract. The goal here is to dissolve the sugar and aerate the eggs slightly.
Step 4: Incorporate Dry Ingredients
Sift the flour, cocoa powder, and salt directly over the wet ingredients. Using a spatula, fold gently until just combined and no dry streaks remain. Tip from me: Overmixing develops gluten and leads to cakey brownies.
We want fudgy. A few flour streaks are better than a tough batter.
Step 5: Bake to Perfection
Pour the thick batter into your prepared pan, smoothing it into an even layer. Bake for 30-35 minutes. The brownies are done when a toothpick inserted into the center comes out with a few moist crumbs attached, not wet batter.
Believe me, it’s better to under-bake slightly than over-bake. The residual heat will continue to cook them as they cool.
Step 6: Cool and Cut for Display
Let the brownies cool completely in the pan on a wire rack. Use the parchment sling to lift them out onto a cutting board. For clean, professional squares, chill the whole slab in the fridge for 1 hour before cutting with a sharp, hot knife (run it under hot water and dry it between cuts).
Now you have the perfect canvas for your dessert table.
- The Room Temperature Egg Rule: This is my number one tip. Room temperature eggs emulsify into the fat and sugar much more easily, creating a stable, homogeneous batter that bakes evenly. Cold eggs can cause the batter to break or become grainy.
- Don’t Skip the Sifting: Cocoa powder loves to clump. Sifting it with the flour ensures no dry pockets of cocoa end up in your finished brownies, giving you a perfectly smooth texture in every bite.
- The Toothpick Test Decoded: For fudgy brownies, you want to see a few sticky, moist crumbs on the toothpick. If it comes out completely clean, the brownies are overdone and will be dry. Pull them out when they look just slightly underdone in the center.
- Chill Before You Cut: I know it’s tempting to dive in, but patience pays off. Chilling the brownies firms up the butter and chocolate, allowing you to get razor-sharp, crumb-free edges that look stunning on a display.
- Metal Pan Mastery: Always use a light-colored metal pan. Dark pans or glass absorb and distribute heat differently, often leading to over-baked edges and an undercooked center. The metal pan gives you the ideal texture contrast.
Recipe Variations & Customizations
- Salted Caramel Swirl: Before baking, drizzle 1/2 cup of thick salted caramel sauce over the batter and use a knife to swirl it gently. The caramel bakes into pockets of gooey sweetness.
- Espresso Infused: Dissolve 1 tablespoon of instant espresso powder into the vanilla extract before adding it. This doesn’t make the brownies taste like coffee; it deepens and amplifies the chocolate flavor phenomenally.
- Mint Chocolate Chip: Add 1 teaspoon of peppermint extract with the vanilla and fold in 1 cup of dark chocolate chips. Top with crushed peppermint candies after baking for a festive look.
- Gluten-Free Adaptation: Substitute the all-purpose flour with a 1:1 gluten-free baking blend. The result is nearly identical in texture and perfect for guests with dietary restrictions.
- Rocky Road: After baking, immediately top the hot brownies with mini marshmallows, chopped walnuts, and extra chocolate chips. Return to the oven for 2-3 minutes to melt the marshmallows slightly.
- Orange Zest: Add the finely grated zest of one large orange to the sugar before mixing it in. The citrus oil cuts through the richness beautifully for a sophisticated twist.
- Turtle Brownies: After baking and cooling, drizzle with caramel and chocolate sauces, then sprinkle generously with toasted pecans for a classic candy-inspired treat.
What to Serve With This Recipe
Your brownie dessert table is the star, but thoughtful accompaniments elevate it to an experience. For toppings, think in categories: Crunch (toasted nuts, crushed pretzels, sprinkles), Creamy (whipped cream, mascarpone, ice cream scoops), Saucy (hot fudge, salted caramel, raspberry coulis), and Fresh (berries, mint leaves). Offer a variety of utensils—small tongs for dry toppings, spoons for sauces, and an ice cream scoop.
For beverages, balance the richness with cold milk, strong coffee, or a dessert wine like Port. If you’re serving a crowd, consider adding a lighter option like a fruit platter or lemon bars to provide contrast.
Storage & Make-Ahead Instructions
- Make-Ahead Brownies: These brownies are ideal for making ahead. Bake, cool completely, and wrap the uncut slab tightly in plastic wrap, then foil. They will stay moist and fresh at room temperature for up to 3 days, or you can freeze them for up to 3 months. Thaw overnight before cutting and serving.
- Storage for Leftovers: Store any leftover topped brownies in a single layer in an airtight container in the refrigerator for up to 2 days. Be aware that toppings like whipped cream will not hold up as well.
- Freezing Instructions: For best results, freeze the brownies before adding toppings. Place cut, un-topped squares on a parchment-lined baking sheet and freeze until solid (about 2 hours). Then, transfer to a freezer-safe bag or container. They will keep for 3 months. Thaw at room temperature for an hour before serving.
- Topping Prep: Nearly all toppings can be prepped 1-2 days in advance. Chop nuts, make sauces (most can be gently reheated), and wash berries. Store each component in its own separate container in the fridge.
Frequently Asked Questions
Q: Can I make these brownies gluten-free?
Absolutely. Use a reputable 1:1 gluten-free flour blend (like Bob’s Red Mill or King Arthur). The texture will be nearly identical—slightly more tender but still wonderfully fudgy.
I’ve tested this multiple times with great success.
Q: How do I prevent my brownies from becoming soggy on the dessert table?
The key is in the brownie base and staging. This recipe is intentionally fudgy but sturdy. Place sauces in small pitchers or bowls with spoons, not directly on the brownies.
Keep whipped cream and ice cream in chilled containers until serving time.
Q: What’s the best way to cut brownies cleanly?
Chill them first, then use a sharp, non-serrated knife. Run the knife under very hot water, wipe it completely dry, and make one confident cut. Wipe the blade clean and reheat it between each cut for perfect squares.
Q: Can I double this recipe for a larger crowd?
I do not recommend doubling and baking in one giant pan. The center will not bake properly. Instead, make two separate batches and bake them in two 9×13 pans.
This ensures even baking and the perfect texture.
Q: My brownies didn’t get a shiny, crackly top. What went wrong?
The shiny top comes from properly dissolving the sugar in the warm chocolate mixture and vigorously whisking in the eggs. Ensure your chocolate-butter mixture is still warm (not hot) when you add the sugar and eggs, and whisk until the mixture is thick and glossy.
Q: How far in advance can I set up the dessert table?
You can set up all dry toppings, sauces (in sealed containers), and dishes 2-3 hours ahead. Add the brownies, ice cream, and whipped cream just before guests arrive—about 15-30 minutes prior is perfect.
Q: What are some non-dairy topping options?
For a dairy-free bar, offer coconut whipped cream, dairy-free hot fudge, sorbet, toasted coconut flakes, and fresh fruit. The brownie recipe itself can be made with a plant-based butter substitute, though the texture will be slightly different.
Final Thoughts
Building a brownie dessert table is more than just serving a dessert; it’s creating a moment of shared joy and creativity. This professional-grade fudgy brownie recipe is your reliable, delicious foundation—a blank canvas ready for your (and your guests’) imagination. With the make-ahead tips and presentation advice, you can host with confidence, knowing the centerpiece of your table is both stunning and stress-free.
Remember, the best gatherings are about the experience. Watching friends and family customize their perfect treat is its own kind of reward. So bake those brownies, lay out those toppings, and step back to enjoy the sweet success.
I’d love to hear how your dessert table turns out—share your creations and tag me! Now, who’s ready for a brownie?
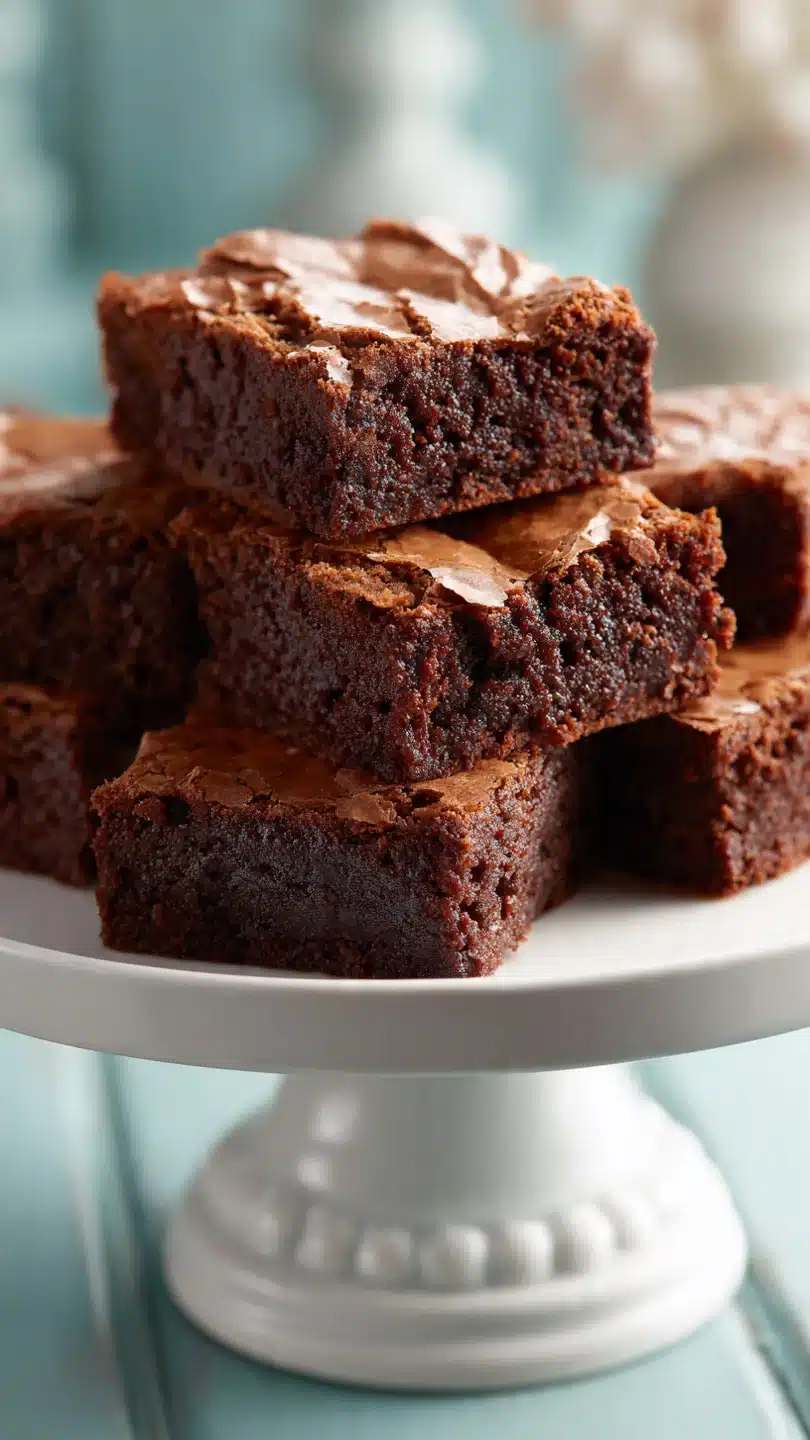
Professional Fudgy Brownies
Ingredients
Equipment
Method
- Preheat your oven to 350°F (175°C). Generously butter a 9×13-inch metal baking pan, then line it with parchment paper, leaving an overhang on two sides. This creates a sling for easy removal. Trust me, this step is non-negotiable for clean cuts.
- In a large, heatproof bowl, combine the chopped chocolate and butter. Melt them together using a double boiler or in 30-second bursts in the microwave, stirring until completely smooth. Let this mixture cool for about 5 minutes—you don’t want to scramble the eggs in the next step.
- Whisk the granulated sugar into the warm chocolate mixture. Then, add the eggs one at a time, whisking vigorously after each addition until fully incorporated. The mixture will become thick and glossy. Stir in the vanilla extract.
- Sift the flour, cocoa powder, and salt directly over the wet ingredients. Using a spatula, fold gently until just combined and no dry streaks remain. Tip from me: Overmixing develops gluten and leads to cakey brownies. We want fudgy.
- Pour the thick batter into your prepared pan, smoothing it into an even layer. Bake for 30-35 minutes. The brownies are done when a toothpick inserted into the center comes out with a few moist crumbs attached, not wet batter. Believe me, it’s better to under-bake slightly than over-bake.
- Let the brownies cool completely in the pan on a wire rack. Use the parchment sling to lift them out onto a cutting board. For clean, professional squares, chill the whole slab in the fridge for 1 hour before cutting with a sharp, hot knife (run it under hot water and dry it between cuts).


