
Easter brownies
The scent of rich chocolate baking is a welcome sign of spring in my kitchen. When Easter rolls around, I find myself craving a dessert that’s both decadent and delightfully festive—something that satisfies the chocolate lovers but also brings that joyful, colorful holiday spirit to the table. That’s where these Easter brownies come in.
Forget dry, cakey squares; we’re making the ultimate fudgy brownie, with a crackly top and a dense, melt-in-your-mouth interior. Then, we crown them with a vibrant confetti of Easter candies, creating a treat that’s as fun to look at as it is to eat. It’s the perfect centerpiece for your holiday dessert spread, guaranteed to earn smiles from kids and adults alike.
- One-Bowl Simplicity: You don’t need a mixer or multiple bowls. Everything comes together quickly with just a whisk and a spatula, meaning less cleanup and more time to enjoy the holiday.
- Perfect Fudgy Texture: Trust me, after years of testing, this ratio of butter, eggs, and cocoa delivers that dense, moist, and intensely chocolatey crumb that defines a perfect brownie.
- Festive with Minimal Effort: The decoration is effortless—simply scatter candy over the hot pan. It creates a stunning visual impact without any fussy frosting or intricate piping.
- Highly Customizable: This is a fantastic base recipe. You can change up the candy toppings based on what you have or prefer, or even mix in nuts or chocolate chips into the batter itself.
- Make-Ahead Friendly: These brownies taste even better the next day and hold up beautifully. You can bake them a day or two before your gathering, freeing up precious oven time.
- Crowd-Pleasing Guarantee: The combination of classic chocolate and festive candy is universally loved, making this the safest bet for pleasing all your Easter guests.
Ingredients You’ll Need
Let’s gather our ingredients—this is where simple pantry staples transform into something magical. Using quality cocoa powder is my number one tip here; it’s the primary flavor, so it makes a big difference. I prefer a natural cocoa powder for a more robust, slightly tangy chocolate note, but Dutch-processed will work too and yield a slightly milder flavor.
- Unsalted butter: Melted and slightly cooled. This gives us that rich, fudgy texture and helps create that shiny, crackly top we all love.
- Granulated sugar: It sweetens the deal and, crucially, helps create that desirable crisp crust on top as the brownies bake.
- Large eggs: Make sure they’re at room temperature. Believe me, this prevents the melted butter from seizing up and ensures a smooth, emulsified batter.
- Pure vanilla extract: A splash enhances all the chocolate flavors in the background.
- All-purpose flour: Just enough to provide structure without making the brownies cakey. Always spoon and level it into your measuring cup for accuracy.
- Unsweetened cocoa powder: The star of the show! Sift it to avoid any lumps in your batter. This is not the time for sweetened drinking cocoa.
- Salt: A must to balance and deepen the sweetness. It makes the chocolate taste more chocolatey.
- Assorted Easter candy: This is your chance to get creative! Mini chocolate eggs, pastel M&M’s, crunchy Robin’s Eggs, or even a few jelly beans. Use about a cup and a half for generous coverage.

Note: You’ll find the complete list of ingredients, along with their exact measurements, in the printable recipe card at the bottom of this post.
Kitchen Equipment Needed
You likely have everything you need already. The essential tool is a 9×13 inch metal baking pan. Glass or ceramic pans bake differently and can lead to overdone edges, so metal is best for even cooking.
Parchment paper with overhanging edges is non-negotiable for me—it guarantees you can lift the entire slab of brownies out for perfect, crumb-free slicing. You’ll also need a large mixing bowl, a whisk, a flexible spatula for folding, and a wire cooling rack. An offset spatula is helpful for smoothing the thick batter but not essential.
How to Make Easter Brownies Recipe
Step 1: Prep Your Pan and Oven
Start by preheating your oven to 350°F (175°C). This ensures it’s perfectly heated and ready to go. Now, line your 9×13 inch metal pan with parchment paper.
I like to cut a sheet that fits the length and hangs over the two long sides—these “handles” will let you lift the whole batch out later. Lightly grease any exposed parts of the pan (where the parchment doesn’t cover) to be safe. This simple step is the secret to getting pristine brownie squares.
Step 2: Build the Fudgy Base
In your large bowl, combine the melted (but not hot) butter and the sugar. Whisk them together for a good minute. You’re not just mixing; you’re beginning to dissolve the sugar, which contributes to that shiny crust.
Next, add your room-temperature eggs one at a time, whisking vigorously after each until the mixture becomes thick, smooth, and slightly paler in color. This incorporation of air is important. Finally, whisk in the vanilla extract.
Step 3: Gently Combine Dry Ingredients
Here’s where we keep the texture fudgy. Sift the flour, cocoa powder, and salt directly into the wet ingredients. Sifting prevents lumps of cocoa and aerates the flour.
Now, put the whisk away and grab your spatula. Gently fold the dry ingredients into the wet until you have a uniform, thick, and glossy batter. A few streaks are okay; stop before you overmix.
The batter will be very dense—that’s exactly what we want.
Step 4: Bake to Fudgy Perfection
Transfer the batter to your prepared pan, using your spatula or an offset knife to spread it into an even layer. Bake on the center rack for 30-35 minutes. Tip from me: Start checking at 30 minutes.
The key is to not overbake. The edges will be set and pulling away slightly, and the center should look set but still soft. A toothpick inserted about 2 inches from the edge should come out with a few moist crumbs attached, not wet batter.
Step 5: Decorate and Cool Completely
As soon as you pull the pan from the oven, it’s time for the fun part! Immediately scatter your assortment of Easter candies evenly across the hot surface. Gently press them in just so they adhere.
Now, the hardest part: patience. You must let the brownies cool completely in the pan on a wire rack. This allows them to finish setting up into that dreamy, fudgy texture.
Rushing this step will lead to a gooey mess when you try to cut them.
- The Toothpick Truth: The classic “clean toothpick” test will lead you to overbaked, cakey brownies. For true fudginess, you want moist crumbs clinging to the pick. Trust me, the residual heat will finish the cooking as they cool.
- Room Temperature Eggs are Key: Using cold eggs straight from the fridge can cause the melted butter to solidify on contact, resulting in a greasy, separated batter. Take your eggs out 30 minutes before you start.
- Cutting for Presentation: For impeccably clean cuts that don’t smash the candies on top, chill the cooled brownies for an hour. Then, use a large, sharp chef’s knife, wiping it clean with a hot, damp cloth between each slice.
- Candy Selection Strategy: If using chocolate-coated candies (like mini eggs), they’ll hold their shape perfectly. If using something softer like marshmallow chicks, add them after the brownies have cooled for 5 minutes to prevent total melting.
Recipe Variations
- Salted Caramel Pretzel: Before baking, swirl 1/2 cup of thick salted caramel sauce into the batter and press in handfuls of mini pretzel twists along with the candy topping.
- Orange Zest Infusion: Add the finely grated zest of one large orange to the butter-sugar mixture for a bright, sophisticated chocolate-orange flavor that pairs wonderfully with spring.
- Gluten-Free Adaptation: Substitute the all-purpose flour with a 1:1 gluten-free baking blend. The result is nearly identical in texture and flavor.
- Peanut Butter Paradise: Drop teaspoonfuls of creamy peanut butter onto the batter and use a knife to swirl before baking. Top with Reese’s Pieces for the ultimate combo.
- Mint Chocolate Refresh: Stir 1/2 teaspoon of peppermint extract into the batter along with the vanilla. Top with Andes mint pieces or pastel mint M&M’s.
- Blondie Base: For a non-chocolate option, omit the cocoa powder, reduce the flour to 2 cups, and use light brown sugar instead of granulated. Top with white chocolate chips and pastel sprinkles.
What to Serve With This Recipe
These Easter brownies are a star dessert all on their own, but they can anchor a beautiful spring sweets table. For a brunch or afternoon gathering, pair them with a bowl of fresh, seasonal berries like strawberries and raspberries to cut through the richness. A scoop of vanilla bean ice cream or a dollop of lightly sweetened whipped cream turns them into a decadent plated dessert.
Beverage-wise, they’re fantastic with a glass of cold milk, a hot cup of coffee, or even a sweet dessert wine. For a full Easter menu, serve them after a main course like glazed ham or herb-roasted lamb, with these brownies providing the perfect, crowd-friendly finale.
Storage & Make-Ahead Instructions
- Room Temperature Storage: Once completely cooled, store the brownies in an airtight container at room temperature for up to 4 days. Place parchment between layers if stacking.
- Refrigerator Storage: For longer storage, you can refrigerate them for up to a week. Let them come to room temperature before serving for the best texture.
- Freezer-Friendly: These brownies freeze exceptionally well. Wrap the whole slab or individual squares tightly in plastic wrap, then place in a freezer bag. They’ll keep for up to 3 months. Thaw overnight in the refrigerator.
- Make-Ahead Strategy: This recipe is ideal for making ahead. Bake and decorate the brownies 1-2 days before you need them. Store, covered, at room temperature. The flavors meld and the texture becomes even more fudgy.
Frequently Asked Questions
Q: Can I use a boxed brownie mix as a base?
A: You absolutely can for a shortcut. Prepare the mix according to the “fudgy” direction package instructions. As soon as it comes out of the oven, top it with your Easter candies as directed in our recipe.
Q: My candy toppings melted into the brownies. What happened?
A: This usually means the candy was added to brownies that were too hot. If you’re using chocolate that melts easily (like chocolate chips), let the brownies cool in the pan for 5 minutes before adding them. Candies with a hard shell are more forgiving.
Q: How do I know the brownies are done without overbaking?
A: Look for the edges to be set and pulling away from the pan slightly. The center should look set but still soft, not liquidy. The toothpick test 2 inches from the edge (with moist crumbs) is your best guide.
Q: Can I make these without the candy topping?
A: Of course! You’ll have a fantastic pan of classic fudgy brownies. You could also top them with a simple chocolate ganache or a dusting of powdered sugar.
Q: Can I double this recipe?
A: I don’t recommend doubling and baking in one pan, as it will not bake through properly. Instead, make two separate batches and bake them in two 9×13 pans.
Q: Why did my brownies turn out cakey?
A: The most common causes are overmixing the batter after adding the flour (which develops gluten) or overbaking. Remember to fold gently and remove them from the oven while the center is still soft.
Q: Can I use milk chocolate instead of cocoa powder?
A: I don’t recommend it. Cocoa powder provides the intense chocolate flavor and proper structure. Using melted chocolate would change the fat-to-flour ratio and require a different recipe formulation.
Final Thoughts
This Easter brownie recipe represents everything I love about holiday baking: it’s approachable, reliably delicious, and brings people together with its festive cheer. That dense, fudgy base is a testament to the power of a few good ingredients combined with a simple technique, and the colorful candy topping is pure, uncomplicated joy. Whether you’re hosting a big family dinner or simply want a special treat for the weekend, these brownies deliver.
I encourage you to make them your own—try a variation, use your family’s favorite candy, and most importantly, share them with someone you love. Happy baking, and have a wonderful, sweet Easter! If you make them, I’d be thrilled to hear how they turned out.
Tag me on social media or leave a comment below
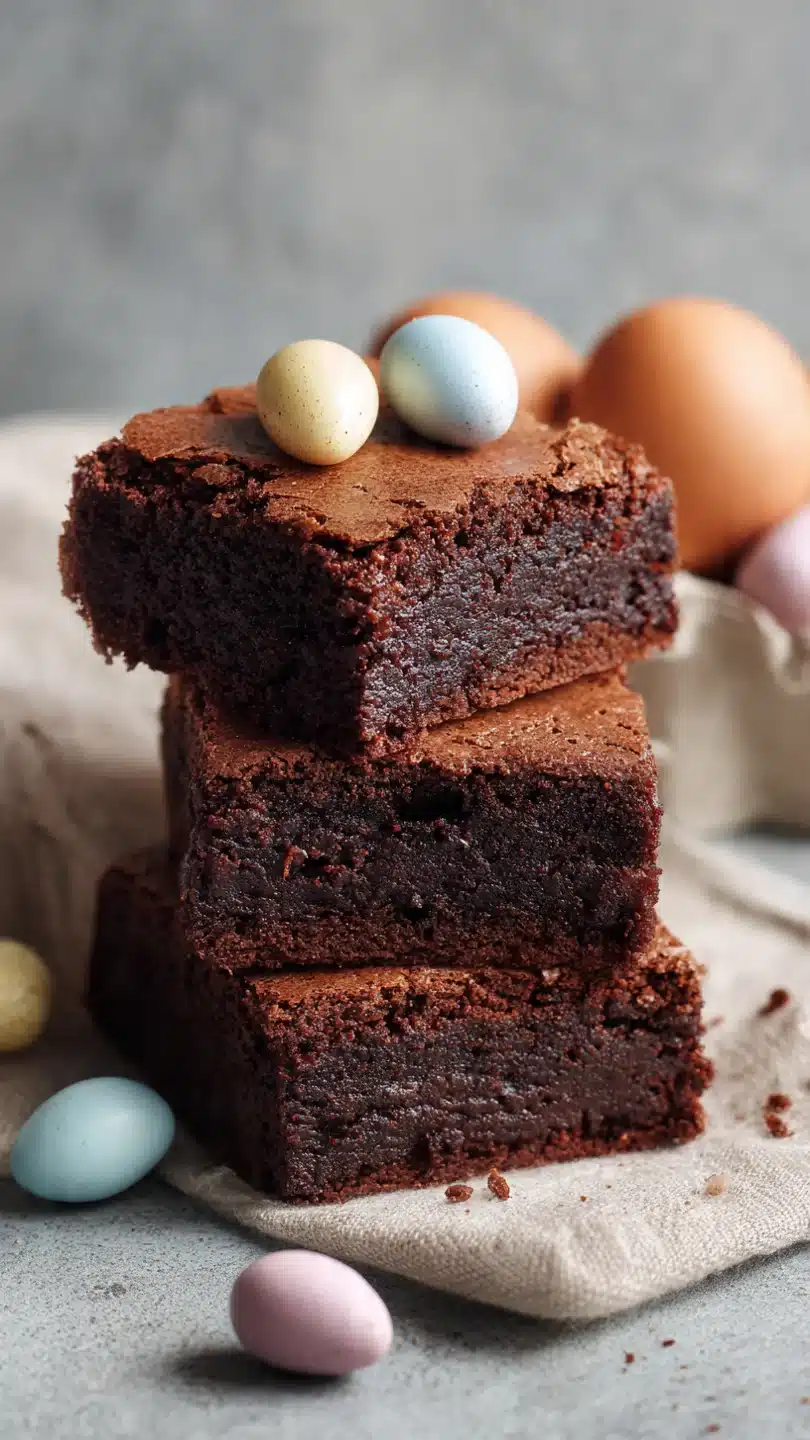
Ultimate Easter Brownies
Ingredients
Equipment
Method
- Preheat your oven to 350°F (175°C). Line a 9×13 inch metal baking pan with parchment paper, leaving an overhang on two sides for easy removal. Lightly grease any exposed pan.
- In a large mixing bowl, whisk together the melted butter and granulated sugar for about 1 minute until well combined. Add the eggs one at a time, whisking vigorously after each addition until the mixture is thick, smooth, and slightly pale. Whisk in the vanilla extract.
- Sift the flour, cocoa powder, and salt directly into the wet ingredients. Using a spatula, fold gently until just combined and no dry streaks remain. The batter will be very thick and fudgy—this is perfect. Avoid overmixing.
- Spread the thick batter evenly into your prepared pan, using an offset spatula or the back of a spoon to smooth the top. Bake on the center rack for 30-35 minutes. A toothpick inserted 2 inches from the edge should come out with moist crumbs, not wet batter.
- Immediately after removing the pan from the oven, scatter the assorted Easter candies evenly over the hot brownies, pressing them in gently. Let the brownies cool completely in the pan on a wire rack—this is crucial for setting the fudgy texture.


