
Strawberry shortcake
There’s a moment of pure, simple joy when you break into a perfect strawberry shortcake. The tender, slightly sweet biscuit gives way to a cascade of juicy, macerated berries and a cloud of fresh whipped cream. It’s a dessert that tastes like sunshine and summer gatherings, yet it’s deceptively simple to make from scratch.
As a professional chef, I’ve seen countless versions, but the classic combination of a flaky biscuit (not sponge cake!), ripe fruit, and barely-sweet cream is truly unbeatable. This recipe distills years of kitchen testing into a foolproof method for creating a strawberry shortcake that’s worthy of any celebration, from a weeknight treat to a festive centerpiece.
- Professional-Grade Texture: The biscuits are the star—flaky, tender, and sturdy enough to hold the juicy berries without becoming soggy, thanks to a chef-approved mixing technique.
- Maximized Strawberry Flavor: Macerating the strawberries with sugar isn’t just for syrup; it intensifies their natural sweetness and creates a luxurious sauce that soaks into the biscuit.
- Simple, Quality Ingredients: No cake mixes or stabilizers here. With just flour, butter, cream, and berries, you’re highlighting the beauty of each component.
- Make-Ahead Friendly: You can prepare every element—biscuits, macerated berries, whipped cream—a few hours ahead, making assembly a breeze when you’re ready to serve.
- Endlessly Customizable: This recipe is a perfect template. I’ll show you how to easily adapt it with different fruits, herbs, or citrus zests to make it your own.
- Impressive Yet Approachable: It looks and tastes like it came from a bakery, but the process is straightforward and forgiving, perfect for bakers of all levels.
Ingredients You’ll Need
Let’s gather our ingredients—this is where the magic starts. Using high-quality, simple components is the secret to an unforgettable shortcake. For the berries, seek out the reddest, most fragrant strawberries you can find; their flavor is the foundation of the entire dessert.
The biscuit relies on the classic combination of cold fat and liquid for its signature flakiness.
- Fresh Strawberries: Look for berries that are uniformly red, fragrant, and firm. Avoid any with white shoulders or soft spots.
- Granulated Sugar: We use it in three places: to macerate the berries, sweeten the biscuit dough, and sprinkle on top for a crackly finish.
- All-Purpose Flour: I recommend a national brand for consistent protein content. Be sure to spoon it into your measuring cup and level it off—don’t scoop!
- Baking Powder: This is our leavening agent. Check the date on your canister; old baking powder won’t give the biscuits their necessary lift.
- Unsalted Butter: Always use unsalted so you control the salt level. It must be very cold, straight from the fridge, to create steam pockets in the oven for flaky layers.
- Heavy Cream: You’ll need it for both the biscuit dough and the whipped topping. The high fat content (36% or more) is non-negotiable for richness and stability.
- Pure Vanilla Extract: A splash in the whipped cream adds a warm, aromatic note that complements the berries beautifully.
Trust me, taking a moment to measure correctly and ensure your dairy is cold will pay off tenfold in the final texture.

Note: You’ll find the complete list of ingredients, along with their exact measurements, in the printable recipe card at the bottom of this post.
Kitchen Equipment Needed
You likely have everything you need already. The key is using the right tools to keep the process simple and the results consistent.
- Baking Sheet & Parchment Paper: For easy cleanup and ensuring the biscuit bottoms don’t over-brown.
- Pastry Cutter or Two Forks: Essential for cutting the cold butter into the flour without melting it with your hands.
- 3-Inch Round Biscuit Cutter: A sharp-edged cutter creates clean sides for the best rise. A floured glass can work in a pinch.
- Mixing Bowls: You’ll need a few—one for the berries, one for the dry ingredients, and a chilled bowl for whipping cream.
- Electric Hand Mixer or Whisk: For whipping the cream to soft, billowy peaks. A stand mixer works too, but be careful not to over-whip.
- Wire Cooling Rack: Allows air to circulate around the baked biscuits, preventing a soggy bottom.
How to Make Strawberry Shortcake Recipe
Step 1: Macerate the Strawberries
This is your first and most important step. Hull and slice your strawberries, then toss them gently with a quarter cup of granulated sugar in a bowl. Set this aside at room temperature for at least 20 minutes.
Believe me, this isn’t just about sweetening the berries. The sugar draws out the natural juices through osmosis, creating a fragrant, ruby-red syrup that will become the sauce for your shortcake. You’ll see the pool of liquid at the bottom of the bowl—that’s liquid gold.
This process also slightly softens the berries, making them melt-in-your-mouth tender.
Step 2: Create the Biscuit Dough
While the berries work their magic, preheat your oven to a hot 425°F (220°C). In a large bowl, whisk together the flour, sugar, baking powder, and salt. Now, add the cold, cubed butter.
Using a pastry cutter or your fingertips, work the butter into the flour until the mixture looks like coarse sand with visible pea-sized bits of butter. Tip from me: those visible butter pieces are what will melt in the oven and create the sought-after flaky layers. If the butter gets too warm and fully incorporates, you’ll get a more crumbly, less layered texture.
Step 3: Form and Cut the Biscuits
Pour the cold heavy cream over the flour-butter mixture. Use a fork to stir gently, just until a shaggy, clumpy dough forms. It will look dry in spots—that’s okay.
Turn it out onto a lightly floured surface and gently pat (don’t roll!) it into a 1-inch thick rectangle. Using your floured biscuit cutter, press straight down to cut each biscuit. Do not twist the cutter, as this seals the edges and hinders their rise.
Gather the scraps, pat them together gently, and cut the remaining biscuits. You should get 6 perfect rounds.
Step 4: Bake to Golden Perfection
Place the biscuits on your parchment-lined baking sheet, leaving a couple of inches between them. Brush the tops lightly with a bit of extra cream—this promotes browning—and sprinkle with a pinch of sugar for a sweet, crackly top. Bake for 14 to 16 minutes.
You’re looking for them to be puffed tall and have a beautiful, even golden-brown color on top. The high heat creates a quick burst of steam from the butter and liquid, giving you that fantastic lift. Transfer them to a wire rack to cool slightly; they should be warm, not hot, when you assemble.
Step 5: Whip the Cream and Assemble
Now comes the fun part. Pour your remaining cold heavy cream and vanilla into a chilled bowl. Whip it just until soft peaks form—when you lift the beaters, the cream should hold a gentle peak that curls over at the tip.
Over-whipping leads to grainy butter, so stop while it’s still lush and smooth. To assemble, split a warm biscuit in half horizontally with a fork. Place the bottom on a plate, spoon over a generous amount of strawberries and their syrup, then add a dollop of whipped cream.
Top with the biscuit lid, more berries, and a final cloud of cream. Step back and admire your creation before diving in.
- The Cold Truth: For the flakiest biscuits, every ingredient that can be cold should be cold: butter, cream, even the bowl. I sometimes freeze my butter cubes for 15 minutes before starting. The goal is to have solid butter pieces that melt in the oven, creating steam pockets.
- Handle With Care: Overworking the biscuit dough is the number one mistake. When you add the cream, mix just until the dough comes together. When patting it out, use a gentle touch. More handling develops gluten, leading to tough biscuits.
- Sugar Sprinkle: Don’t skip brushing the biscuit tops with cream and sprinkling with sugar before baking. This creates a delightful, slightly crisp and sweet crust that contrasts beautifully with the soft interior.
- Peak Performance: Whip your cream to soft peaks, not stiff peaks. Soft peaks are more luxurious and meld seamlessly with the other components. Stiff peaks can feel grainy and stand apart from the dessert.
- Assembly Timing: For the best texture, assemble the shortcakes just before serving. You can have all components ready to go, but once stacked, the biscuit will begin to soften from the berries’ juices after about 15-20 minutes.
Recipe Variations & Customizations
- Lemon Zest Brightness: Add the finely grated zest of one lemon to the biscuit dough and a teaspoon of lemon juice to the macerating strawberries. The citrus cuts through the richness beautifully.
- Herb-Infused Berries: Add 5-6 torn fresh basil or mint leaves to the strawberries as they macerate. Remove the leaves before serving. It adds a sophisticated, garden-fresh note.
- Cornmeal Biscuits: Substitute ½ cup of the all-purpose flour with fine-ground yellow cornmeal for a biscuit with a delightful rustic texture and subtle corn flavor.
- Mixed Berry Medley: Replace half the strawberries with other in-season berries like raspberries, blackberries, or blueberries for a more complex fruit flavor and stunning color.
- Vegan Adaptation: Use a high-fat vegan butter and chilled coconut cream (the solid part from a can) for the biscuits and whipped topping. The flavor will be different but delicious.
- Gluten-Free Option: Swap the all-purpose flour for a 1:1 gluten-free baking blend. The texture will be slightly more crumbly but still excellent.
- Balsamic Strawberries: Add 1 teaspoon of high-quality balsamic vinegar to the macerating berries. It sounds unusual, but it intensifies the strawberries’ sweetness with a deep, complex note.
What to Serve With This Recipe
Strawberry shortcake is a celebration in itself, but it plays wonderfully with other dishes for a complete menu. For a classic summer lunch or brunch, serve it after a light main like a quiche Lorraine or a grilled chicken salad. For a more formal dinner, it’s the perfect, not-too-heavy finale following grilled salmon or herb-roasted chicken.
In terms of beverages, it pairs beautifully with a glass of crisp Prosecco or Champagne—the bubbles cut through the cream. For non-alcoholic options, try sparkling lemonade, iced tea with a hint of mint, or a cold brew coffee. If you’re creating a dessert buffet, place the shortcake alongside other fruit-forward options like a lemon tart or peach cobbler for a beautiful and varied spread.
Storage & Make-Ahead Instructions
- Component Storage: Store the completely cooled biscuits in an airtight container at room temperature for up to 2 days. The macerated strawberries and their syrup can be stored separately in the refrigerator for up to 3 days. The whipped cream is best made the day you plan to serve it.
- Freezing Biscuits: Baked and cooled biscuits freeze exceptionally well. Wrap them individually in plastic wrap and place in a freezer bag for up to 2 months. Thaw at room temperature and warm gently in a 300°F oven for 5 minutes before serving.
- Avoid Assembled Storage: Do not assemble the full shortcakes and store them. The biscuits will become unpleasantly soggy. The beauty of this recipe is the quick, last-minute assembly.
- Make-Ahead Strategy: For effortless entertaining, bake the biscuits and macerate the strawberries the day before. Keep the berries chilled. About 30 minutes before your guests arrive, whip the cream. You’ll have a stunning dessert ready in minutes with no last-minute stress.
Frequently Asked Questions
Q: Can I use frozen strawberries?
A: I don’t recommend it for the best texture. Frozen berries release too much water when thawed, creating a soupy mixture that will make your biscuit soggy. Fresh is essential for this recipe.
Q: My biscuits didn’t rise very high. What happened?
A: The most common culprits are old baking powder (check the expiration date), overworking the dough, or twisting the cutter when cutting. Also, ensure your oven is fully preheated before baking.
Q: Can I make the dough in a food processor?
A: You can, but be extremely careful. Pulse the dry ingredients and butter just 4-5 times until crumbly, then transfer to a bowl to stir in the cream by hand. Over-processing in the machine will lead to tough biscuits.
Q: How do I know when the whipped cream is at “soft peaks”?
A: When you lift the beaters or whisk out of the cream, the peak that forms should hold its shape but the very tip will curl over gracefully. It should look smooth and billowy, not stiff or grainy.
Q: Is there a substitute for heavy cream in the biscuit dough?
A: Buttermilk is a classic substitute and will add a pleasant tang. The biscuits will be slightly more tender and less flaky. Use the same volume but note the dough may be stickier.
Q: Can I make smaller or larger shortcakes?
A: Absolutely. Use a 2-inch cutter for mini shortcakes (adjust bake time to 10-12 minutes) or a 4-inch cutter for large, shareable portions (bake for 18-20 minutes).
Q: My berries aren’t very sweet. What can I do?
A: Macerate them for a full hour, and you can safely increase the sugar by another tablespoon or two. A tiny pinch of salt added to the berries can also help enhance their perceived sweetness.
Final Thoughts
This strawberry shortcake recipe is more than just a list of ingredients and steps—it’s a blueprint for creating a moment of genuine, shared delight. From the satisfying process of cutting cold butter into flour to the final drizzle of ruby-red strawberry syrup over a cloud of cream, every step is designed to build towards a perfect, classic dessert. I’ve made this countless times in professional settings and home kitchens, and it never fails to impress with its honest, vibrant flavors and textures.
Remember, cooking is part science and part heart. Trust the process, especially keeping things cold and handling the dough gently. But don’t be afraid to make it your own with a twist of citrus or a fresh herb.
I encourage you to try this recipe, savor the process, and most importantly, share the results with someone you care about. Please let me know how it turns out in the comments below—I love hearing your baking stories and seeing your creations. Happy baking
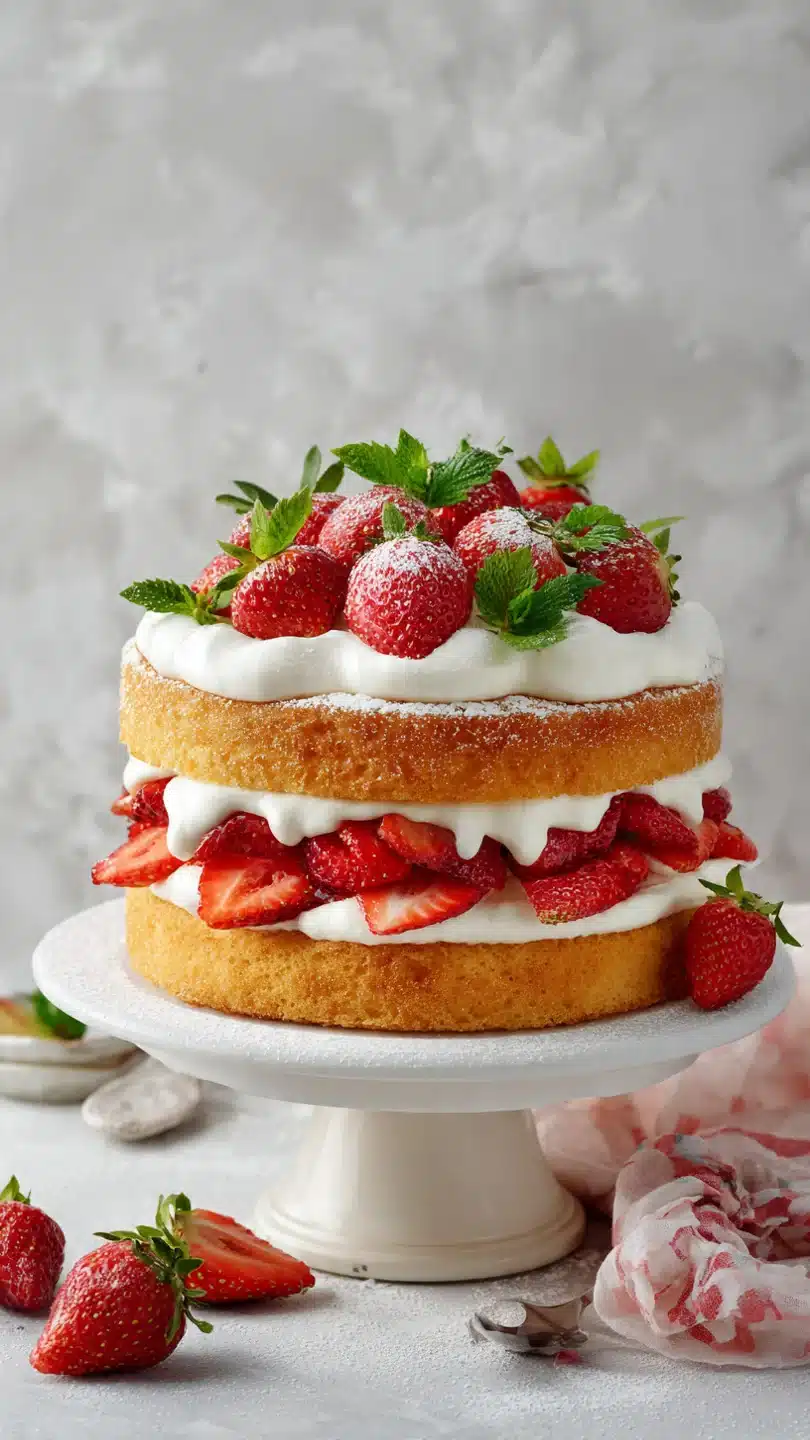
Classic Strawberry Shortcake
Ingredients
Equipment
Method
- Preheat oven to 425°F (220°C). Line a baking sheet with parchment paper. In a medium bowl, combine sliced strawberries and ¼ cup sugar. Stir gently, then set aside to macerate for at least 20 minutes. This draws out the berries’ natural juices, creating a delicious syrup.
- Make the biscuit dough. In a large bowl, whisk together flour, 2 tablespoons sugar, baking powder, and salt. Using a pastry cutter or your fingertips, work the cold, cubed butter into the flour mixture until it resembles coarse crumbs with some pea-sized pieces of butter remaining.
- Pour ¾ cup cold heavy cream over the flour-butter mixture. Use a fork to gently stir just until a shaggy dough forms. Do not overmix. Turn the dough out onto a lightly floured surface and gently pat it into a 1-inch thick rectangle.
- Using a 3-inch round biscuit cutter or glass, cut out biscuits, pressing straight down without twisting. Gather scraps, gently pat together, and cut remaining biscuits. You should have 6. Place on the prepared baking sheet, brush tops with a little cream, and sprinkle with a pinch of sugar.
- Bake for 14-16 minutes, or until the biscuits are puffed and golden brown on top. Transfer to a wire rack to cool slightly. While biscuits cool, make the whipped cream. In a chilled bowl, whip 1 cup heavy cream with 1 tsp vanilla until soft peaks form.
- To assemble, split the warm biscuits in half horizontally. Place the bottom half on a plate. Spoon a generous amount of macerated strawberries and their syrup over it. Top with a dollop of whipped cream. Add the biscuit top, another spoonful of berries, and a final cloud of cream. Serve immediately.


