
How to package brownies for gifts
There’s something uniquely heartfelt about a homemade food gift. It says you cared enough to spend your time and skill. A beautifully wrapped loaf of bread or a jar of jam is lovely, but a batch of rich, fudgy brownies?
That’s pure joy, neatly packaged. Yet, the journey from pan to present can be fraught with crumbling corners and stale squares. Having packaged thousands of desserts in professional kitchens, I’ve learned that presentation is the final, crucial ingredient.
Let’s transform your delicious brownies into a gift that looks as incredible as it tastes, ensuring they arrive in perfect, mouthwatering condition.
- Professional Presentation: With the right techniques, your homemade gift will rival any boutique bakery offering, impressing friends, family, or colleagues.
- Practical & Secure: These packaging methods are designed to protect your brownies during transport, preventing breakage and preserving that just-made texture.
- Highly Customizable: From rustic charm to elegant minimalism, you can tailor the look to the recipient’s personality and the occasion, making each gift feel personal.
- Cost-Effective Luxury: Using simple, clever materials, you can create a high-impact gift for a fraction of the cost of store-bought gourmet treats.
- Suitable for All Occasions: The principles apply whether you’re gifting for the holidays, a birthday, a thank-you, or a simple “thinking of you” gesture.
Essential Ingredients for Packaging (Beyond the Brownies)
Let’s gather our packaging toolkit. Think of these as the “ingredients” for your presentation. You likely have many already, and the rest are easy to find.
The goal is to choose materials that protect the brownies first and look beautiful second.
- The Brownie Base: Use the provided recipe or your own sturdy, fudgy variety. Cakey brownies can be more crumbly. Ensure they are completely cooled—warm brownies steam in packaging and become soggy.
- Parchment Paper or Wax Paper: This is your first line of defense, creating a non-stick barrier between the brownie and its decorative wrapper. It also looks classic and bakery-style.
- Rigid Containers: The single most important element. Cardboard gift boxes (available at craft stores), tins with tight-fitting lids, or clean, sturdy takeout containers prevent crushing.
- Cellophane Bags or Clear Treat Bags: Perfect for individual brownies. Choose bags that are food-safe and large enough to tie closed without squishing the treat.
- Adhesive: Double-sided tape is a packaging pro’s secret for clean, invisible seams. Have scissors and a hole punch on hand for tags and ribbons.
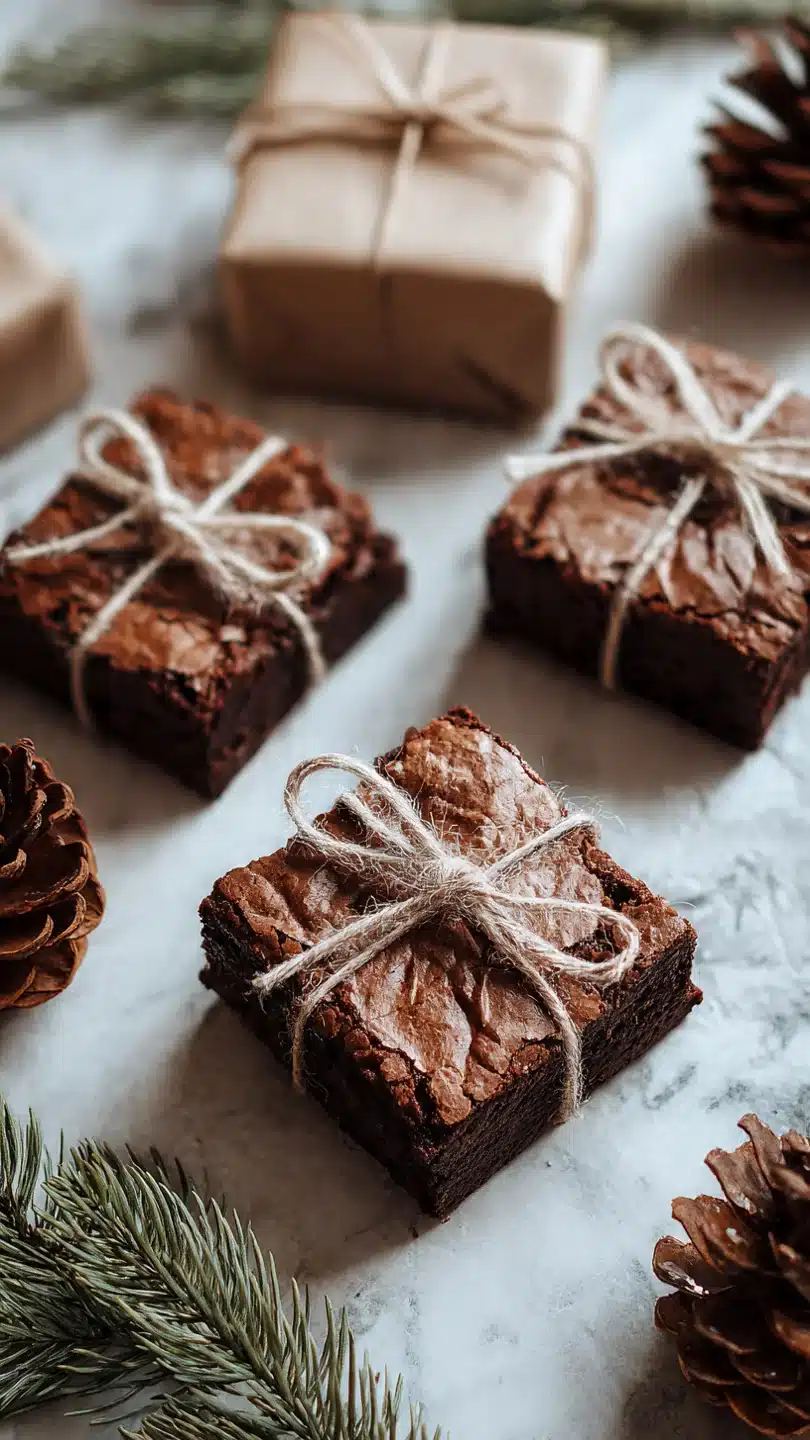
- Decorative Elements: Baker’s twine, ribbon, jute string, gift tags, seasonal stickers, or fresh herbs like rosemary sprigs add the final personal touch.

Note: You’ll find the complete list of ingredients, along with their exact measurements, in the printable recipe card at the bottom of this post.
Kitchen & Craft Equipment Needed
You don’t need specialized tools. Beyond your standard baking equipment, focus on items that aid in clean assembly.
- Essential: A sharp chef’s knife or a plastic knife for crumb-free slicing, a wire cooling rack, a ruler for measuring parchment, and a clean cutting board.
- Helpful for Presentation: A pastry brush to dust off any loose crumbs before wrapping. A small bowl for holding ribbons and tags keeps your workspace organized.
- Optional but Impactful: A custom stamp for tags, washi tape for sealing paper wraps, or a glue gun (used carefully) for securing heavier decorations to boxes.
How to Make Your Brownies Gift-Ready
Step 1: Bake and Cool with Intention
Start with a brownie recipe you trust, baked in a pan lined with parchment paper that overhangs the sides. Trust me, this is non-negotiable for gift-giving. It allows you to lift the entire slab out for flawless, crumb-minimized cutting.
Once baked, let the brownies cool completely in the pan on a wire rack. Rushing this step traps steam, which leads to a sticky, messy texture that’s hard to package neatly.
Step 2: The Perfect Slice
Use the parchment overhang to lift the cooled brownie block onto a cutting board. For pristine squares, take your sharpest knife and run it under very hot water, then wipe it dry. The heat helps it glide through the dense, fudgy texture.
Make one confident, downward cut—don’t saw. Wipe the blade clean between each cut. Believe me, this extra minute of care makes all the difference in presentation.
Step 3: Choose Your Packaging Vessel
This is where you match the package to the occasion. For a single, generous brownie, a cellophane bag is perfect. For a small assortment, a small cardboard box or a parchment-lined bakery bag works beautifully.
For gifting a whole batch, a decorative tin or a sturdy cardboard gift box is ideal. Always line the bottom of your container with a piece of parchment or a decorative doily first.
Step 4: Layer and Protect
Place your brownies in the container. If stacking, place a sheet of parchment paper between layers to prevent them from sticking together. Tip from me: if your container is slightly too big, you can use crumpled parchment paper in the gaps to keep the brownies from sliding around.
The goal is a snug, secure fit.
Step 5: The Final Seal and Embellish
If using a box, close the lid securely. For bags, gather the top and tie it closed with baker’s twine or ribbon. Now comes the fun part: embellishment.
Attach a handwritten tag with the flavor and date. Tie on a sprig of dried lavender or a cinnamon stick for fragrance. Step back and admire your handiwork—you’ve just created a professional-quality, edible gift.
- The Crumb Rule: Always brush away any loose crumbs from the edges of your brownies with a dry pastry brush before wrapping. This keeps the packaging looking clean and professional.
- Moisture Management: Never package brownies that are even slightly warm. Condensation is the enemy of texture and will make them soggy. For extra protection in humid climates, you can add a small food-safe silica gel packet to the container.
- Tag Essential Information: Your gift tag should always include the type of treat (e.g., “Dark Chocolate Fudge Brownies”) and the date they were baked. This is both thoughtful and important for food safety.
- Freezing for Future Gifting: Brownies freeze exceptionally well. Wrap individual squares tightly in plastic wrap, then place them in a freezer bag. Thaw in the refrigerator overnight before gifting. They’ll taste freshly baked.
Recipe Variations for Gifting
- Salted Caramel Swirl: After spreading the batter in the pan, drizzle 1/2 cup of thick salted caramel sauce over the top and swirl with a knife. The caramel adds a gorgeous marbled effect and a sophisticated flavor.
- Espresso Chip: Dissolve 1 tablespoon of instant espresso powder into the melted butter before adding the sugar. Fold in espresso beans or chocolate chunks. This adult variation is perfect for coffee lovers.
- Peppermint Crunch: After baking, let brownies cool for 10 minutes, then sprinkle with crushed peppermint candies or candy canes. The candy will adhere as they finish cooling, creating a festive, crunchy top.
- Gluten-Free Option: Substitute the all-purpose flour with a 1:1 gluten-free baking blend. The result is equally fudgy and perfect for those with dietary restrictions.
- Blondie Variation: For a different look, make butterscotch blondies. Omit the cocoa powder, use 2 cups of brown sugar, and add 1 cup of white chocolate chips and 1 cup of chopped pecans.
What to Serve With Your Brownie Gift
While brownies are a complete gift on their own, you can create a themed gift basket for extra impact.
- Beverage Pairings: Package a bag of locally roasted coffee beans for classic mocha pairing, or include a few bottles of craft stout beer, which complements dark chocolate beautifully.
- Accompaniment Ideas: A small jar of homemade vanilla bean whipped cream cheese frosting (for dipping!), a bag of toasted walnuts, or a bottle of high-quality caramel sauce turns your gift into a dessert experience.
- Occasion-Specific Ideas: For a housewarming, include a mug. For a birthday, add a candle. For the holidays, pair with a bag of mulling spices or hot cocoa mix.
Storage & Make-Ahead Instructions
- Room Temperature Storage: Properly packaged in an airtight container, brownies will stay fresh and fudgy at room temperature for 3-4 days. This is the ideal method for gifting.
- Freezer Storage: For long-term storage or make-ahead gifting, freeze unbaked brownies. Wrap the entire cooled slab tightly in plastic wrap, then in foil. They can be frozen for up to 3 months. Thaw overnight in the refrigerator before slicing and packaging.
- Avoid the Fridge: Unless they have perishable frosting, do not refrigerate brownies. The cold, dry air accelerates staling and can dull the chocolate flavor.
- Gifting Timeline: You can bake, slice, and package brownies 1-2 days before gifting. Store the finished packages at room temperature in a cool, dark place until you’re ready to deliver them.
Frequently Asked Questions
Q: How far in advance can I package brownies for gifting?
You can package them 1-2 days before gifting. For best texture and flavor, bake no more than 48 hours before they will be received. The airtight packaging will keep them perfectly fresh.
Q: Can I mail packaged brownies?
Absolutely. Choose a very rigid container like a tin or a sturdy cardboard box. Pack any empty space in the shipping box with bubble wrap or packing peanuts to prevent movement.
Avoid shipping in extreme heat.
Q: My brownies are too crumbly to package neatly. What can I do?
Chill them thoroughly before slicing—this firms them up. You can also cut them into slightly larger pieces, as smaller squares are more fragile. If all else fails, crumble them and layer in a jar with alternating layers of whipped cream and berries for a “brownie trifle in a jar” gift.
Q: Are there any food-safe materials I should avoid?
Avoid using non-food-grade plastics, printed newspaper, or certain metallic wrapping papers that may not be food-safe. When in doubt, always use parchment paper as a liner between the food and the decorative wrap.
Q: How do I prevent the frosting from sticking to the wrapper?
If your brownies are frosted, ensure the frosting is completely set. Then, use the “cupcake liner” method: place each frosted brownie in a flat-bottomed parchment cupcake liner before placing it in the bag or box.
Q: Can I add a personal note inside the package?
Yes, and it’s a lovely touch! Write your note on a small card and place it on top of the parchment liner, under the first brownie, so it’s the first thing the recipient sees.
Q: What’s the best way to package individual brownies for a party favor?
Clear cellophane bags are ideal. Place one brownie in each bag, gather the top, and tie it with ribbon or twine. You can then place all the individual bags in a larger basket or box for easy distribution.
Final Thoughts
Gifting homemade brownies is more than sharing a dessert; it’s sharing a moment of care and creativity. The extra effort you put into beautiful, thoughtful packaging transforms a simple treat into a memorable experience. It tells the recipient, “You are worth this extra mile.” With these professional techniques—from the crucial cool-down to the choice of a rigid container—you are equipped to deliver joy in its most delicious form.
So bake a batch, wrap them with love, and take pride in the smiles you’re about to create. I’d love to hear about your gifting successes or see your beautiful creations—tag me on social media or leave a comment below. Happy baking and gifting
Classic Fudge Brownies (for Gifting)
Ingredients
Equipment
Method
- Preheat your oven to 350°F (175°C). Line an 8×8-inch baking pan with parchment paper, leaving an overhang on two opposite sides for easy lifting. This is crucial for clean, giftable squares.
- In a large bowl, whisk together the melted butter and sugar until well combined. Add the eggs one at a time, whisking vigorously after each addition until the mixture is smooth and slightly thickened. Stir in the vanilla extract.
- Sift the flour, cocoa powder, and salt directly into the wet ingredients. Use a spatula to fold the dry ingredients in until just combined and no dry streaks remain. Be careful not to overmix. Fold in the chocolate chips.
- Pour the batter into the prepared pan and spread it into an even layer. Bake for 28-32 minutes, or until a toothpick inserted into the center comes out with a few moist crumbs attached, not wet batter. This is the key to a fudgy yet sliceable texture.
- Let the brownies cool completely in the pan on a wire rack. Once cool, use the parchment overhang to lift the entire slab out. Place it on a cutting board and slice into clean, even squares using a sharp knife wiped clean between cuts.


