
Packaging brownies for sale
You’ve perfected your brownie recipe—the crackly top, the fudgy center, the balance of bitter and sweet. Now comes the crucial bridge between your kitchen and a happy customer: the packaging. How you present and protect your product can be the difference between a one-time purchase and a loyal fanbase.
In my years supplying baked goods to cafes and farmers’ markets, I’ve learned that impeccable packaging communicates care, quality, and professionalism before the first bite is even taken. This guide will walk you through the practical, legal, and aesthetic steps to package brownies for sale, ensuring they arrive as delicious as they left your kitchen.
- Professional Presentation: Transforms homemade treats into a sellable product that commands a higher price and builds brand trust.
- Food Safety First: Uses approved materials and techniques to ensure your brownies are safe for consumption, protecting both your customer and your business.
- Brand Building Power: Clear packaging acts as a billboard for your product, while labels tell your story and provide essential information.
- Practical & Scalable: The system is simple to execute for small batches but uses techniques that work efficiently as your business grows.
- Preserves Quality: Proper sealing maintains freshness, texture, and flavor from your counter to the customer’s home.
- Regulatory Confidence: Takes the guesswork out of labeling, helping you comply with cottage food or local health regulations.
Ingredients You’ll Need
Let’s talk about your packaging “ingredients.” Just as quality chocolate matters in your batter, the materials you choose for packaging directly impact perception and safety. You don’t need a huge investment to start, but selecting the right components is non-negotiable.
- Cooled Brownies: Your product must be completely cool. Packaging warm goods is the number one mistake new sellers make—it leads to condensation, sogginess, and spoilage.
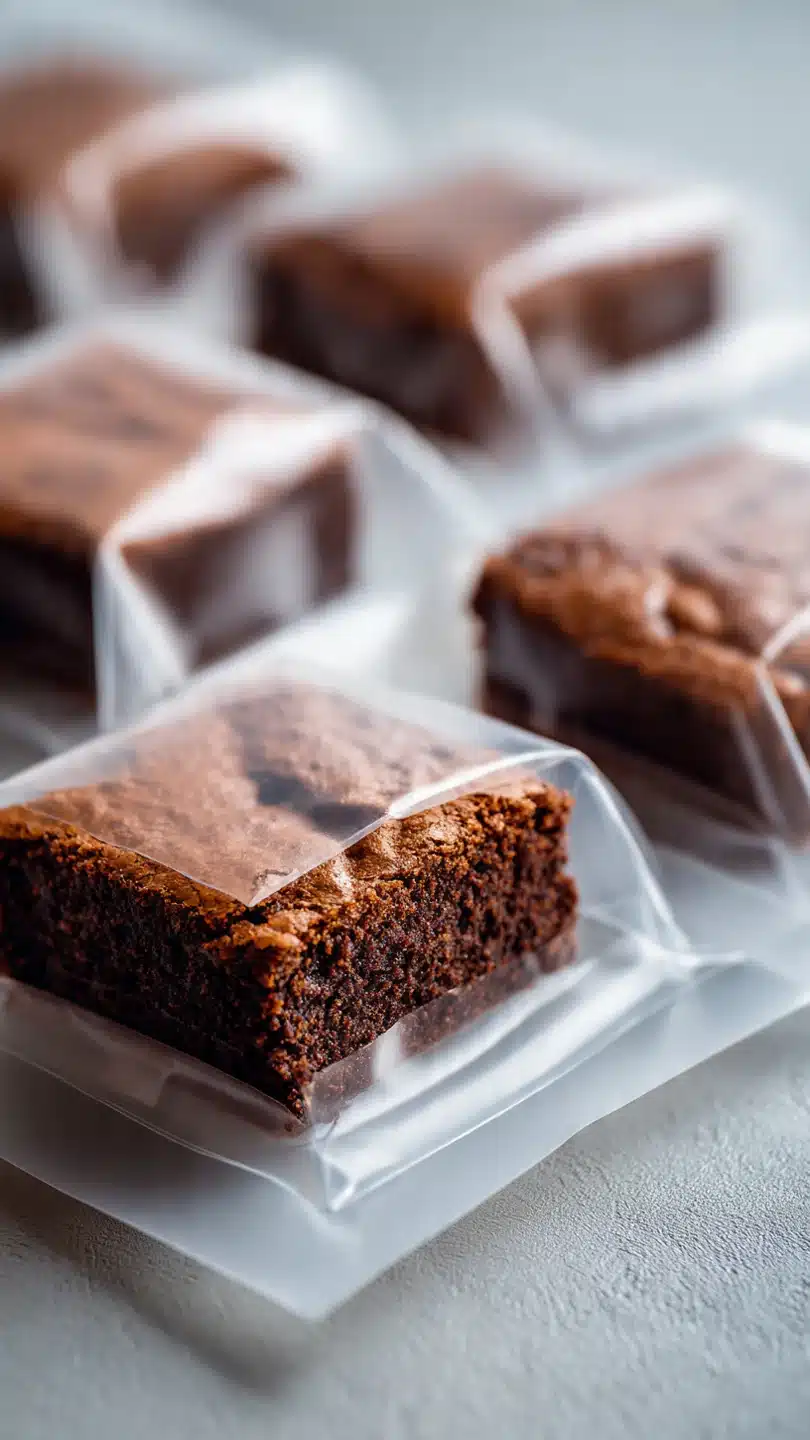
- Food-Safe Bags: Opt for clear cellophane or polypropylene bags labeled “food-safe.” Avoid plain plastic wrap or sandwich bags; they look unprofessional. Sizes like 4×6 inches are perfect for single portions.
- Sealing Method: Simple twist ties work, but an impulse heat sealer (a modest investment) creates an airtight, professional-looking seal that extends shelf life.
- Labels: This is critical. You need allergen-aware labels that list every ingredient, in descending order by weight. Include your business name, product name, net weight, and a “Best By” date.
- Rigid Outer Box: A simple cardboard bakery box or cupcake carrier protects your individually wrapped brownies during transport and allows for neat, stackable display.

Note: You’ll find the complete list of ingredients, along with their exact measurements, in the printable recipe card at the bottom of this post.
Kitchen Equipment Needed
You won’t need mixers, but a few tools will make the process clean and efficient.
- Large Chef’s Knife & Ruler: For cutting perfectly uniform portions. A ruler ensures consistency, which is key for pricing and presentation.
- Cutting Board: Dedicate one solely for packaging to avoid cross-contamination from raw ingredients.
- Food-Safe Gloves: Wearing disposable gloves when handling the final product is a best practice that customers notice and appreciate.
- Clean, Dry Workspace: Clear a large counter area. Ensure it’s free of clutter, pets, and non-kitchen items.
- Impulse Heat Sealer (Optional but Recommended): This $30-$50 tool is a game-changer for a polished, secure finish.
How to Make Professional Brownie Packaging Recipe
Step 1: The Critical Cool-Down
Your brownies must be at a true room temperature. I cannot stress this enough. If they’re even slightly warm, moisture will get trapped inside the bag and ruin the texture.
For ultra-fudgy brownies, I take it a step further: chill the entire slab in the refrigerator for 30-60 minutes before cutting. This firms up the fat, allowing you to cut clean, sharp edges with minimal crumbs—a hallmark of professional baking. Trust me, this extra time pays off in presentation.
Step 2: Precision Cutting for Portions
Using your ruler and a large chef’s knife, measure and cut your brownies into uniform squares or rectangles. Standard sale sizes are 2″ or 3″ squares. Dip your knife in hot water and wipe it dry between cuts for the cleanest slices.
This isn’t just about looks; consistent sizing means consistent value for your customer. Place each cut brownie on a fresh, food-safe tissue paper square if desired. This little liner adds a touch of class and helps manage any minimal oil.
Step 3: The Bagging Technique
Slide one brownie (with its tissue paper liner, if using) into the center of your clear bag. Gently push it to the bottom. If you want a really crisp look, you can insert a thin, food-safe cardboard backer behind the brownie first.
Ensure the front of the brownie is facing forward and visible. Tap the bag gently to settle any loose crumbs away from the top inch, which will be your sealing zone. This area must be clean for a proper seal.
Step 4: Sealing for Freshness & Appeal
Now, seal your package. If using twist ties or ribbon, gather all the bag material tightly above the brownie and secure it. For a more professional, airtight finish, use an impulse sealer.
Line up the open end of the bag in the sealer’s jaws and press down. The heat melts the plastic layers together, creating a permanent, hygienic seal that locks in freshness. This method looks store-bought in the best way and prevents the bag from accidentally opening.
Step 5: Labeling and Final Presentation
This is where you meet legal requirements and tell your story. Apply your compliant label to the sealed top or the front of the bag. It must include every ingredient, major allergens (like wheat, eggs, dairy, nuts), your business name, and a “Best By” date (usually 3-5 days for brownies).
Finally, arrange your individually wrapped brownies neatly in a rigid bakery box. This final container prevents crushing and presents your products as a cohesive, tempting collection ready for pickup or delivery.
- The Crumb Rule: Any loose crumbs on the inside of the bag, especially near the seal, look unprofessional. Use a soft pastry brush to gently remove them before sealing.
- Temperature Matters: Never package in a humid kitchen. If it’s a rainy day, run a dehumidifier or air conditioner in your packaging area to prevent moisture issues.
- Label Transparency: Be meticulously accurate with your ingredient list. If you use vanilla extract that contains corn syrup, list it. This builds immense trust and protects those with sensitivities.
- Shelf-Life Testing: Before selling, do a test: package two brownies and leave them in a typical room environment. Check them daily to see when quality declines. This informs your “Best By” date.
- Visual Hierarchy: On your label, make the product name (e.g., “Sea Salt Dark Chocolate Brownie”) the largest text, followed by your business name. The ingredient list can be smaller but must be legible.
Recipe Variations & Customizations
- Themed Packaging: For holidays, use colored cellophane bags (food-safe) or seasonal stickers over your standard label. A gold twist tie for New Year’s or a pumpkin sticker for Halloween adds festive flair.
- Multi-Pack Options: Package two smaller brownies together as a “Duo” or use a windowed bakery box for a 4, 6, or 9-count assortment. This increases your average sale price.
- Gluten-Free or Vegan Focus: If your brownies cater to a dietary need, make it a key part of your branding. Use a prominent “Gluten-Free” or “Vegan” call-out on the label in addition to the allergen statement.
- Subscription or Gift Style: For a premium offering, place the individually wrapped brownie in a small, giftable box lined with shredded paper before placing it in your shipping box.
- Sample-Size Packaging: Use tiny 2×3 inch bags for bite-sized samples at markets. It’s a powerful and low-cost marketing tool to drive sales of full-size portions.
What to Serve With This Recipe
Your packaged brownies are the star, but think about how they fit into a customer’s life. Market them as the perfect gourmet gift for colleagues, teachers, or hostesses. Position them as an artisan dessert for dinner parties—suggest pairing a rich, dark chocolate brownie with a glass of port or cold brew coffee.
For farmers’ markets, display them alongside complementary items you may sell later, like bags of coffee beans or jars of homemade caramel sauce. Consider offering a “Brownie & Beverage” pairing suggestion on a small card attached to the box.
Storage & Make-Ahead Instructions
- For the Seller (You): Store fully packaged brownies in a single layer in a cool, dry, dark place. Do not refrigerate, as this can dry them out and cause condensation when returned to room temperature. Your labeled “Best By” date is your guide.
- For the Customer: Include brief storage instructions on your label or a small insert card: “Best enjoyed at room temperature within 3 days. For longer storage, freeze in an airtight container for up to 3 months.”
- Freezing for Inventory: You can freeze unfrosted brownies very successfully for future packaging. Wrap the entire cooled slab tightly in plastic wrap, then aluminum foil. Thaw overnight in the refrigerator before cutting and packaging as usual.
- Make-Ahead Strategy: You can bake and cool brownies 1-2 days before a market or sale. Package them the day before or the morning of the event to ensure maximum freshness.
Frequently Asked Questions
Q: What are the absolute legal requirements for my label?
A: Laws vary by state/country under “cottage food” or “home bakery” regulations. Universally, you need: Product Name, Your Business Name & Address, Net Weight or Count, Full Ingredient List (descending by weight), Allergen Statement, and Date of Production or “Best By” Date. Always check your local health department website.
Q: Can I use decorative ribbons and stickers from a craft store?
A: You must be extremely careful. Any material that could potentially touch the food surface must be food-safe. It’s safest to tie decorative ribbon over a food-safe twist tie or sealed area, ensuring it doesn’t contact the brownie itself.
Stickers should only go on the outside of the bag.
Q: How do I prevent my brownies from drying out in the package?
A: A proper, airtight seal (like a heat seal) is the first defense. Fudgy brownies retain moisture better than cakey ones. Ensuring they are completely cool before packaging is the second critical step.
The tissue paper liner can also help slightly by creating a micro-environment.
Q: My brownies are too sticky and cling to the bag. Help!
A: This is common with very fudgy recipes. The chill-before-cutting method is essential. You can also very lightly dust the bottom of the brownie with powdered sugar or cocoa powder before placing it on the tissue paper, but note this adds an ingredient you must list.
Q: Is a heat sealer worth the investment?
A: If you plan to sell consistently, absolutely. It creates a more secure, tamper-evident, and professional-looking package than twist ties. It also speeds up your packaging process significantly once you get the hang of it.
Q: How should I price my packaged brownies?
A: Factor in ALL costs: ingredients, packaging materials (bag, tie, label, box), your time, and any market fees. A common formula is (Cost of Goods + Labor) x 2 or 3. Research what similar artisan products sell for in your area.
Q: Can I ship my packaged brownies?
A: Yes, but it requires extra care. Use a rigid, insulated box, pack with cushioning (like bubble wrap or packing peanuts), and consider including a cold pack during warm weather. Clearly state “Perishable” on the outer box and offer expedited shipping.
Final Thoughts
Packaging is the final, critical step in your recipe for success. It’s the tangible expression of the care you’ve poured into your baking. When you hand a customer a beautifully wrapped, clearly labeled brownie, you’re not just selling dessert—you’re offering a reliable, professional experience.
Start with the fundamentals of food safety and clear labeling; this builds a foundation of trust. Then, let your brand’s personality shine through with thoughtful touches. Remember, people eat with their eyes first.
A perfectly packaged brownie promises quality and delivers joy. Now, take your amazing brownies, package them with confidence, and share them with the world. I’d love to hear about your packaging journey—tag me on social media with your creations
Professional Brownie Packaging Protocol
Ingredients
Equipment
Method
- Ensure your brownies are completely cooled to room temperature. Warm brownies will create condensation inside the packaging, leading to sogginess and potential mold growth. For fudgy brownies, I recommend chilling them in the refrigerator for 30 minutes before cutting; this gives you cleaner, crumb-free edges.
- Cut your brownies into uniform, professional portions using a large chef’s knife. Wipe the blade clean with a damp cloth between cuts for perfect squares. Standard sale sizes are 2×2 inches or 3×3 inches. Place each portion on a fresh, food-safe tissue paper square if desired; this adds polish and absorbs minimal excess oil.
- Slide one brownie (with tissue, if using) into a clear cellophane bag. Push it gently to the bottom. For a premium look, you can use a small piece of cardboard as a backer. Leave about an inch of bag at the top for sealing. Ensure no crumbs are on the sealing area.
- Seal the bag securely. For a simple seal, gather the top and secure it tightly with a twist tie or a piece of ribbon. For a more professional, airtight seal, use a impulse heat sealer. This method is best for longer shelf life. Always seal at least 1/2 inch from the top of the brownie.
- Apply your compliant label to the sealed area or the front of the bag. The label must include: Product Name (e.g., ‘Classic Fudge Brownie’), Your Business Name, Net Weight or Count, Full Ingredient List, Allergen Statement (Contains: Wheat, Eggs, Dairy), and a ‘Best By’ date. Place your packaged brownies carefully into a rigid bakery box for delivery or display.


