
Vegan brownies
There’s a common misconception that vegan baking is a compromise, especially when it comes to something as decadent as a brownie. I’m here to tell you that’s simply not true. After years of testing in professional kitchens, I’ve found that removing dairy and eggs can actually lead to a more intensely chocolatey, fudgy, and satisfying dessert.
This recipe is the culmination of that work—a one-bowl wonder that delivers a dense, moist crumb, a signature shiny crackly top, and those coveted chewy edges. It’s the brownie that will make everyone, vegan or not, ask for the recipe.
- One-Bowl Simplicity: No need for multiple bowls or a mixer. Everything comes together quickly with just a whisk and spatula, meaning less cleanup and more time to enjoy.
- Authentic Fudgy Texture: Forget cakey or dry vegan baked goods. The combination of applesauce and precise mixing creates a dense, moist, and deeply satisfying brownie that rivals any traditional version.
- Pantry-Friendly Ingredients: You likely have most of these items already. We’re using simple swaps like applesauce for eggs and coconut oil for butter—no obscure vegan specialty products required.
- Rich, Complex Chocolate Flavor: Using natural cocoa powder and a hint of espresso powder amplifies the chocolate to a deep, almost bitter-sweet level that true chocolate lovers crave.
- Perfect for Sharing: These brownies are universally appealing. They’re the perfect dessert to bring to a gathering where dietary preferences are mixed, ensuring no one feels left out.
- Customizable Base: Once you master this foundational recipe, it’s incredibly easy to add your own twist with nuts, swirls, or different mix-ins.
Ingredients You’ll Need
Let’s gather our ingredients—this is where the magic starts. The beauty of this recipe lies in how these simple pantry staples interact. The fats and sugars create tenderness and sweetness, the cocoa provides the soul, and the clever binders replicate the structure eggs usually provide.
I recommend using a natural (non-alkalized) cocoa powder here; its slightly acidic nature reacts perfectly with the baking powder to give us a good rise and that classic brownie flavor. For the fat, refined coconut oil is my top choice as it’s neutral in flavor, but a good vegan butter stick works beautifully too, adding a richer note. Don’t skip the espresso powder—it’s my professional secret for making chocolate taste more like itself without any coffee flavor coming through.

Note: You’ll find the complete list of ingredients, along with their exact measurements, in the printable recipe card at the bottom of this post.
Kitchen Equipment Needed
You don’t need any fancy gear. An 8×8-inch metal baking pan is essential—metal heats quickly and evenly, giving you those perfect chewy edges. Parchment paper is a must for easy, clean removal.
A large mixing bowl, a whisk for building that crucial batter structure, and a spatula for folding are all you need for mixing. A wire cooling rack helps the brownies cool evenly, and a sharp knife (run under hot water and wiped dry) will give you those pristine, professional cuts.
How to Make Vegan Brownies Recipe
Step 1: Prepare Your Pan
Preheat your oven to 350°F (175°C). Take your 8×8-inch metal pan and line it with parchment paper, leaving an overhang on two opposite sides. This little step is your best friend—it guarantees you can lift the entire slab of brownies out perfectly intact for flawless slicing.
Lightly grease any exposed parts of the pan. Believe me, skipping the parchment is the number one reason for broken brownies.
Step 2: Build the Wet Batter Base
In your large bowl, combine the melted (and slightly cooled) coconut oil with both sugars. Whisk them together vigorously for a full minute. You’re not just mixing; you’re dissolving the sugar into the fat, which is the first step to creating that shiny, crackly top we all love.
Now, add the cocoa powder, applesauce, vanilla, and espresso powder. Whisk again with gusto for another minute until the batter is thick, smooth, and gloriously glossy.
Step 3: Incorporate the Dry Ingredients
Sift the flour, baking powder, and salt directly into the wet mixture. Sifting prevents lumps and ensures even distribution. Now, put the whisk away and grab your spatula.
Gently fold the dry ingredients into the wet until you no longer see any streaks of flour. Overmixing at this stage develops gluten, leading to tough brownies. Once just combined, fold in most of your chocolate chips, saving a handful for the top.
Step 4: Bake to Perfection
Pour the thick, luxurious batter into your prepared pan, nudging it into the corners with the spatula. Sprinkle the reserved chocolate chips over the top. Bake for 30-35 minutes.
Here’s my pro tip: start checking at 30 minutes. The brownies are done when the top is set and crackly, and a toothpick inserted into the center comes out with a few sticky, moist crumbs attached. If it comes out clean, they’re overdone.
For fudgy results, err on the side of under-baking.
Step 5: The Crucial Cool & Serve
Remove the pan to a wire rack. This is the ultimate test of patience—you must let the brownies cool completely in the pan. For the cleanest cuts and the densest, most fudgy texture, I highly recommend chilling the entire pan in the refrigerator for at least an hour.
Once cold, use the parchment paper to lift the brownie block out onto a cutting board. Use a sharp knife, wiping it clean between cuts, to slice into 16 perfect squares. Step back and admire your work.
- Sugar Whisking is Key: That initial minute of whisking fat and sugar is non-negotiable. It helps create a micro-foam that contributes to the shiny, crackly crust. Don’t rush this step.
- The Toothpick Truth: Forget “clean” toothpicks for brownies. You want a few fudgy crumbs clinging to it. If you hit a melted chocolate chip, test another spot. This ensures a moist, not undercooked, center.
- Chill for Clean Cuts: Trying to cut warm brownies is a recipe for a gooey mess. Chilling them firms up the fats, allowing you to get those sharp, photogenic edges and intensifies the fudgy mouthfeel.
- Pan Material Matters: I insist on a metal pan. Glass or ceramic insulates heat, often leading to gummy centers and pale edges. A metal pan provides the immediate, consistent heat needed for the perfect texture contrast.
- Measure Flour Correctly: The most common mistake is using too much flour. Spoon the flour into your measuring cup and level it off with a knife. Scooping directly from the bag can pack in 20% more flour, leading to dry brownies.
Recipe Variations
- Salted Caramel Swirl: After pouring the batter, dollop 1/3 cup of vegan caramel sauce over the top and use a knife to swirl it gently into the batter. Sprinkle with flaky sea salt before baking.
- Nutty Crunch: Fold 3/4 cup of chopped walnuts, pecans, or almonds into the batter along with the chocolate chips for added texture and flavor.
- Orange Zest Infusion: Add the zest of one large orange to the wet ingredients for a bright, citrusy twist that pairs beautifully with dark chocolate.
- Mint Chocolate Chip: Replace the vanilla extract with 1/2 teaspoon of pure peppermint extract and use vegan mint chocolate chips if you can find them.
- Gluten-Free Adaptation: Substitute the all-purpose flour with a 1:1 gluten-free baking blend. The texture will be slightly more delicate but still delicious.
- Blonde Brownies: Replace the cocoa powder with 3/4 cup of all-purpose flour (for a total of 1 1/2 cups flour) and use 1 cup of vegan white chocolate chips.
- Extra Decadent: After baking, while the brownies are still warm, sprinkle with a handful of vegan chocolate chips. Let them sit for 5 minutes, then spread the melted chips into a thin frosting layer.
What to Serve With This Recipe
These brownies are a star on their own, but they can be dressed up for any occasion. For a classic diner-style dessert, serve a warm square topped with a scoop of vanilla vegan ice cream and a drizzle of chocolate sauce. For a dinner party, plate a smaller brownie with a dollop of coconut whipped cream and a few fresh raspberries.
They pair wonderfully with a glass of oat milk latte or a rich, dark cold brew coffee. Crumble them over vegan yogurt for a decadent breakfast parfait, or pack them in lunchboxes for a sweet treat.
Storage & Make-Ahead Instructions
- Room Temperature Storage: Store cooled brownies in an airtight container at room temperature for up to 3 days. Place a piece of parchment between layers if stacking.
- Refrigerator Storage: For longer storage or a firmer, fudgier texture, keep them in the fridge for up to 1 week. Let them come to room temperature for 15 minutes before serving for the best flavor and texture.
- Freezer Instructions: These brownies freeze exceptionally well. Wrap individual squares or the whole slab tightly in plastic wrap, then in foil or a freezer bag. Freeze for up to 3 months. Thaw overnight in the refrigerator or at room temperature for a few hours.
- Make-Ahead Strategy: The brownie batter can be made, poured into the pan, covered tightly, and refrigerated for up to 24 hours before baking. You may need to add 2-3 minutes to the baking time if baking directly from the fridge.
Frequently Asked Questions
Q: Can I use Dutch-process cocoa powder instead of natural?
A: I don’t recommend it for this specific recipe. Dutch-process cocoa is alkalized, which affects its reaction with the baking powder. Stick with natural cocoa to ensure the proper rise and classic acidic chocolate tang.
Q: My brownies didn’t get a crackly top. What happened?
A: The crackly top comes from properly dissolving the sugar in the fat and whisking enough air into the wet batter. Ensure your coconut oil isn’t too hot when you mix, and don’t skimp on that vigorous 1-minute whisking step for both the sugar and the cocoa mixture.
Q: Can I substitute the applesauce with something else?
A: Yes, mashed ripe banana or pumpkin puree can work in a pinch, but they will impart their own flavor. For a neutral flavor, unsweetened flaxseed meal (1 tbsp ground flax + 3 tbsp water, let sit 5 mins) is a good egg substitute, though it may yield a slightly denser result.
Q: How do I know if my brownies are truly done baking?
A: Look for the edges to be slightly pulled away from the pan and the center to look set, not jiggly. The toothpick test is your best guide: moist crumbs are perfect, wet batter needs more time.
Q: Can I double this recipe?
A: Absolutely. Double all ingredients and bake in a 9×13-inch metal pan. The baking time may increase to 35-40 minutes.
Start checking at 32 minutes.
Q: Why do you recommend chilling before cutting?
A: Chilling solidifies the fats (coconut oil/chocolate), turning the brownies from tender and fragile to firm and sliceable. It also concentrates the flavors and gives you that dense, fudgy texture that is the hallmark of a great brownie.
Q: Are these brownies gluten-free?
A: Not as written. However, you can successfully use a reputable 1:1 gluten-free all-purpose flour blend. The texture may be a bit more crumbly but will still be delicious.
Final Thoughts
This recipe proves that vegan desserts can be every bit as indulgent, satisfying, and technically impressive as their traditional counterparts. It’s a formula I’ve refined through countless tests to deliver consistent, spectacular results. The deep chocolate flavor, the contrast between the chewy edge and fudgy center, and that professional crackly top are all achievable in your kitchen with minimal effort.
Whether you’re baking for someone with dietary restrictions or simply exploring plant-based cooking, these brownies are a guaranteed win. I encourage you to make them, share them, and see for yourself. Don’t forget to come back and let me know how they turned out—I love hearing your baking stories!
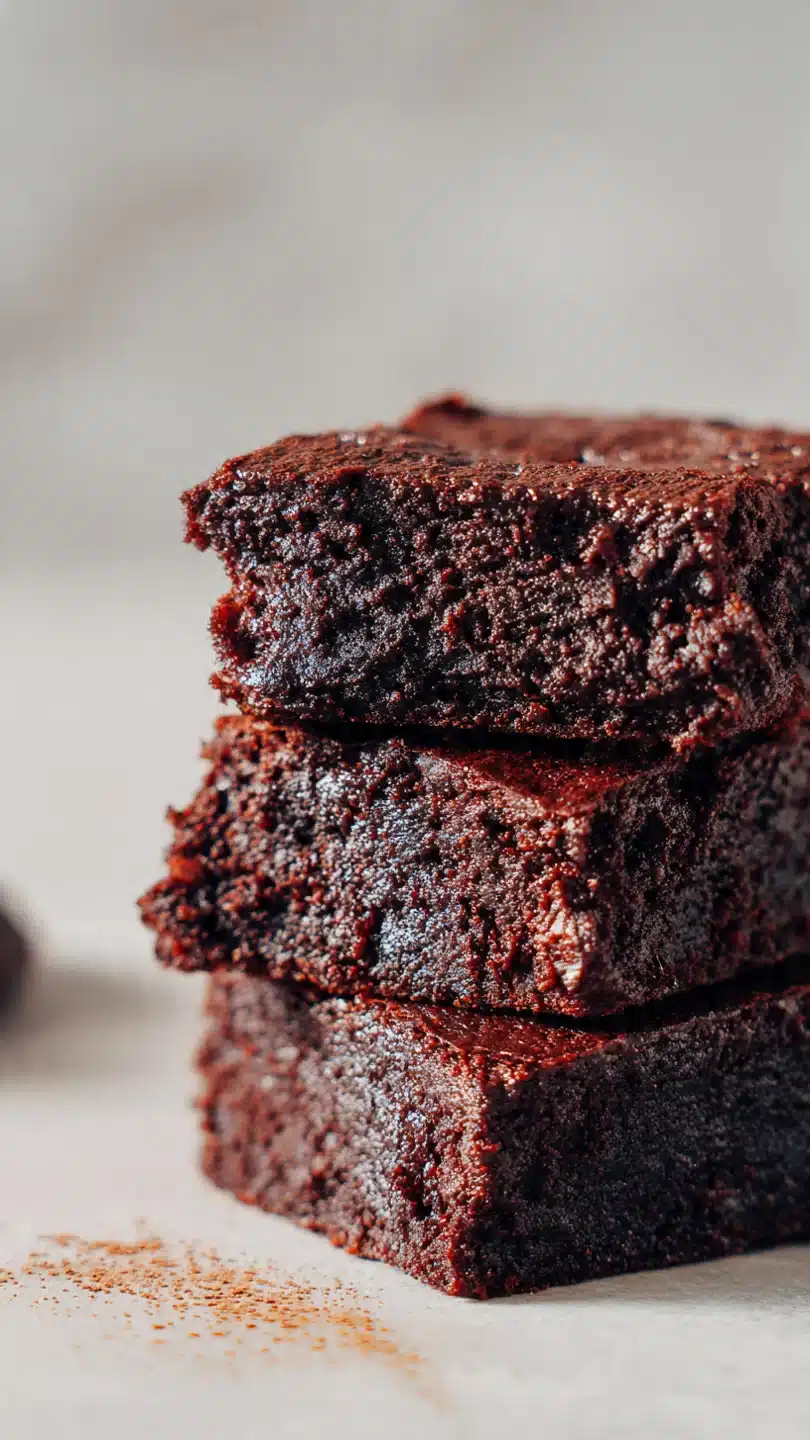
Ultimate Fudgy Vegan Brownies
Ingredients
Equipment
Method
- Preheat your oven to 350°F (175°C). Line an 8×8-inch metal baking pan with parchment paper, leaving an overhang on two sides for easy removal. This is non-negotiable for clean cuts.
- In a large bowl, whisk together the melted coconut oil, granulated sugar, and brown sugar for about 1 minute until well combined and glossy. Add the cocoa powder, applesauce, vanilla, and espresso powder (if using). Whisk vigorously for another minute until you have a thick, smooth, and glossy batter. Trust me, this whisking builds structure for that crackly top.
- Sift the flour, baking powder, and salt directly into the wet ingredients. Use a spatula to fold gently until just combined and no dry streaks remain. Be careful not to overmix. Fold in 3/4 cup of the chocolate chips.
- Pour the thick batter into your prepared pan, spreading it evenly into the corners. Sprinkle the remaining 1/4 cup of chocolate chips over the top. Bake for 30-35 minutes. The brownies are done when the top is shiny and crackly, and a toothpick inserted into the center comes out with a few moist crumbs (not wet batter).
- This is the hardest part: let the brownies cool completely in the pan on a wire rack. For the cleanest cuts and best texture, I recommend chilling them in the pan in the fridge for at least 1 hour. Use the parchment overhang to lift them out, place on a cutting board, and slice into 16 squares with a sharp knife wiped clean between cuts.


