
Valentine’s Day brownies
There’s something deeply satisfying about a perfect brownie. It’s not just a dessert; it’s a textural promise—a dense, fudgy interior with a delicate, papery crust that shatters at the first bite. For Valentine’s Day, that promise feels even more special.
Forget complicated pastries; the humble, heartfelt brownie, especially one you’ve made with a little intention, is the ultimate edible love letter. This recipe is my gold standard, developed and tested relentlessly in my kitchen to deliver that luxurious, melt-in-your-mouth quality with minimal fuss. Let’s make a batch that’s as memorable as the occasion itself.
- Professional-Grade Fudginess: The combination of melted chocolate and cocoa powder creates an intense, double-chocolate depth you typically only find in boutique bakeries.
- The Signature Shiny Top: I’ll walk you through the simple whisking technique that guarantees that beautiful, glossy, crackled crust every single time.
- Incredibly Customizable: This rich base is the perfect canvas. Swirl in raspberry jam, top with sea salt, or stud it with festive sprinkles to match your Valentine’s theme.
- One-Bowl Simplicity: You’ll mix everything in one bowl (minus the double boiler), meaning less cleanup and more time for celebrating.
- Foolproof Timing Guide: I give you the visual and textural cues, not just a timer, so you can confidently pull out perfectly baked, fudgy—not dry—brownies.
- Make-Ahead Magic: They taste even better the next day and freeze beautifully, letting you prepare your sweet gesture well in advance.
Ingredients You’ll Need
Let’s gather our ingredients. This is where the magic starts, and choosing quality components makes a noticeable difference. We’re building layers of chocolate flavor, so each element plays a key role.
- Unsalted Butter: This gives our brownies their rich mouthfeel and helps create that tender crumb. Using unsalted butter lets us control the salt level perfectly.
- Semi-Sweet Chocolate: Choose a bar you enjoy eating on its own (around 60-70% cacao works wonderfully). We’ll melt it with the butter for the foundational flavor. Good-quality chocolate chips are a fine shortcut here.
- Granulated Sugar: It sweetens, of course, but when whisked with the eggs and warm chocolate, it’s crucial for creating that desirable shiny, crackled top.
- Eggs: Please use room-temperature eggs. They incorporate much more easily into the batter, creating a smooth, emulsified mixture that bakes up evenly.
- Pure Vanilla Extract: A splash enhances all the other flavors and adds a subtle, warm aroma.
- All-Purpose Flour: Just enough to provide structure without turning our treat cakey. Be sure to spoon it into your measuring cup and level it off for accuracy.
- Unsweetened Cocoa Powder: This is our second chocolate layer, intensifying the flavor and contributing to that deep, dark color. Natural or Dutch-processed will both work here.
- Salt: A must to balance the sweetness and make the chocolate flavor pop. Don’t skip it.
- Chocolate Chips or Chunks (Optional): For those irresistible, melty pockets of extra chocolate in every bite. I always add them.

Note: You’ll find the complete list of ingredients, along with their exact measurements, in the printable recipe card at the bottom of this post.
Kitchen Equipment Needed
You don’t need any specialty gear. An 8×8-inch square baking pan is ideal for the thick, fudgy texture we’re after. Parchment paper is my secret weapon for flawless removal and clean cuts.
A medium heatproof bowl that fits snugly over a saucepan creates an easy double boiler for gentle melting. A sturdy whisk and a rubber spatula for mixing, and a wire cooling rack to let your brownies set properly are all you need. If you want to get festive, a heart-shaped cookie cutter is a lovely touch for serving.
How to Make Valentine’s Day Brownies Recipe
Step 1: Prep Your Pan and Melt the Chocolate
Preheating your oven to 350°F (175°C) ensures it’s perfectly ready. Grease your 8×8-inch pan with butter, then line it with parchment paper, leaving an overhang on two sides. Believe me, this simple step is what allows you to lift out a perfect, uncracked slab of brownie for pristine cutting.
For the chocolate, combine the butter and chopped chocolate in your heatproof bowl over simmering water. Stir until it’s a single, velvety pool of chocolate. Let it cool for about 5 minutes—this is crucial so the hot mixture doesn’t cook the eggs in the next step.
Step 2: Build the Base and Create the Shiny Top
Now, whisk the sugar into the warm chocolate mixture. It will look grainy at first, but keep whisking until it’s incorporated. Next, add your room-temperature eggs one at a time.
This is where the magic happens: whisk each egg vigorously for a good 30 seconds before adding the next. Tip from me: you’re looking for the batter to become thick, paler in color, and wonderfully glossy. This process aerates the batter, which is the secret to that classic crackled top.
Whisk in the vanilla extract.
Step 3: Gently Fold in the Dry Ingredients
Sift the flour, cocoa powder, and salt directly into the chocolate bowl. Sifting prevents lumps and ensures even distribution. Using your rubber spatula, fold the dry ingredients into the wet.
Use gentle, sweeping motions from the bottom of the bowl up and over. Stop as soon as you see no more dry streaks. Overmixing develops the gluten in the flour, leading to tough, cakey brownies—the opposite of our fudgy goal.
Now is the time to fold in those extra chocolate chips if you’re using them.
Step 4: Bake to Fudgy Perfection
Pour your thick, luxurious batter into the prepared pan. Use the spatula to spread it evenly into all the corners. Slide the pan into the center of your preheated oven.
Bake for 28 to 32 minutes. Here’s the most important tip: start checking at 28 minutes. The brownies are done when a toothpick inserted into the center comes out with a few moist crumbs clinging to it.
If it comes out clean, they’re overbaked. Trust me, they will continue to set as they cool.
Step 5: The Crucial Cool and Creative Cut
This is the test of patience! Place the entire pan on a wire rack and let the brownies cool completely. Cutting into warm brownies is a recipe for a gooey mess.
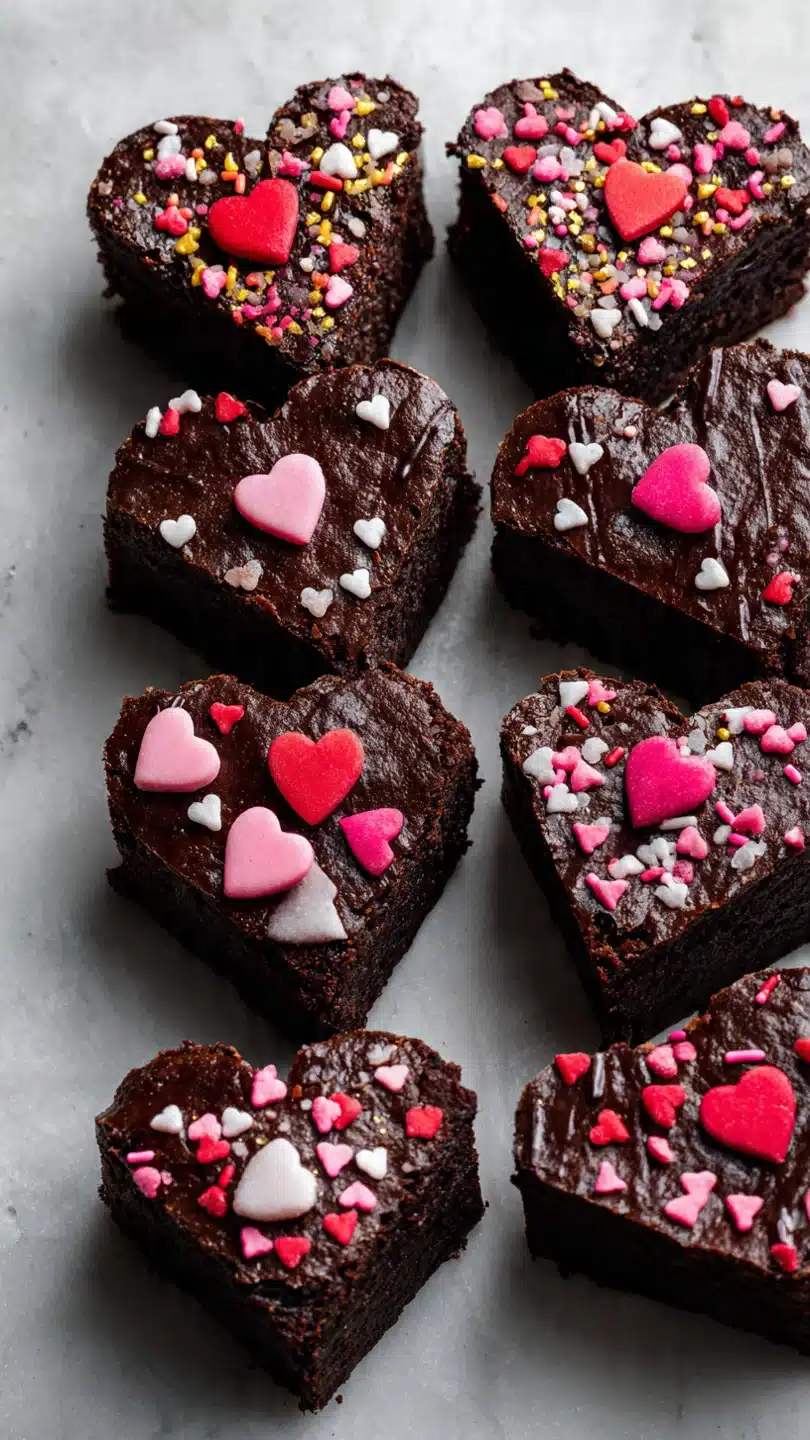
Once cool, use the parchment paper overhangs to lift the entire block out onto a cutting board. For classic squares, use a large, sharp knife. For a Valentine’s twist, press a heart-shaped cookie cutter firmly into the slab.
Wipe the knife or cutter clean between cuts for beautiful edges. Step back and admire your handiwork.
- Temperature is Everything: Using room-temperature eggs is non-negotiable. They blend seamlessly into the chocolate, creating a stable emulsion that bakes into that perfect, dense texture. Cold eggs can cause the warm chocolate to seize or result in a greasy layer.
- The Doneness Test: Rely on the visual cue, not just the timer. A toothpick with wet batter needs more time. A toothpick with a few fudgy crumbs is perfect. A clean toothpick means you’ve ventured into cakey territory.
- For the Cleanest Cuts: For absolutely pristine, crumb-free slices, pop the completely cooled brownie block (once out of the pan) into the refrigerator for 20-30 minutes. Use a sharp chef’s knife, and clean it with a hot, damp cloth between each cut.
- Quality of Chocolate: This recipe shines with good chocolate. You don’t need the most expensive, but choose a brand you’d happily snack on. The flavor difference between generic and a good semi-sweet bar is profound in such a simple recipe.
- Rest for Flavor: While hard to resist, these brownies actually taste richer and more developed if you let them rest, covered, for a few hours or overnight. The flavors meld and the texture becomes even more fudgy.
Recipe Variations & Customizations
- Raspberry Swirl Brownies: Before baking, dollop 1/3 cup of seedless raspberry jam over the batter. Use a knife or toothpick to swirl it gently for a beautiful marbled effect and a tangy flavor contrast.
- Salted Caramel Heart: After spreading the batter, press soft, store-bought caramel candies (like Kraft caramels) into the top in a heart shape. Sprinkle the entire top with flaky sea salt before baking.
- Black Forest Brownies: Fold 1/2 cup of chopped, well-drained maraschino cherries into the batter. The cherry-chocolate combination is a classic for a reason.
- Mint Chocolate Chip: Add 1/2 teaspoon of peppermint extract with the vanilla. Fold in 1/2 cup of dark chocolate chips and, if you like, a few drops of green food gel for a festive hue.
- Gluten-Free Version: Substitute the all-purpose flour with an equal weight (about 60g) of a 1:1 gluten-free baking blend. The texture will be nearly identical.
- Espresso Brownies: Dissolve 1 tablespoon of instant espresso powder into the vanilla extract before adding it. This doesn’t make them taste like coffee; it deepens the chocolate flavor incredibly.
- Valentine’s Confetti: Fold in 1/4 cup of red, pink, and white sprinkles or heart-shaped sprinkles into the batter for a fun, festive look in every bite.
What to Serve With This Recipe
These brownies are a star on their own, but a few accompaniments can elevate them into a restaurant-worthy dessert. A simple scoop of high-quality vanilla bean ice cream melting over a warm brownie is pure bliss. For a more elegant plating, add a handful of fresh berries like raspberries or strawberries and a dusting of powdered sugar.
A drizzle of warm chocolate ganache or a shot of espresso on the side makes for a decadent finish. They’re perfect for a cozy night in, but also impressive enough to be the centerpiece of a Valentine’s Day dinner party dessert spread.
Storage & Make-Ahead Instructions
- Room Temperature Storage: Once completely cool, store brownies in an airtight container at room temperature for up to 4 days. They stay beautifully fudgy.
- Refrigerator Storage: For longer storage, up to a week, keep them in the fridge. Let them come to room temperature for 30 minutes before serving for the best texture.
- Freezer-Friendly: These freeze exceptionally well. Wrap individual brownies or the whole block tightly in plastic wrap, then in foil or a freezer bag. Freeze for up to 3 months. Thaw overnight in the refrigerator or at room temperature.
- Make-Ahead Strategy: You can bake the brownies 2-3 days in advance. In fact, their flavor improves. Store the uncut block tightly wrapped at room temperature, then cut and garnish on the day you plan to serve them.
Frequently Asked Questions
Q: Can I use only cocoa powder and skip the melted chocolate?
A: I don’t recommend it for this recipe. The melted chocolate provides the fat and structure for that ultra-fudgy, dense texture. A cocoa-powder-only brownie tends to be more cake-like.
This dual-method is key to the professional result.
Q: My brownies didn’t get a shiny top. What went wrong?
A: The shiny top comes from properly dissolving the sugar in the warm chocolate and eggs. Ensure you whisk vigorously for the full time after adding each egg. Also, don’t overmix once the flour is added, as this can deflate the air you just incorporated.
Q: Can I double this recipe?
A: Absolutely! Double all ingredients and bake in a 9×13-inch pan. The baking time may increase by 5-10 minutes, so keep a close eye and use the toothpick test for doneness.
Q: How do I make these egg-free or vegan?
A: For an egg substitute, I’ve had success using a commercial egg replacer or a flax egg (1 tbsp ground flax + 2.5 tbsp water per egg). Use vegan butter and ensure your chocolate is dairy-free. The texture will be slightly denser but still delicious.
Q: What’s the best way to cut brownies without crumbling?
A: Use a sharp, thin-bladed knife. Run it under very hot water, wipe it dry, and make a clean cut. Wipe and reheat the knife between each cut for perfect squares every time.
Q: Can I use a glass or ceramic baking dish instead of metal?
A: Yes, but note that glass and ceramic retain heat differently and can lead to faster baking on the edges. Reduce your oven temperature by 25°F and check for doneness a few minutes earlier than the recipe suggests.
Q: My toothpick came out with wet batter after 32 minutes. What should I do?
A: Your oven may run cool. Continue baking in 2-minute increments, checking after each, until you get those few moist crumbs. Also, ensure your pan is in the center of the oven, not too close to the sides or top.
Final Thoughts
This Valentine’s Day brownie recipe is more than just a list of ingredients; it’s a reliable path to a deeply satisfying, impressively delicious homemade dessert. It combines professional techniques with simple steps, ensuring success whether you’re a seasoned baker or a nervous first-timer. The rich, fudgy result, with its glossy top and intense chocolate flavor, is guaranteed to make your celebration sweeter.
Remember, the best gift is often the one made with care. So, preheat that oven, melt that chocolate, and get ready to share a moment of pure, chocolatey joy. I’d love to hear how your brownies turn out—tag me on social media or leave a comment below.
Happy baking, and Happy Valentine’s Day
Ultimate Fudgy Valentine’s Day Brownies
Ingredients
Equipment
Method
- Preheat your oven to 350°F (175°C). Grease an 8×8-inch square baking pan with butter, then line it with parchment paper, leaving an overhang on two sides for easy removal. This is a non-negotiable step for perfect, clean-cut brownies.
- In a heatproof bowl set over a saucepan of gently simmering water (a double boiler), melt the butter and the 6 ounces of chopped chocolate together. Stir frequently until completely smooth and glossy. Remove from heat and let it cool for 5 minutes. This prevents the eggs from scrambling when you add them.
- Whisk the granulated sugar into the warm chocolate mixture until combined. Then, add the eggs one at a time, whisking vigorously after each addition until the batter is thick, shiny, and pulls away from the sides of the bowl. This incorporates air for that signature crackly top. Whisk in the vanilla extract.
- Sift the flour, cocoa powder, and salt directly into the chocolate mixture. Use a rubber spatula to fold gently until just combined and no dry streaks remain. Overmixing leads to cakey brownies. Fold in the extra chocolate chips or chunks if using.
- Pour the batter into your prepared pan and spread it evenly into the corners. Bake for 28-32 minutes. The brownies are done when a toothpick inserted into the center comes out with a few moist crumbs attached, not wet batter. Trust me, this is the key to fudginess.
- Let the brownies cool completely in the pan set on a wire rack. This is the hardest part, but it allows them to set for clean cutting. Use the parchment overhang to lift them out, then cut into squares or use a heart-shaped cookie cutter for a festive touch.


