
Strawberry cake
There’s something undeniably special about a strawberry cake. It’s not just a dessert; it’s a celebration of the season, a burst of sunshine on a plate. But too often, the promise of strawberry flavor falls flat, yielding a bland, pink-tinted cake.
After years in professional kitchens, I’ve cracked the code. This recipe uses a simple, chef-approved technique to concentrate the essence of fresh strawberries into every single bite, resulting in a cake that’s incredibly moist, tender, and tastes unmistakably of real berries. It’s the cake I make for birthdays, spring gatherings, or whenever I need a guaranteed showstopper.
- Intense Real Strawberry Flavor: Unlike recipes that rely on artificial flavoring or Jell-O, we reduce fresh strawberries into a potent syrup, packing the cake with authentic, fruity taste.
- Perfectly Moist & Tender Crumb: The combination of buttermilk, sour cream, and our strawberry reduction creates an exceptionally soft and velvety texture that stays moist for days.
- Professional-Grade Structure: This cake is sturdy enough to stack and frost beautifully but remains light and fluffy to eat—a balance that’s often hard to achieve.
- Crowd-Pleasing Versatility: Perfect for birthdays, holidays, potlucks, or a simple weekend treat. It’s a universal favorite.
- Make-Ahead Friendly: Both the strawberry reduction and the baked cake layers can be prepared a day in advance, making assembly a breeze.
- Tangy Cream Cheese Frosting: The slightly tart, rich frosting is the perfect complement to the sweet berry cake, cutting through the richness perfectly.
Ingredients You’ll Need
Let’s gather our ingredients. This recipe uses pantry staples transformed by one key technique: the strawberry reduction. Using fresh berries here is non-negotiable for that vibrant, true flavor.
Frozen berries can work in a pinch for the reduction, but avoid pre-sweetened varieties.
- Fresh Strawberries: You’ll need two cups, hulled and quartered. We’ll cook these down to create our flavor powerhouse.
- All-Purpose Flour: Spoon it into your measuring cup and level it off for accuracy. Too much flour is the #1 cause of a dry cake.
- Leavening Agents: Both baking powder and baking soda work together to give our dense, fruit-laden batter the perfect rise.
- Unsalted Butter & Sugar: Room temperature butter creams with sugar to create the airy foundation of our cake. I always use unsalted to control the salt level.
- Eggs & Vanilla: Room temperature eggs incorporate more evenly. Use pure vanilla extract for the best flavor.
- Buttermilk & Sour Cream: This dynamic duo is my secret for unbeatable moisture and a slight tang. Full-fat sour cream is essential.
- Pink Gel Food Coloring: This is optional, but a drop or two of gel color (not liquid, which thins the batter) enhances the natural pink hue beautifully.

Note: You’ll find the complete list of ingredients, along with their exact measurements, in the printable recipe card at the bottom of this post.
Kitchen Equipment Needed
You don’t need any specialty gear, but a few key tools will make the process smoother. A stand mixer is fantastic for creaming the butter and sugar to the perfect lightness, but a sturdy hand mixer will work. You’ll need two 9-inch round cake pans—light-colored metal pans bake most evenly.
A fine-mesh sieve is crucial for straining the strawberry reduction to get a smooth liquid without seeds. Don’t forget an offset spatula for frosting; it gives you much more control than a butter knife.
How to Make Strawberry Cake Recipe
Step 1: Create the Strawberry Essence
This is where the magic happens. In a small saucepan, combine your quartered strawberries with a couple tablespoons of water. Cook them over medium heat, mashing with a spoon or spatula as they soften.
You’re looking for the berries to completely break down and the liquid to reduce by about half, leaving you with a thick, jammy puree. This takes 15-20 minutes. Trust me, this reduction step concentrates the flavor and removes excess water that would make your cake soggy.
Strain it through a fine-mesh sieve and let it cool completely before using.
Step 2: Prepare Your Pans and Dry Mix
While the reduction cools, preheat your oven to 350°F (175°C). Properly preparing your pans is insurance against sticking. Grease the pans with butter or baking spray, line the bottoms with a circle of parchment paper, then grease the paper and dust the entire interior with flour, tapping out the excess.
In a separate bowl, whisk together your flour, baking powder, baking soda, and salt. This “sifting” via whisking ensures your leavening agents are evenly distributed for a uniform rise.
Step 3: Build the Cake Batter
In the bowl of your stand mixer, beat the room-temperature butter and sugar on medium-high speed for a full 4-5 minutes. Believe me, this isn’t the time to shortcut. You want the mixture to become very pale and fluffy—this incorporates air, which is vital for texture.
Scrape down the bowl, then add the eggs one at a time, beating well after each. Now, beat in the vanilla and your completely cooled strawberry reduction until the mixture is homogenous and a lovely pink color.
Step 4: Gently Combine Everything
Reduce your mixer speed to low. Add about one-third of your dry ingredients, mixing until just combined. Follow with half of the buttermilk and sour cream mixture.
Repeat, ending with the final third of the dry ingredients. Mix only until the last streaks of flour disappear. Overmixing at this stage develops gluten and leads to a tough cake.
If using, now is the time to fold in a drop or two of gel food coloring for a more vibrant pink.
Step 5: Bake, Cool, and Frost
Divide the batter evenly between your prepared pans. Bake for 30-35 minutes. The cakes are done when they spring back lightly to the touch and a toothpick inserted into the center comes out clean.
Let them cool in the pans for 15 minutes—this allows the structure to set. Then, turn them out onto a wire rack to cool completely. I know it’s tempting, but you must let them cool fully before frosting, or your beautiful cream cheese frosting will melt right off.
Once cool, frost, slice, and prepare for compliments.
- Temperature is Everything: All your refrigerated ingredients (butter, eggs, buttermilk, sour cream) must be at true room temperature (about 70°F). This allows them to emulsify properly, creating a smooth, uniform batter that bakes up evenly.
- Don’t Skip the Strain: Straining the strawberry reduction removes the seeds and any fibrous pulp, ensuring a smooth texture in your final cake. Press hard on the solids in the sieve to extract every last drop of flavorful liquid.
- The “Just Combined” Rule: When alternating the wet and dry ingredients, mix only until you no longer see streaks of flour. A few small lumps are better than overmixing, which develops gluten and makes the cake dense.
- Cooling is Part of Baking: Allowing the cakes to cool in the pans for 15 minutes lets the crumb set so they don’t break apart. Cooling completely on a rack prevents condensation from making the bottoms soggy and is absolutely essential before applying any frosting, especially cream cheese.
- For Flat Cake Layers: If your cakes dome significantly in the center, you can trim them with a serrated knife for a level stack. For prevention, ensure your oven temperature is accurate with an oven thermometer and avoid over-beating the batter once the flour is added.
Recipe Variations
- Strawberry Shortcake Style: Skip the frosting between layers. Instead, split the cooled layers and fill them with lightly sweetened whipped cream and sliced fresh strawberries. Frost the outside with more whipped cream.
- Lemon-Strawberry Twist: Add the zest of one lemon to the batter and use a lemon cream cheese frosting (add 2 tbsp fresh lemon juice and 1 tsp zest to the frosting recipe) for a bright, zesty combination.
- Chocolate-Dipped Strawberry Cake: Add 1/2 cup of sifted cocoa powder to the dry ingredients, replacing an equal amount of flour. Frost with the cream cheese frosting and garnish with chocolate-dipped strawberries.
- Adult Celebration Cake: Brush the cooled cake layers with a tablespoon of strawberry liqueur or vodka before frosting for a subtle grown-up twist.
- Gluten-Free Adaptation: Substitute the all-purpose flour with a 1:1 gluten-free baking blend that contains xanthan gum. The texture will be slightly more delicate but still delicious.
- Mini Layer Cakes: Bake the batter in three 6-inch round pans for an adorable, tall mini-cake perfect for small gatherings. Reduce baking time to 25-28 minutes.
What to Serve With This Recipe
This strawberry cake is a complete dessert on its own, but a few accompaniments can elevate it into a truly special occasion. For a classic pairing, serve each slice with a scoop of high-quality vanilla bean ice cream—the warm cake and cold ice cream are a timeless duo. For a lighter option, a dollop of softly whipped cream and a few extra fresh berries on the side are perfect.
Beverage-wise, it pairs wonderfully with a glass of cold milk, a cup of coffee, or even a glass of Prosecco or Moscato d’Asti if you’re celebrating. For a full spring or summer menu, serve it after a light main like grilled chicken or salmon with a fresh green salad.
Storage & Make-Ahead Instructions
- Storage: Once frosted, the cake must be stored in the refrigerator due to the cream cheese frosting. Cover it with a cake dome or place it in an airtight container. It will keep beautifully for up to 4 days.
- Freezing: You can freeze the unfrosted cake layers for up to 3 months. Wrap each cooled layer tightly in plastic wrap, then in a layer of aluminum foil. Thaw overnight in the refrigerator before frosting.
- Make-Ahead Strategy: The strawberry reduction can be made up to 3 days in advance and stored in a sealed container in the fridge. The cake layers can be baked, cooled, wrapped tightly, and stored at room temperature for one day or refrigerated for up to 2 days before assembling. Let refrigerated layers come to room temperature before frosting.
- Reheating: This cake is best served at cool room temperature. If refrigerated, let it sit out for 30-60 minutes before serving for the best texture and flavor.
Frequently Asked Questions
Q: Can I use frozen strawberries?
A: Yes, you can use frozen strawberries for the reduction without thawing. They may release more water, so you might need to cook them a few minutes longer to reduce properly.
Q: My cake is very dense. What went wrong?
A: The most common causes are overmixing the batter after adding the flour (which develops gluten) or using cold ingredients that don’t emulsify properly. Ensure everything is at room temperature and mix only until combined.
Q: Can I make this into cupcakes?
A: Absolutely! Fill lined cupcake tins 2/3 full and bake at 350°F for 18-22 minutes. This recipe will yield about 24 cupcakes.
Q: Why did my cream cheese frosting turn out runny?
A: This happens if the cream cheese or butter was too warm, or if the cake layers were not completely cool before frosting. To fix it, chill the frosting bowl for 20 minutes and re-whip.
Q: Can I omit the sour cream?
A: You can substitute an equal amount of full-fat plain Greek yogurt. Do not use a low-fat alternative, as the fat is crucial for tenderness.
Q: How do I get my layers perfectly level for stacking?
A: For minimal doming, ensure your oven temperature is accurate and try using cake strips (wet fabric strips wrapped around the outside of the pan) to promote even baking. You can also trim the tops with a serrated knife.
Q: Is the food coloring necessary?
A: Not at all! The reduction gives the cake a natural, soft pink hue. The gel coloring simply intensifies it for a more vibrant look.
Final Thoughts
This strawberry cake represents everything I love about baking: transforming simple, quality ingredients into something extraordinary through thoughtful technique. That step of reducing the strawberries makes all the difference, delivering a flavor that’s honest and intense. It’s a rewarding recipe that feels special every time you make it.
Whether it’s for a milestone birthday, a holiday table, or just a sweet weekend project, I hope this cake brings as much joy to your kitchen as it has to mine. I’d love to hear how it turns out for you—share your creations and any questions in the comments below. Happy baking
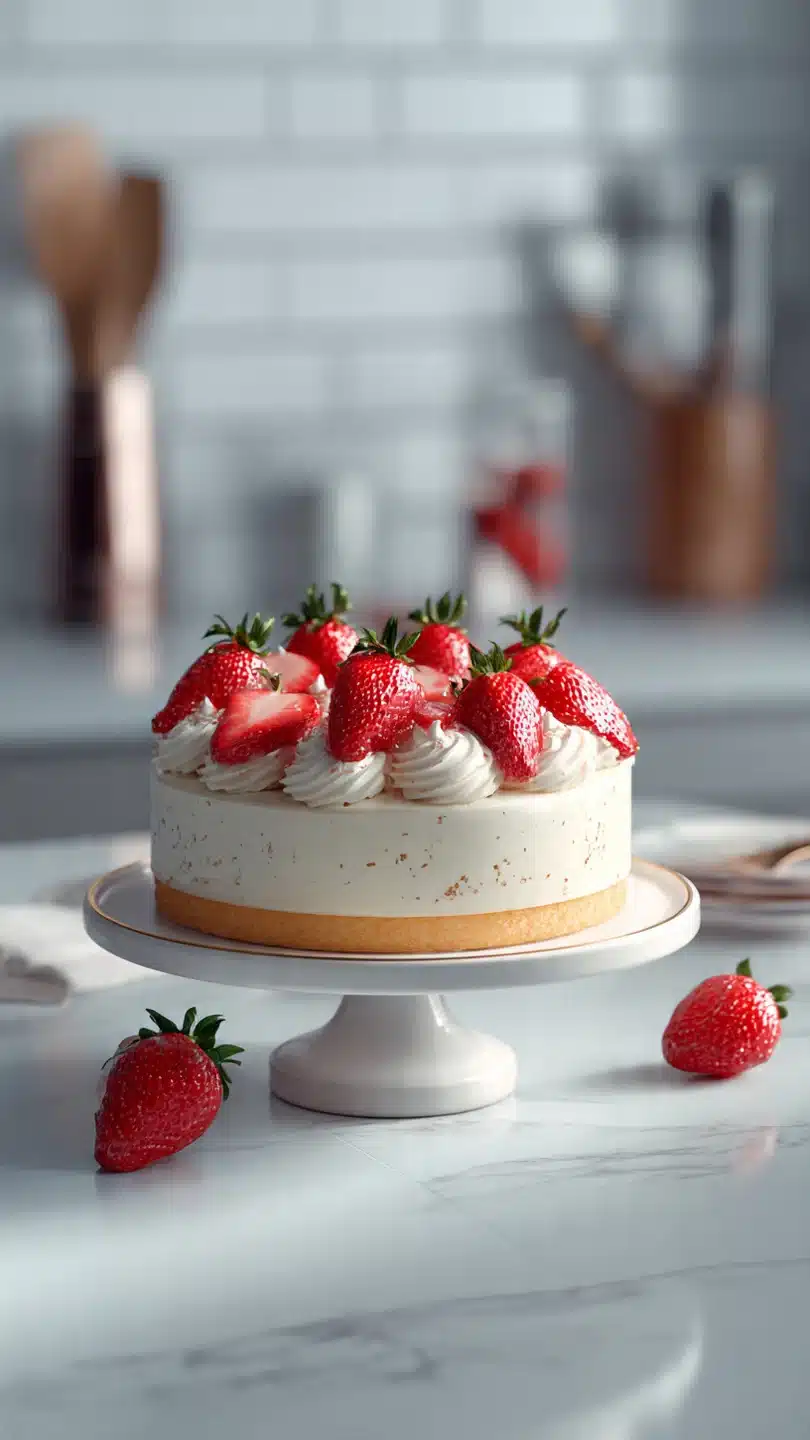
Ultimate Strawberry Cake
Ingredients
Equipment
Method
- Make the strawberry reduction. In a small saucepan, combine the quartered strawberries with 2 tablespoons of water. Cook over medium heat for 15-20 minutes, mashing occasionally, until the berries have broken down and the liquid has reduced to about 1/2 cup of thick, jammy puree. Strain through a fine-mesh sieve into a bowl, pressing with a spatula to extract all the liquid. Discard the solids. Let the reduction cool completely. This step is non-negotiable for intense flavor.
- Preheat and prepare. Preheat your oven to 350°F (175°C). Grease and flour two 9-inch round cake pans and line the bottoms with parchment paper. In a medium bowl, whisk together the flour, baking powder, baking soda, and salt. Set aside.
- Cream butter and sugar. In the bowl of a stand mixer fitted with the paddle attachment, beat the room-temperature butter and sugar on medium-high speed for 4-5 minutes until very light, fluffy, and pale in color. Scrape down the bowl. Add the eggs one at a time, beating well after each addition. Beat in the vanilla extract and the cooled strawberry reduction until fully incorporated.
- Combine wet and dry. With the mixer on low, add the dry ingredients in three additions, alternating with the buttermilk and sour cream in two additions, beginning and ending with the dry ingredients. Mix only until just combined after each addition. If using, add the gel food coloring and fold in gently. Divide the batter evenly between the prepared pans.
- Bake and cool. Bake for 30-35 minutes, or until a toothpick inserted into the center comes out clean and the cakes spring back when lightly pressed. Let the cakes cool in the pans on a wire rack for 15 minutes, then carefully invert them onto the rack to cool completely before frosting, at least 2 hours.


