
Halloween brownies ideas
The crisp autumn air, the rustle of fallen leaves, and the undeniable urge to create something festive in the kitchen—it must be Halloween season. While candy is king, there’s something uniquely satisfying about presenting a homemade treat that’s both delicious and delightfully spooky. As a chef, I believe the best holiday desserts start with a flawless base.
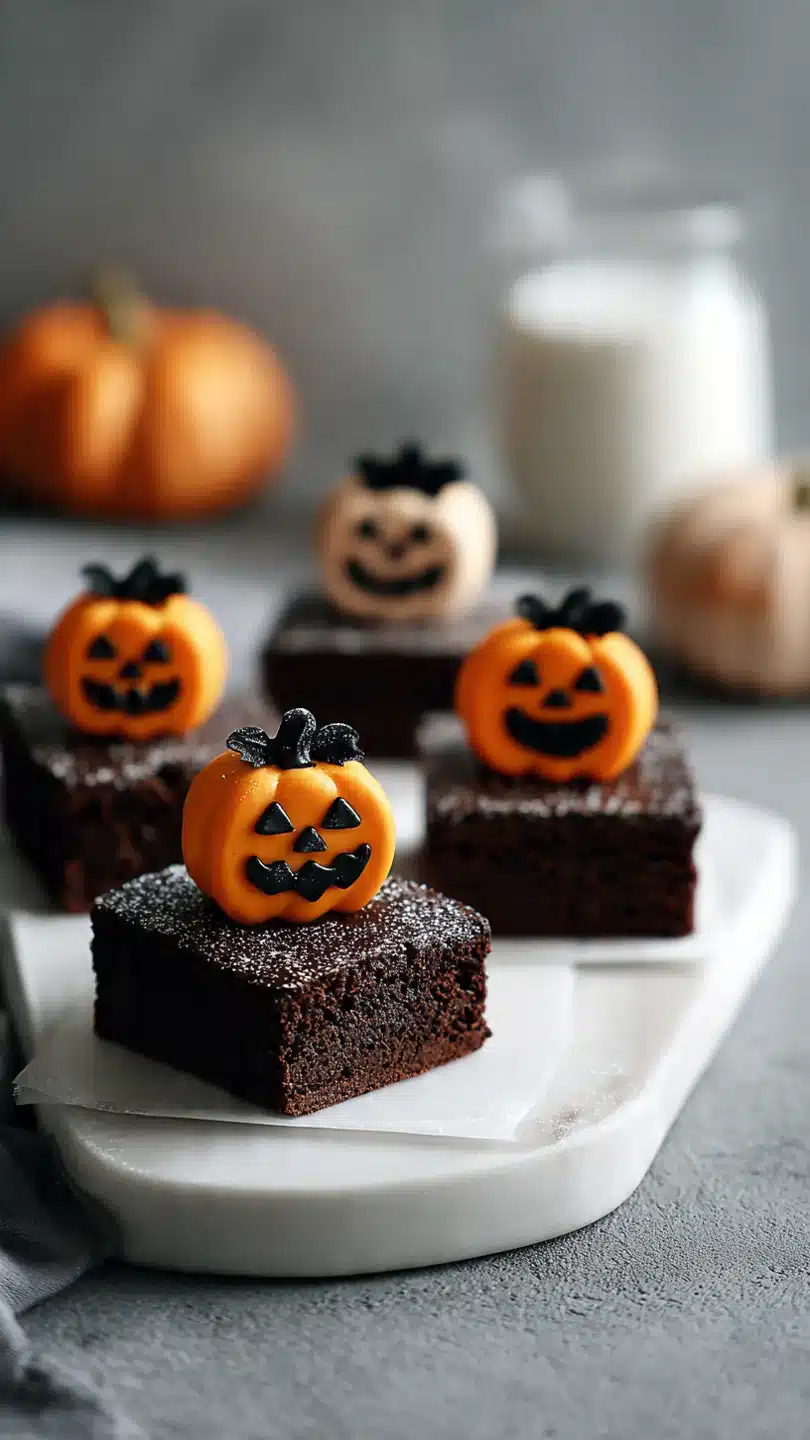
That’s why we’re focusing on a supremely fudgy, crackly-topped brownie that acts as the perfect edible canvas. This recipe is your starting point for five incredibly easy decorating ideas that look impressive but require zero advanced piping skills. Let’s turn a simple pan of brownies into the centerpiece of your Halloween party.
This approach takes the stress out of holiday baking by separating the creation of a perfect dessert from the fun of decorating it.
- Foolproof Fudgy Base: This brownie recipe is tested to deliver a dense, moist, and chocolatey crumb every single time, thanks to a specific mixing method and visual doneness cues.
- Maximum Impact, Minimal Effort: The decorating ideas use simple techniques and common ingredients. You’ll create spiderwebs with a zip-top bag and turn candy eyes into monsters in minutes.
- Kid-Friendly Project: The decorating stage is a fantastic, low-mess activity to do with children. They can add candy eyes, place pretzel sticks, and drizzle icing with glee.
- Highly Customizable: Start with this master brownie recipe, then choose one or all five decorating themes. Each idea includes easy variations so you can use what you have on hand.
- Perfect for Any Event: These brownies are sturdy enough for school parties, impressive enough for adult gatherings, and delicious enough to satisfy any trick-or-treater’s parent.
Ingredients You’ll Need
- Let’s gather our ingredients—this is where quality really shines. A great brownie is about balance: the right fat for richness, the right sugar for texture, and the right cocoa for deep flavor. Using real butter and good-quality cocoa powder is non-negotiable in my kitchen for that professional-grade taste.
For the Brownie Base:
- Unsalted Butter: Melted and slightly cooled. It provides richness and that classic fudgy mouthfeel. I prefer unsalted to control the overall salt level.
- Granulated Sugar: Creates the signature shiny, crackly top when properly whisked with the butter and eggs.
- Large Eggs: Must be at room temperature. Cold eggs can cause the melted butter to seize, leading to a greasy batter.
- Pure Vanilla Extract: A flavor enhancer that rounds out the chocolate.
- All-Purpose Flour: Spooned and leveled into your measuring cup to avoid a dry, cakey texture.
- Unsweetened Cocoa Powder: Sifted to prevent lumps. I often use Dutch-processed for a darker color and milder flavor, but natural works perfectly too.
- Salt: A critical ingredient that makes the chocolate flavor pop.
- Semisweet Chocolate Chips: Folded into the batter for pockets of melted chocolate. Using a chopped chocolate bar can elevate it further.
For Decorating (Ideas detailed later):
- Vanilla or Cream Cheese Frosting: Store-bought or homemade for piping and spreading.
- Black & Orange Gel Food Coloring: Gel colors provide vibrant hues without thinning your icing.
- Candy Eyes: Available in baking aisles or online.
- Pretzel Sticks & Rods: For spider legs and broom handles.
- Oreo Cookies: Crushed for “dirt” or whole for tombstones.
- Colored Candy Melts or White Chocolate: For easy drizzling and detailing.

Note: You’ll find the complete list of ingredients, along with their exact measurements, in the printable recipe card at the bottom of this post.
Kitchen Equipment Needed
You don’t need any specialty tools. A good metal pan (not glass, which bakes differently) and parchment paper are your best friends here.
- 9×13-inch Metal Baking Pan: Provides the ideal heat conduction for even baking and those coveted crispy edges.
- Parchment Paper: For the legendary clean lift-out. Greasing is not a reliable substitute.
- Large Mixing Bowls, Whisk, and Rubber Spatula: For mixing and folding the batter.
- Fine-Mesh Sieve: For sifting cocoa and flour to guarantee a smooth batter.
- Wire Cooling Rack: Essential for allowing the brownies to cool completely before decorating.
- Sharp Chef’s Knife: For cutting clean squares. Wiping it with a hot, damp cloth between cuts makes all the difference.
- Decorating Tools (Optional but helpful): Small offset spatula for frosting, zip-top bags for piping, and toothpicks for marbling designs.
How to Make Halloween Brownies Recipe
Step 1: Prepare Your Pan and Mix Wet Ingredients
Preheat your oven to 350°F (175°C). Line your 9×13-inch pan with parchment paper, letting the paper overhang the two long sides—this is your built-in lifting handle. In a large bowl, whisk the slightly cooled melted butter and granulated sugar together for a good 60 seconds.
You’re not just combining them; you’re dissolving the sugar into the butter to start forming that shiny crust. Add your room-temperature eggs one at a time, whisking vigorously after each until the mixture becomes thick, smooth, and pale. This incorporates air.
Stir in the vanilla. Believe me, taking this minute to whisk properly is the secret to a professional-looking top.
Step 2: Incorporate Dry Ingredients Gently
Sift the flour, cocoa powder, and salt directly into the bowl with your wet ingredients. Sifting is crucial here—it aerates the dry goods and prevents lumps of cocoa in your finished brownies. Using your rubber spatula, fold the mixture together using broad, gentle strokes.
Stop folding when just a few streaks of flour remain. Now, fold in the chocolate chips. The batter will be very thick and glossy.
Tip from me: Overmixing at this stage develops gluten in the flour, leading to a tougher, cakier brownie. We want fudgy.
Step 3: Bake to Fudgy Perfection
Transfer the thick batter to your prepared pan. Use the spatula to spread it evenly into all corners and smooth the top. Bake for 30-35 minutes.
Start checking at 30 minutes. The brownies are done when the top is shiny and set, the edges are slightly pulled away from the pan, and a toothpick inserted about 2 inches from the edge comes out with a few moist crumbs attached. If the toothpick is clean, they’re overdone.
The center should not jiggle. Trust your instincts and the visual cues over the clock.
Step 4: The Crucial Cool Down
This is the hardest part for many bakers: patience. Place the pan on a wire rack and let the brownies cool completely in the pan. This usually takes 1-2 hours.
Decorating warm brownies is a disaster—the frosting will melt, cuts will be messy, and your designs will slide right off. For even cleaner cuts, once cooled, you can refrigerate the whole pan for 30 minutes to firm up the slab.
Step 5: Slice and Unleash Your Creativity
Once completely cool, use the parchment paper “handles” to lift the entire brownie slab onto a cutting board. With a sharp knife, slice into squares. For pristine edges, wipe the knife blade clean with a hot, damp cloth between each cut.
Now, arrange your brownies on a work surface and choose your Halloween adventure from the five ideas below. This is the fun part where you get to play!
A few insights from years in pastry kitchens can elevate your brownies from good to exceptional.
- Temperature is Key: Using room-temperature eggs is non-negotiable. They emulsify into the butter and sugar much more easily, creating a stable batter that bakes evenly. Cold eggs can cause the fat to separate.
- The Toothpick Test, Decoded: For fudgy brownies, you want a toothpick with a few sticky, moist crumbs. A clean toothpick means cakey, potentially dry brownies. A gooey, wet batter on the pick needs more time. Aim for the moist crumbs.
- Cutting Clean Squares: A sharp, straight-edged knife is best. Run it under very hot water, wipe it dry, and make a single, confident downward cut. Wipe and reheat between cuts. This prevents dragging and crumbly edges.
- Gel vs. Liquid Food Coloring: For decorating icing, always use gel food coloring. Liquid coloring can thin your frosting or royal icing, ruining its piping consistency. Gel colors provide vibrant color with just a drop.
- Storage Strategy: Store undecorated brownie squares in an airtight container at room temperature for up to 4 days. Brownies decorated with cream cheese frosting or fresh fruit must be refrigerated.
Recipe Variations & Customizations
- This master recipe is your playground. Here are five tested Halloween decorating ideas, plus ways to modify the brownie base itself.
What to Serve With This Recipe
These brownies are a complete dessert on their own, but they can anchor a fantastic Halloween spread.
- Beverage Pairings: Serve with cold milk for the kids, a rich hot chocolate for a cozy touch, or a glass of Cabernet Sauvignon for an adult gathering. A pumpkin-spiced latte also makes a wonderful autumnal companion.
- Create a Dessert Board: Arrange an assortment of the different decorated brownies on a large board or platter. Fill in the spaces with other Halloween treats like candy corn, chocolate bats, popcorn balls, and clementines decorated like pumpkins.
- For a Full Party Menu: Start with savory items like “Witch’s Fingers” (breadsticks with almond nails), a cheesy “Spiderweb” dip, and “Eyeball” Caprese skewers (mozzarella balls with olive pupils). These rich brownies provide the perfect sweet finale.
Storage & Make-Ahead Instructions
- Planning is key for stress-free holiday hosting.
- Make-Ahead Brownie Base: The unfrosted brownie slab can be baked, cooled completely, wrapped tightly in plastic wrap, and frozen for up to 2 months. Thaw overnight in the refrigerator before decorating.
- Room Temperature Storage: Brownies decorated with buttercream or royal icing can be stored in a single layer in an airtight container at room temperature for 2-3 days.
- Refrigerator Storage: Brownies with cream cheese frosting, fresh fruit, or other perishable toppings must be refrigerated, covered, for up to 4 days. Let them sit at room temperature for 15 minutes before serving for the best texture.
- Freezing Decorated Brownies: I do not recommend freezing fully decorated brownies, as the frosting can become sticky and the colors may bleed. Freeze the base only, then decorate after thawing.
Frequently Asked Questions
Q: Can I make these brownies gluten-free?
A: Absolutely. I’ve successfully tested this recipe using a 1:1 gluten-free all-purpose flour blend. The texture remains excellent.
Just ensure your cocoa powder and other ingredients are certified gluten-free.
Q: My frosting is too runny to pipe. How can I fix it?
A: For store-bought or homemade frosting that’s too soft, chill it in the refrigerator for 20-30 minutes to firm up. For royal icing, add a small amount of sifted powdered sugar until it reaches your desired consistency. Gel coloring won’t thin it out like liquid will.
Q: How do I get really vibrant black frosting?
A: Start with chocolate frosting as your base—it requires less black coloring to achieve a deep shade. Use a high-quality gel food coloring (like Americana Super Black) and add it gradually. Let the colored frosting sit for 30 minutes; the color often deepens over time.
Q: Can I use a boxed brownie mix instead?
A: You can, for the sake of time. Follow the directions for a 9×13-inch pan. However, the texture and flavor of this from-scratch base are superior and more reliably sturdy for decorating.
A box mix can sometimes be too tender or cakey.
Q: The brownies are too crumbly when I cut them. What happened?
A: This usually indicates overbaking. Next time, bake for a few minutes less. For this batch, chill them thoroughly before cutting, and use a very sharp, hot knife as described in the tips.
Q: How far in advance can I decorate them?
A: For the best appearance, decorate within 24 hours of serving. You can bake and freeze the base weeks ahead, then thaw and decorate the day before your event.
Q: What’s the best way to transport these to a party?
A: Use a flat, rigid container. Place a sheet of parchment or wax paper between layers if you must stack them. Keep the container level in your car and avoid placing it in a warm spot.
Final Thoughts
Halloween baking should be filled with more fun than fright. By starting with a reliable, deeply chocolatey brownie base, you’ve already won half the battle. The decorating ideas I’ve shared are designed to be accessible, encouraging creativity without requiring a pastry degree.
Whether you choose the elegant spiderweb, the silly monster eyes, or go for a full graveyard scene, the result will be a treat that’s as joyful to make as it is to eat. So gather your little ghouls and goblins, put on some spooky music, and transform a simple dessert into a Halloween memory. I’d love to see your creations—tag me on social media with your spooky brownie masterpieces!
Ultimate Fudgy Brownie Base
Ingredients
Equipment
Method
- Preheat your oven to 350°F (175°C). Line a 9×13-inch metal baking pan with parchment paper, leaving an overhang on two sides for easy removal. This is non-negotiable for clean cuts later. Trust me, greasing alone won’t give you the same clean lift.
- In a large bowl, whisk together the melted butter and sugar for a full minute until well combined. Add the eggs one at a time, whisking vigorously after each addition until the mixture is thick, smooth, and slightly paler in color. This step incorporates air for a crackly top. Stir in the vanilla extract.
- Sift the flour, cocoa powder, and salt directly into the wet ingredients. Use a rubber spatula to fold gently until just a few streaks of flour remain. Fold in the chocolate chips. The batter will be thick and glossy. Avoid overmixing to keep the texture fudgy.
- Spread the batter evenly into your prepared pan, smoothing the top with your spatula. Bake for 30-35 minutes. The brownies are done when a toothpick inserted 2 inches from the edge comes out with a few moist crumbs, but the center is set and doesn’t jiggle.
- Let the brownies cool completely in the pan on a wire rack. This is crucial for decorating! Once cool, use the parchment paper overhang to lift the entire slab onto a cutting board. Slice into squares with a sharp knife wiped clean between cuts for perfect edges.


