
Protein brownies
Ever had a brownie that left you feeling sluggish and guilty? What if you could have a square of deep, dark chocolate indulgence that actually fueled your body? As a chef, I’ve tested countless “healthy” brownie recipes that sacrificed texture for virtue.
My mission was clear: create a protein brownie that didn’t taste like one. After three meticulous rounds of testing, I landed on this formula. These brownies boast a crackly top, a dense, fudgy interior, and a rich chocolate flavor that will make you forget they’re packed with 12 grams of protein.
They’re the perfect solution for a post-workout treat, an afternoon pick-me-up, or simply satisfying a chocolate craving the smart way. Let’s make dessert that loves you back.
This recipe is designed for success, whether you’re a seasoned baker or a beginner. Here’s what makes it special:
- Legitimately Fudgy Texture: Forget dry, cakey protein bars. These brownies are dense, moist, and deeply satisfying, thanks to the precise balance of nut butter, eggs, and minimal dry ingredients.
- Simple, Wholesome Ingredients: No mysterious protein bar chemicals here. We use real food like almond butter, eggs, and maple syrup to build flavor and nutrition from the ground up.
- Quick & One-Bowl Friendly: From bowl to oven in about 10 minutes. The mixing method is straightforward, with minimal cleanup required.
- Highly Customizable: The base recipe is a perfect canvas. Easily swap nut butters, add nuts, or swirl in peanut butter to make it your own.
- Meal-Prep Friendly: These brownies store and freeze beautifully, making them a perfect grab-and-go snack for the week ahead.
- Diet-Inclusive: Naturally gluten-free and grain-free. With a simple plant-based protein powder and flax egg swap, they can easily be made vegan.
Ingredients You’ll Need
- Let’s gather our ingredients—this short list is all you need to create a protein-packed dessert that doesn’t compromise on decadence. Quality matters here, especially for the star players.
- Creamy Almond Butter: This is our flour, fat, and structure. Use a natural, drippy almond butter with just nuts (and maybe salt) on the label. The oil should be incorporated, not separated. If you use a stiff, dry nut butter, your brownies will be dry. Peanut butter or sunflower seed butter work wonderfully for a different flavor profile.
- Pure Maple Syrup: Our natural liquid sweetener. It adds moisture, a subtle caramel note, and helps create that shiny, crackly top. Honey is a direct 1:1 substitute.
- Eggs: Essential for binding, leavening, and creating that rich, fudgy crumb. Bring them to room temperature for easier mixing.
- Chocolate Protein Powder: This is the key variable. For the best fudgy texture, I highly recommend a whey-casein blend or a plant-based blend (like pea and brown rice protein). Avoid 100% whey isolate, as it can make the brownies gummy. The protein powder should be one you enjoy the taste of on its own.
- Unsweetened Cocoa Powder: For intense chocolate depth. I prefer Dutch-process for its smoother flavor, but natural works too.
- Dark Chocolate Chips: Because more chocolate is always better. They create melty pockets throughout. Look for a brand with a high cocoa percentage and minimal added sugar to keep things clean.

Note: You’ll find the complete list of ingredients, along with their exact measurements, in the printable recipe card at the bottom of this post.
Kitchen Equipment Needed
You don’t need any fancy gadgets for this recipe. Here’s your simple toolkit:
- 8×8 Inch Baking Pan: The perfect size for achieving the ideal brownie thickness. A metal pan will give you slightly crisper edges.
- Parchment Paper: Non-negotiable for easy, clean removal and slicing. Leaving an overhang on two sides creates “handles.”
- Mixing Bowls: One medium microwave-safe bowl for wet ingredients and a small one for dry.
- Whisk and Spatula: A whisk for emulsifying the wet ingredients and a spatula for gentle folding.
- Wire Cooling Rack: Allowing air to circulate underneath the pan as the brownies cool is critical for setting the texture properly.
How to Make Protein Brownies Recipe
Step 1: Prep and Warm the Wet Base
Begin by preheating your oven to 350°F (175°C) to ensure it’s perfectly ready. Line your 8×8 inch pan with parchment paper—trust me, this saves so much frustration later. In your microwave-safe bowl, combine the almond butter and maple syrup.
Heat them in short bursts, stirring well after each, until the mixture is warm, fluid, and blends together seamlessly. This gentle warming is my pro tip; it mimics the creaming process in traditional baking, leading to a smoother, more emulsified batter that bakes up with a better texture. Let it cool for just a minute or two before adding the eggs.
Step 2: Build the Batter Foundation
To your warm (not hot) almond butter mixture, add the eggs and vanilla extract. Now, whisk vigorously for about 30 seconds. Believe me, you want to see the mixture turn glossy, thick, and completely uniform.
This emulsification traps air and is the first step to creating that desirable slightly crackly top. In your separate small bowl, sift together the protein powder, cocoa powder, salt, and baking soda. Sifting is important here to break up any stubborn clumps in the protein powder, ensuring a silky batter without gritty bits.
Step 3: Combine and Fold Gently
Add the sifted dry ingredients to the wet mixture. Put the whisk away and grab your spatula. Tip from me: fold gently.
You’re not beating air into it; you’re just marrying the components until no dry pockets remain. The batter will be quite thick and fudgy—this is exactly what you want. Once combined, fold in the dark chocolate chips, reserving a few for the top if you’re feeling fancy.
Step 4: Bake to Fudgy Perfection
Transfer the thick batter to your prepared pan. Use the spatula to press and spread it into an even layer, reaching all the corners. Sprinkle the reserved chocolate chips on top.
Bake for 20-25 minutes. Here’s the most critical part: do not over-bake. At the 20-minute mark, the edges will look set, but the center should still look slightly soft and underdone.
A toothpick inserted will come out with a few moist crumbs clinging to it, not wet batter. If it comes out clean, they’re already overdone. This residual heat will continue to cook the center as it cools, giving you that ultimate fudgy texture.
Step 5: The Crucial Cool and Serve
Once out of the oven, place the entire pan on a wire cooling rack. I know it’s tempting, but you must let them cool completely in the pan—at least one hour. This patience allows the structure to set properly.
If you cut into warm protein brownies, they’ll be a gooey mess. Once cool, use the parchment paper handles to lift the entire slab out. Slice into 9 squares.
Step back and admire your work: you’ve just made a healthy dessert that looks and tastes utterly indulgent.
A few chef-driven insights will guarantee your brownies turn out perfectly every single time.
- Protein Powder Selection: This is the make-or-break ingredient. A blend (whey-casein or plant-based) absorbs liquid differently than pure isolate, yielding a better texture. If you only have whey isolate, reduce the amount by 2 tablespoons to prevent gumminess.
- The Doneness Test: Visual cues are more reliable than time. Look for the center to lose its glossy, wet look and appear matte and just set. The edges will pull slightly away from the pan. Remember, moist crumbs on the toothpick are your goal.
- Room Temperature Eggs: Using cold eggs straight from the fridge can cause the warm nut butter mixture to seize up, making it harder to achieve a smooth emulsion. Take them out 30 minutes before you start.
- For Clean Slices: For picture-perfect squares, chill the completely cooled brownie slab in the refrigerator for 20-30 minutes. Use a sharp chef’s knife, wiping it clean with a hot, damp cloth between each cut.
Recipe Variations
- This base recipe is wonderfully adaptable. Here are some of my tested and approved twists.
- Peanut Butter Cup: Use peanut butter instead of almond butter and fold in chopped sugar-free peanut butter cups along with the chocolate chips.
- Mint Chocolate Chip: Add 1/4 teaspoon of pure peppermint extract with the vanilla. Use dark chocolate chips or sugar-free mint chocolate pieces.
- Salted Caramel Swirl: Before baking, drizzle 2-3 tablespoons of sugar-free caramel sauce over the batter and use a knife to gently swirl it in. Sprinkle with flaky sea salt.
- Espresso Kick: Add 1-2 teaspoons of instant espresso powder to the dry ingredients. It amplifies the chocolate flavor without making the brownies taste like coffee.
- Vegan Version: Substitute the eggs with 2 “flax eggs” (2 tbsp ground flaxseed mixed with 5 tbsp water, left to gel for 5 minutes). Use a plant-based protein powder and vegan chocolate chips.
- Nutty Crunch: Fold in 1/4 cup of chopped walnuts or pecans for added texture and healthy fats.
- Double Chocolate Chunk: Replace half the chocolate chips with chopped sugar-free dark chocolate bar for irregular, melty pockets.
What to Serve With This Recipe
These protein brownies are delicious on their own, but they can be dressed up for any occasion. For a decadent yet balanced dessert, serve a warm square topped with a scoop of high-protein vanilla ice cream or a dollop of whipped coconut cream. For a breakfast or brunch treat, pair one with a berry smoothie or a cup of Greek yogurt.
They’re the perfect portable snack for hikes, gym bags, or lunchboxes. For a casual gathering, cut them into smaller bites and serve on a platter alongside fresh fruit and nuts.
Storage & Make-Ahead Instructions
- Proper storage is key to maintaining that perfect fudgy texture.
- Room Temperature: Store cooled brownies in an airtight container at room temperature for up to 2 days.
- Refrigerator: For longer storage, keep them in the fridge for up to 1 week. The cool temperature makes them even denser and fudgier.
- Freezer: These brownies freeze exceptionally well. Wrap individual squares tightly in plastic wrap and place them in a freezer bag for up to 3 months. Thaw at room temperature or warm gently in the microwave.
- Make-Ahead: The entire recipe can be made 1-2 days in advance. In fact, I find the flavor deepens and the texture becomes even more cohesive after a night in the fridge.
- Reheating: For a fresh-from-the-oven experience, warm a square in the microwave for 10-15 seconds. Avoid overheating, as this can dry them out.
Frequently Asked Questions
Q: Can I use a different protein powder?
A: Yes, but the type matters. Whey-casein blends or plant-based blends (pea/brown rice) work best. Pure whey isolate tends to create a gummy, rubbery texture.
If using isolate, reduce the amount by 2 tablespoons.
Q: My batter is super thick—is that normal?
A: Absolutely! This is a thick, fudgy batter, not a pourable cake batter. It should hold its shape when scooped.
This density is what gives you that rich, brownie-like texture instead of a cakey one.
Q: How do I know when they’re done baking?
A: Look for the center to look just set and no longer wet or glossy. The edges will be slightly puffed and may start to pull away from the pan. A toothpick inserted should have a few moist crumbs, not wet batter.
It’s better to under-bake slightly than to over-bake.
Q: Can I make these vegan?
A: Definitely. Replace each egg with a “flax egg” (1 tbsp ground flax + 2.5 tbsp water, per egg). Use a plant-based protein powder and ensure your chocolate chips are vegan/dairy-free.
Q: Why did my brownies turn out dry?
A: The most common culprits are over-baking or using a dry, stiff nut butter. Ensure your almond butter is natural and stir well before measuring. Also, double-check your oven temperature with a thermometer.
Q: Can I use a sugar-free syrup?
A: Yes, a monk fruit or allulose-based syrup can be used in place of maple syrup. The texture may be slightly different, and baking time might need a 1-2 minute reduction.
Q: Are these brownies keto-friendly?
A: With modifications, they can be. Use a keto-friendly sweetener syrup (like monk fruit), a keto protein powder, and sugar-free chocolate chips. Be mindful that nut butters and cocoa powder still contain carbs.
Q: Can I double this recipe?
A: Yes, simply double all ingredients and bake in a 9×13 inch pan. The baking time may increase by 5-10 minutes; rely on the visual doneness cues.
Final Thoughts
This protein brownie recipe represents what I love most about modern, health-conscious baking: it doesn’t ask you to compromise. You get genuine chocolate satisfaction, a luxuriously fudgy bite, and the nutritional benefits of a high-protein snack, all from one simple pan. As a professional, I’ve poured my testing experience into ensuring these work reliably, with clear cues to guide you to success.
Whether you’re fueling a busy day, curbing a sweet tooth, or simply wanting a better-for-you treat, these brownies deliver. I encourage you to make them your own with the variations provided. When you do, I’d love to hear how they turned out!
Share your creations online and tag me. Happy, healthy baking
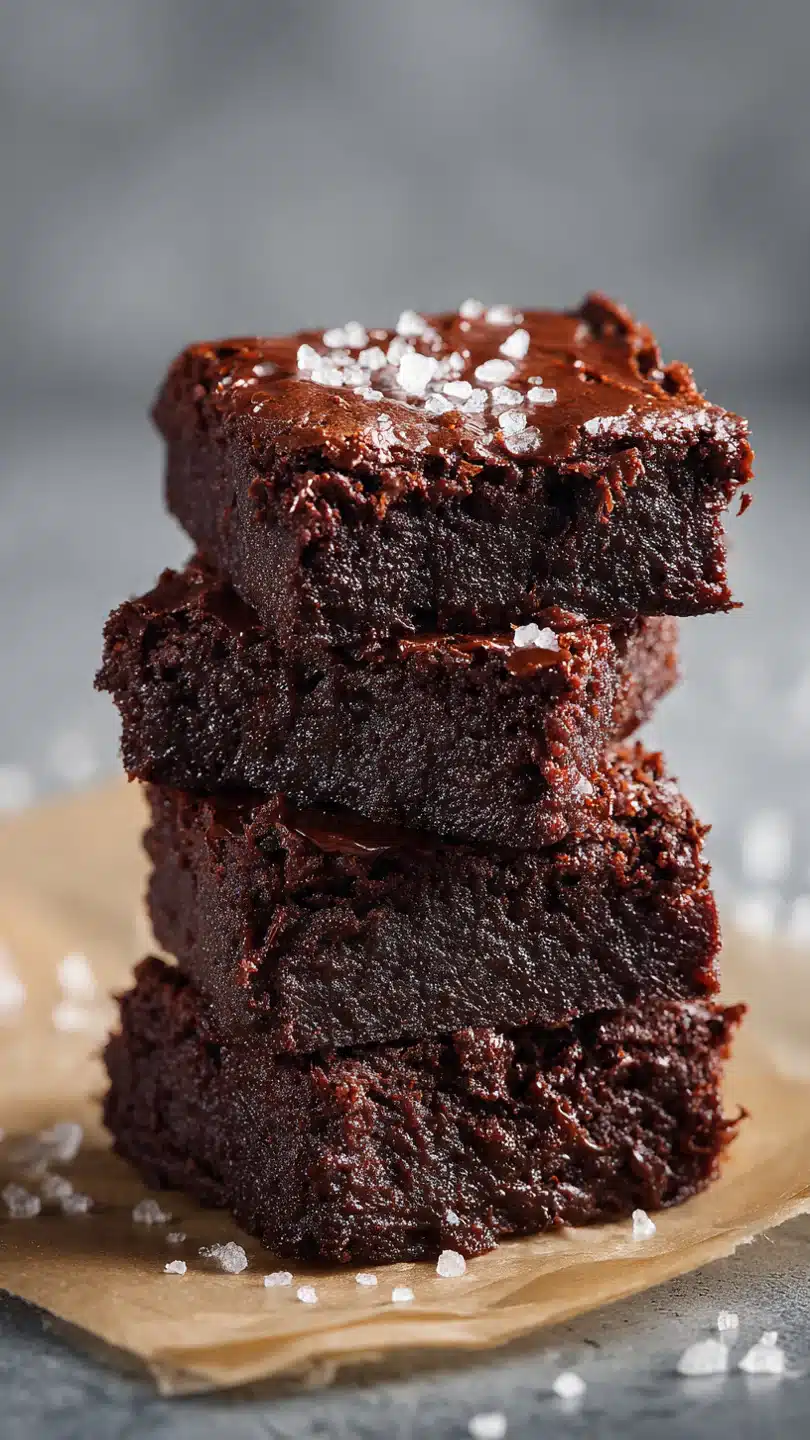
Ultimate Fudgy Protein Brownies
Ingredients
Equipment
Method
- Preheat your oven to 350°F (175°C). Line an 8×8 inch baking pan with parchment paper, leaving an overhang on two sides for easy removal. Lightly grease any exposed pan.
- In a medium microwave-safe bowl, combine the almond butter and maple syrup. Heat in 20-second bursts, stirring between each, until the mixture is warm, fluid, and easily stirrable—about 40-60 seconds total. This step is crucial for a smooth batter. Let it cool for 2 minutes.
- To the warm almond butter mixture, whisk in the eggs and vanilla extract until completely smooth and emulsified. The mixture should be glossy.
- In a separate bowl, sift together the protein powder, cocoa powder, salt, and baking soda. This prevents lumps. Add the dry ingredients to the wet ingredients and fold gently with a spatula until just combined and no dry streaks remain. The batter will be thick. Fold in the chocolate chips.
- Transfer the batter to your prepared pan. Use the spatula to spread it into an even layer. Sprinkle a few extra chocolate chips on top, if desired. Bake for 20-25 minutes. The key is to pull them out when the center is just set but still looks slightly underdone—a toothpick inserted will have moist crumbs, not wet batter.
- Let the brownies cool completely in the pan on a wire rack. This is non-negotiable for the perfect fudgy texture. Once cool, use the parchment paper to lift them out. Slice into 9 squares and enjoy!


