
Healthy banana brownies
There’s a special kind of kitchen magic that happens when overripe bananas meet a craving for something deeply chocolatey. You know the moment—you spot those speckled bananas on the counter, and the thought of banana bread feels too predictable. That’s when these brownies come to the rescue.
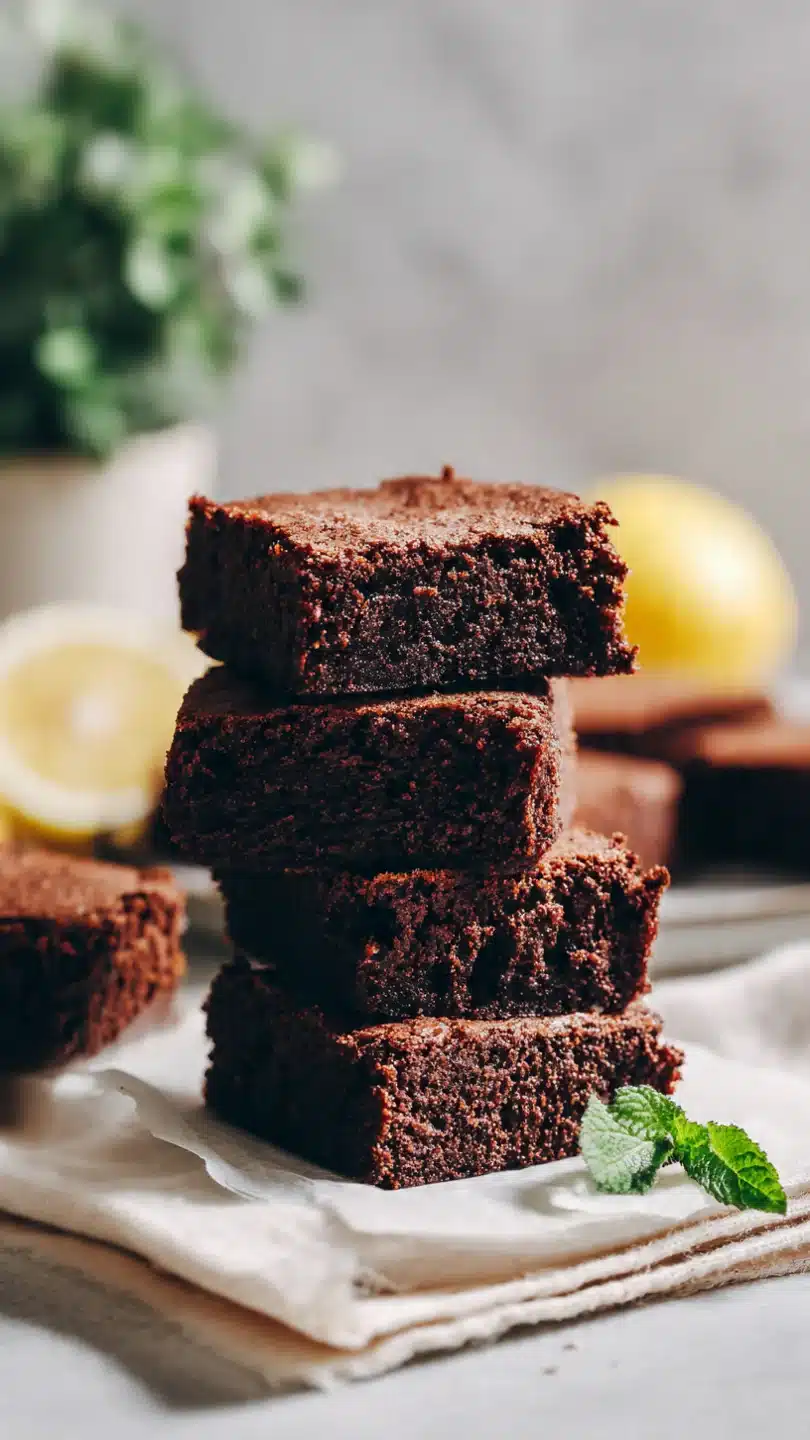
Forget dry, cakey health desserts. This recipe delivers a brownie with a crackly top, an intensely fudgy center, and a rich chocolate flavor that will make you do a double-take at the ingredient list. As a chef who has tested countless “healthy” baked goods, my mission was to create one that doesn’t taste like a compromise.
This is it: a one-bowl wonder that’s as satisfying to make as it is to eat.
- Seriously Fudgy Texture: Thanks to the mashed banana and almond butter, these brownies are moist and dense, not cakey.
- One-Bowl Simplicity: No mixer, no fuss. You can have the batter ready and in the oven in under 10 minutes.
- Naturally Sweetened: Ripe bananas and a touch of maple syrup provide all the sweetness you need, without refined sugar.
- Packed with Protein: The addition of protein powder makes these a satisfying snack or post-workout treat.
- Gluten & Grain-Free: With no flour at all, these brownies are friendly for many dietary needs.
- Kid-Approved: The rich chocolate flavor wins over even the pickiest eaters, making it a sneaky way to add fruit and protein.
Ingredients You’ll Need
Let’s gather our ingredients—this is where simple pantry staples transform into something extraordinary. The ripe banana is the star here, doing triple duty: it adds natural sweetness, provides moisture, and helps bind everything together without flour. I recommend a creamy, natural almond butter with no added sugar or oils for the best texture and clean flavor.
For the cocoa, use a high-quality unsweetened variety; the better the cocoa, the richer the brownie. The protein powder is key for structure; a good-quality vanilla whey or plant-based blend works perfectly. Don’t skip the chocolate chips—they create those irresistible molten pockets.
If you have a nut allergy, sunflower seed butter is a fantastic swap for the almond butter.

Note: You’ll find the complete list of ingredients, along with their exact measurements, in the printable recipe card at the bottom of this post.
Kitchen Equipment Needed
You don’t need any fancy gear for this recipe. An 8×8 inch square baking pan is the ideal size for the perfect thickness. Parchment paper is my non-negotiable secret for flawless removal and clean cuts—simply cut a sheet to fit the width of the pan, leaving a few inches of overhang on two sides to create “handles.” A large mixing bowl, a whisk, and a spatula are all you need for mixing.
A wire cooling rack is helpful for allowing air to circulate around the pan as the brownies cool, which prevents a soggy bottom.
How to Make Healthy Banana Brownies Recipe
Step 1: Prep Your Pan and Mash
First, preheat your oven to 350°F (175°C). This ensures a consistent temperature for even baking. Line your 8×8 inch pan with parchment paper.
Trust me, this small step saves so much frustration later. In your large bowl, take your three very ripe bananas and mash them thoroughly with a fork. You want them mostly smooth, but a few small lumps are perfectly fine—they’ll add little bursts of banana flavor.
Step 2: Build the Wet Base
To the mashed bananas, add the creamy almond butter, maple syrup, eggs, and vanilla extract. Now, grab your whisk and get ready to put a little muscle into it. Whisk everything together vigorously for a full 60 seconds.
Believe me, this isn’t just mixing; you’re emulsifying the fats and liquids, which creates a stable, smooth base that will hold the dry ingredients beautifully. The mixture should look glossy and unified.
Step 3: Fold in the Dry Ingredients
Here’s a pro tip: sift your cocoa powder, protein powder, baking soda, and salt directly into the wet ingredients. Sifting prevents any stubborn lumps of cocoa or protein powder and ensures everything incorporates evenly. Use your spatula to gently fold the dry ingredients into the wet.
Mix until you just see no more dry streaks. Overmixing can lead to tough brownies, so once it’s combined, stop.
Step 4: Add Chocolate and Bake
Now for the best part: fold in those dark chocolate chips. Pour the thick, luxurious batter into your prepared pan, using the spatula to spread it evenly into the corners. For a professional touch, sprinkle a few extra chocolate chips on top.
Bake for 22 to 25 minutes. Tip from me: start checking at 22 minutes. The brownies are done when the top looks dry and set, and a toothpick inserted into the center comes out with a few moist crumbs attached, not wet batter.
Step 5: The Crucial Cool and Serve
This is the ultimate test of patience. You must let the brownies cool completely in the pan on a wire rack. I know it’s hard, but if you cut into them warm, they’ll be a gooey mess.
As they cool, they finish setting into that perfect fudgy texture. Once cool, use the parchment paper “handles” to lift the entire slab out. Slice into 9 squares with a sharp knife, step back, and admire your beautiful, healthy creation.
- Banana Ripeness is Key: The more black spots, the better. Green-tipped bananas lack the necessary sweetness and starch conversion, which can result in a bland, gummy texture.
- Emulsify for Structure: That 60-second whisking of the wet ingredients is crucial. It traps air and binds the almond butter (fat) with the eggs and syrup (liquids), creating a stable emulsion that supports the dry ingredients.
- The Toothpick Test: For fudgy brownies, you want moist crumbs on the toothpick, not a clean one. A clean toothpick means you’ve overbaked into cakey territory.
- Cooling is Part of Baking: Residual heat continues to cook the center. Allowing them to cool in the pan ensures they set properly without drying out.
- For Clean Slices: For picture-perfect squares, pop the completely cooled brownie slab into the refrigerator for 20-30 minutes before slicing with a sharp knife wiped clean between cuts.
Recipe Variations
- Nut-Free Version: Swap the almond butter for an equal amount of sunflower seed butter or tahini. Be aware that sunflower seed butter can sometimes cause baked goods to turn green (a harmless reaction with baking soda), but the taste is still fantastic.
- Double Chocolate: Fold in 1/4 cup of cacao nibs along with the chocolate chips for an intense, less-sweet chocolate experience with a delightful crunch.
- Peanut Butter Swirl: Before baking, drop small dollops of natural peanut butter onto the batter and use a knife to swirl it gently through the top layer.
- Mocha Brownies: Add 1-2 teaspoons of instant espresso powder to the dry ingredients. The coffee doesn’t make it taste like coffee; it deepens the chocolate flavor exponentially.
- Add Crunch: Stir 1/4 cup of chopped walnuts or pecans into the batter for added texture and healthy fats.
- Vegan Option: Replace the eggs with two “flax eggs” (2 tbsp ground flaxseed mixed with 5 tbsp water, left to gel for 5 minutes). The texture will be slightly more dense but still delicious.
What to Serve With This Recipe
These brownies are wonderfully versatile. For an elegant dessert, serve a square slightly warmed with a scoop of vanilla bean ice cream or a dollop of coconut whipped cream and a few fresh raspberries. They make a fantastic lunchbox treat or afternoon pick-me-up alongside a cup of coffee or a glass of cold almond milk.
For a brunch spread, consider them a sweet, protein-packed alternative to muffins. They’re also the perfect portable dessert for picnics or potlucks, as they hold their shape well and don’t require refrigeration for short periods.
Storage & Make-Ahead Instructions
- Room Temperature: Store cooled brownies in an airtight container at room temperature for up to 2 days.
- Refrigerator: For longer storage, keep them in the fridge for up to 5 days. The cool temperature makes them even fudgier.
- Freezer: These brownies freeze exceptionally well. Wrap individual squares tightly in plastic wrap and place them in a freezer bag for up to 3 months. Thaw at room temperature or warm briefly in the microwave.
- Make-Ahead: You can prepare the batter, pour it into the lined pan, cover tightly, and refrigerate for up to 24 hours before baking. You may need to add 1-2 minutes to the baking time if the batter is cold.
Nutritional Benefits
While this is a dessert, it’s built on wholesome ingredients. Bananas provide potassium and fiber. Almond butter contributes healthy monounsaturated fats, vitamin E, and protein.
The cocoa powder is a rich source of flavonoids and antioxidants. By using protein powder, you’re significantly boosting the satiety factor, making one brownie a truly satisfying treat that can help curb sugar cravings. It’s a dessert that fuels you rather than leaving you in a sugar slump.
Frequently Asked Questions
Q: Can I make these without protein powder?
A: Yes, but you’ll need a substitute for structure. Replace the 1/2 cup protein powder with 1/4 cup coconut flour OR 1/2 cup oat flour. The texture will be slightly different but still good.
Q: My bananas aren’t ripe enough. What can I do?
A: Speed-ripen them! Place whole, unpeeled bananas on a baking sheet and bake at 300°F for 15-20 minutes, until the skins are black. Let them cool, then scoop out the soft interior.
Q: Can I use a different nut butter?
A: Absolutely. Cashew butter will yield the mildest flavor, while peanut butter will give a distinct peanut butter cup vibe. Just ensure it’s the creamy, natural kind without added sugars or oils.
Q: Why did my brownies turn out gummy?
A: This usually points to underbaking or using bananas that weren’t ripe enough. Ensure you get that dry top and use the toothpick test. Overripe bananas have more sugar and less moisture.
Q: Are these brownies keto-friendly?
A: Not as written due to the bananas and maple syrup. For a keto version, you’d need to use a banana extract substitute and a sugar-free sweetener, which is a different recipe entirely.
Q: Can I double this recipe?
A: Yes! Double all ingredients and bake in a 9×13 inch pan. The baking time may increase by 5-8 minutes; use the same visual and toothpick tests for doneness.
Q: How do I know if my baking soda is still active?
A: Mix 1/4 teaspoon of baking soda with 2 teaspoons of vinegar. If it doesn’t bubble vigorously immediately, it’s lost its potency and should be replaced.
Final Thoughts
After 15 years of testing recipes from fine dining to family kitchens, I can confidently say that a truly satisfying healthy dessert is a rare find. These banana brownies are that find. They prove that with a few smart ingredient swaps and solid technique, you don’t have to sacrifice flavor or texture for nutrition.
The process is wonderfully simple, the result is consistently impressive, and the flexibility to adapt them to your pantry makes them a true keeper. I hope this recipe becomes your go-to solution for those ripe bananas and chocolate cravings. When you make them, I’d love to hear how they turned out!
Share your photos and variations with me, and if you enjoyed this recipe, explore my site for more tested, chef-approved recipes that bring joy and goodness to your table. Happy baking
Healthy Banana Brownies
Ingredients
Equipment
Method
- Preheat your oven to 350°F (175°C). Line an 8×8 inch baking pan with parchment paper, leaving an overhang on two sides for easy removal. This is non-negotiable for clean slices.
- In a large mixing bowl, mash the ripe bananas with a fork until mostly smooth with just a few small lumps. Add the almond butter, maple syrup, eggs, and vanilla extract. Whisk vigorously for about 60 seconds until the mixture is completely smooth and emulsified. This step builds structure.
- Sift the cocoa powder, protein powder, baking soda, and salt directly into the wet ingredients. This prevents lumps. Use a spatula to fold the dry ingredients into the wet until just combined and no dry streaks remain. Be careful not to overmix.
- Fold in the dark chocolate chips. Pour the thick, glossy batter into your prepared pan, spreading it evenly into the corners. Sprinkle a few extra chocolate chips on top for a bakery-style finish.
- Bake for 22-25 minutes. The brownies are done when the top is set and looks dry, and a toothpick inserted into the center comes out with a few moist crumbs (not wet batter). Trust me, they will continue to set as they cool.
- Let the brownies cool completely in the pan on a wire rack. This is the hardest part, but crucial for that fudgy texture. Once cool, use the parchment paper to lift them out and slice into 9 squares with a sharp knife.

![Cinnamon Swirl Bread [120 Minutes] - Image 1](http://ratepep.com/wp-content/uploads/2025/11/Cinnamon_Swirl_Bread__120_Minutes__recipe_1-768x1365.webp)


