
Sweet potato brownies
Imagine a brownie so rich and fudgy it feels indulgent, yet secretly packed with wholesome ingredients. That’s the magic of these sweet potato brownies. As a chef, I’ve tested countless “healthy” dessert recipes that sacrifice texture for virtue.
This one is different. The sweet potato creates an incredibly moist, dense crumb that rivals any traditional brownie, while adding natural sweetness and nutrients. Whether you’re looking for a gluten-free treat, a lunchbox surprise, or just a delicious way to eat more vegetables, this recipe delivers.
Get ready for a dessert that will have everyone asking for seconds, completely unaware of its secret superfood ingredient.
- Surprisingly Fudgy: The mashed sweet potato creates an intensely moist, dense texture that classic brownie lovers adore.
- Naturally Sweetened: Relying on maple syrup and the sweet potato itself means no refined white sugar is needed.
- Gluten & Dairy-Free Friendly: With simple swaps, this recipe easily accommodates common dietary needs without compromising taste.
- Nutrient-Packed: You’re getting a dose of fiber, vitamins, and antioxidants from the sweet potato and cocoa.
- Simple to Make: One-bowl mixing (plus one for dry ingredients) and straightforward steps make this a stress-free bake.
- Kid-Approved Stealth Health: It’s the perfect way to sneak extra vegetables into a treat that kids will devour.
Ingredients You’ll Need
Let’s gather our ingredients—this is where simple, whole foods transform into something decadent. The sweet potato is the star, providing moisture, sweetness, and that gorgeous fudgy body. For the best results, use a well-cooked, cooled sweet potato.
Mash it until completely smooth; any lumps will show up in your final brownie. I prefer a creamy, natural almond butter for its neutral flavor, but any nut or seed butter works. The type of cocoa powder matters: Dutch-process will give a darker, milder chocolate flavor, while natural cocoa offers a more intense, slightly fruity note.
Both are excellent.
- Sweet Potato: 1 1/2 cups mashed. Bake or boil until very tender, then cool completely.
- Almond Butter: 1/2 cup. Use a creamy, drippy style for easiest mixing.
- Pure Maple Syrup: 1/2 cup. This is our liquid sweetener; honey can be substituted.
- Eggs: 2 large. They bind the batter and help with the rise.
- Vanilla Extract: 1 tsp. Pure extract enhances the chocolate flavor.
- Cocoa Powder: 1/2 cup. Sift it to avoid clumps.
- Almond Flour: 1/4 cup. This gives structure without gluten; oat flour is a good substitute.
- Baking Powder: 1 tsp. Provides just a little lift.
- Sea Salt: 1/2 tsp. Balances and intensifies all the sweet flavors.
- Dark Chocolate Chips: 1/2 cup. Folded into the batter and sprinkled on top for melty pockets of chocolate.

Note: You’ll find the complete list of ingredients, along with their exact measurements, in the printable recipe card at the bottom of this post.
Kitchen Equipment Needed
You don’t need any specialty gear for this recipe. An 8×8 inch baking pan is ideal for the right thickness. Parchment paper is my non-negotiable tip—it guarantees easy, clean removal and slicing.
You’ll need a couple of mixing bowls, a whisk for the wet ingredients, and a spatula for folding. A fine-mesh sieve for sifting the dry ingredients is highly recommended to prevent cocoa lumps. Finally, a wire rack for cooling and a sharp knife for clean cuts will complete your setup.
How to Make Sweet Potato Brownies Recipe
Step 1: Prepare Your Pan and Wet Ingredients
First, line your 8×8 inch pan with parchment paper, letting it overhang on two sides. This creates “handles” to lift the whole brownie slab out later—a game-changer for clean slicing. In your large bowl, combine the cooled, mashed sweet potato, almond butter, maple syrup, eggs, and vanilla.
Whisk vigorously for a good minute until the mixture is completely smooth and emulsified. Believe me, taking the time here to eliminate any sweet potato lumps is the foundation for that luxurious, fudgy texture we’re after.
Step 2: Sift the Dry Ingredients
In your medium bowl, sift together the cocoa powder, almond flour, baking powder, and salt. I insist on sifting, especially with cocoa powder which loves to clump. This aerates the dry ingredients, ensures even distribution of the baking powder, and guarantees your batter will be silky smooth without any chalky pockets.
It’s a simple step that professional bakers never skip, and you shouldn’t either.
Step 3: Combine and Add Chocolate
Now, add the sifted dry ingredients to the wet mixture. Use a spatula and fold gently until the flour is just incorporated. Overmixing can lead to toughness, so stop as soon as you no longer see dry streaks.
Tip from me: fold in half of the chocolate chips at this stage. This distributes melty chocolate throughout every bite. The batter will be very thick and glossy—this is perfect.
Step 4: Bake to Fudgy Perfection
Transfer the thick batter to your prepared pan, spreading it evenly into the corners. Sprinkle the remaining chocolate chips over the top and press them in lightly. Bake at 350°F for 30-35 minutes.
The key is to not overbake. The top should look set and may have a few cracks, but a toothpick inserted into the center should come out with a few sticky crumbs attached, not wet batter. Trust me, they will set further as they cool.
Step 5: The Crucial Cool and Serve
Here’s where patience is essential. Let the brownies cool completely in the pan on a wire rack for at least an hour. They need this time to firm up and develop their final texture.
Once cool, use the parchment paper to lift them out onto a cutting board. Use a sharp knife to slice into squares. For picture-perfect clean cuts, wipe the knife clean with a damp cloth between each slice.
Step back and admire your gorgeous, fudgy creation.
- Sweet Potato Prep is Key: For the smoothest mash, bake your sweet potato whole (pierced with a fork) at 400°F until very tender. The dry heat of baking concentrates the flavor and reduces excess moisture compared to boiling. Let it cool completely before using.
- Temperature Matters: Use room temperature eggs. They incorporate more easily into the batter, creating a smoother emulsion and more even bake.
- The Doneness Test: The toothpick test is your best friend, but interpret it correctly. You want a few moist crumbs clinging to it. If it comes out completely clean, the brownies are overbaked and will be drier.
- For Ultimate Fudginess: After cooling to room temperature, I often pop the whole pan, covered, into the refrigerator for an hour. The chill gives them an even denser, more decadent texture.
- Sifting is Non-Negotiable: Cocoa powder and almond flour are prone to clumping. Sifting ensures a homogeneous batter and prevents dry, chalky spots in your finished brownies.
Recipe Variations
- Nut-Free Version: Substitute the almond butter with sunflower seed butter and use oat flour instead of almond flour. Be aware that sunflower seed butter can sometimes cause baked goods to turn green (a harmless reaction with baking soda/powder), but it’s still perfectly safe and tasty.
- Double Chocolate: Add 1/4 cup of cocoa nibs along with the chocolate chips for an intense, crunchy chocolate experience with less sugar.
- Salted Caramel Swirl: Before baking, drizzle 1/4 cup of your favorite runny salted caramel sauce over the batter and use a knife to swirl it gently into the top layer.
- Espresso Infused: Add 1-2 teaspoons of instant espresso powder to the dry ingredients. This won’t make them taste like coffee, but will deepen and enhance the chocolate flavor remarkably.
- Peanut Butter Lover’s: Swap the almond butter for creamy peanut butter and use chopped peanut butter cups instead of dark chocolate chips.
- Add Some Texture: Fold in 1/3 cup of chopped walnuts or pecans with the chocolate chips for a delightful crunch.
- Mint Chocolate: Add 1/2 teaspoon of pure peppermint extract to the wet ingredients and use dark chocolate or mint chocolate chips.
What to Serve With This Recipe
These brownies are a fantastic standalone treat with a glass of cold milk or a cup of coffee. For a more elegant dessert, warm a brownie slightly and serve it à la mode with a scoop of high-quality vanilla bean ice cream or coconut whipped cream. They’re perfect for potlucks, bake sales, or as a lunchbox treat.
For a grown-up dinner party, pair them with a glass of port or a rich, cherry-forward red wine. They also make a wonderful component in a dessert board alongside fresh berries, cheese, and nuts.
Storage & Make-Ahead Instructions
- Storage: Store cooled brownies in an airtight container at room temperature for up to 2 days, or in the refrigerator for up to 5 days. The fridge will give them an even fudgier texture.
- Freezing: These brownies freeze beautifully. Wrap individual squares tightly in plastic wrap and place them in a freezer bag for up to 3 months. Thaw at room temperature or warm gently in the microwave.
- Make-Ahead: You can cook and mash the sweet potato up to 3 days in advance and store it covered in the refrigerator. The entire brownie slab can also be baked, cooled, and stored (unsliced) in the pan, covered tightly, for a day before serving.
- Reheating: For a fresh-from-the-oven experience, warm individual squares in the microwave for 10-15 seconds.
Nutritional Benefits
While these are indeed a dessert, they offer more nutritional value than your standard brownie. Sweet potatoes are an excellent source of beta-carotene (which converts to Vitamin A), fiber, and Vitamin C. Using almond butter and almond flour adds healthy fats, plant-based protein, and Vitamin E.
Cocoa powder is rich in flavonoids, antioxidants linked to heart health. By using natural sweeteners and whole-food ingredients, you’re enjoying a treat that satisfies your sweet tooth while providing substantive nutrients.
Frequently Asked Questions
Q: Can I use canned sweet potato puree?
A: I don’t recommend it. Canned puree often has added water and preservatives that can throw off the moisture balance and flavor of the recipe. Baking your own sweet potato is simple and yields a far superior result.
Q: My batter seems very thick. Is that normal?
A: Absolutely! This is a thick, fudgy batter, not a runny cake batter. It should be scoopable and hold its shape.
This density is what creates that rich, dense brownie texture.
Q: Can I make these vegan?
A: You can experiment, but eggs are key for structure here. A tested substitute is to use 2 “flax eggs” (2 tbsp ground flaxseed mixed with 5 tbsp water, left to gel for 5 minutes). The texture will be slightly more dense but still delicious.
Q: How do I know the sweet potato is cooked enough?
A: A knife should slide into the center with absolutely no resistance. For baking, this usually takes 45-60 minutes at 400°F for a medium potato.
Q: Why did my brownies sink in the middle?
A: This usually indicates underbaking or opening the oven door too early in the baking process. Ensure your baking powder is fresh and try not to open the oven for at least the first 25 minutes of baking.
Q: Can I use a different flour?
A: Almond flour works best for the intended texture. Oat flour is the next best substitute. I do not recommend coconut flour, as it absorbs too much moisture and would require a complete recipe overhaul.
Q: Are these brownies super sweet?
A: They are pleasantly sweet, but less cloyingly sweet than many store-bought or traditional brownies. The sweetness comes from the maple syrup and the natural sugars in the sweet potato, resulting in a more balanced, complex flavor.
Final Thoughts
After 15 years of developing recipes, I can confidently say these sweet potato brownies are a true winner. They prove that “healthy” and “indulgent” don’t have to be mutually exclusive. The fudgy texture, deep chocolate flavor, and simple ingredient list make this a recipe you’ll return to again and again.
It’s a joy to serve a dessert that everyone loves, knowing it’s made with wholesome ingredients. I encourage you to give them a try—bake them for your family, bring them to a gathering, or simply enjoy one as an afternoon pick-me-up. Don’t forget to come back and let me know how they turned out!
Share your photos and variations; I love seeing your kitchen creations. Happy baking
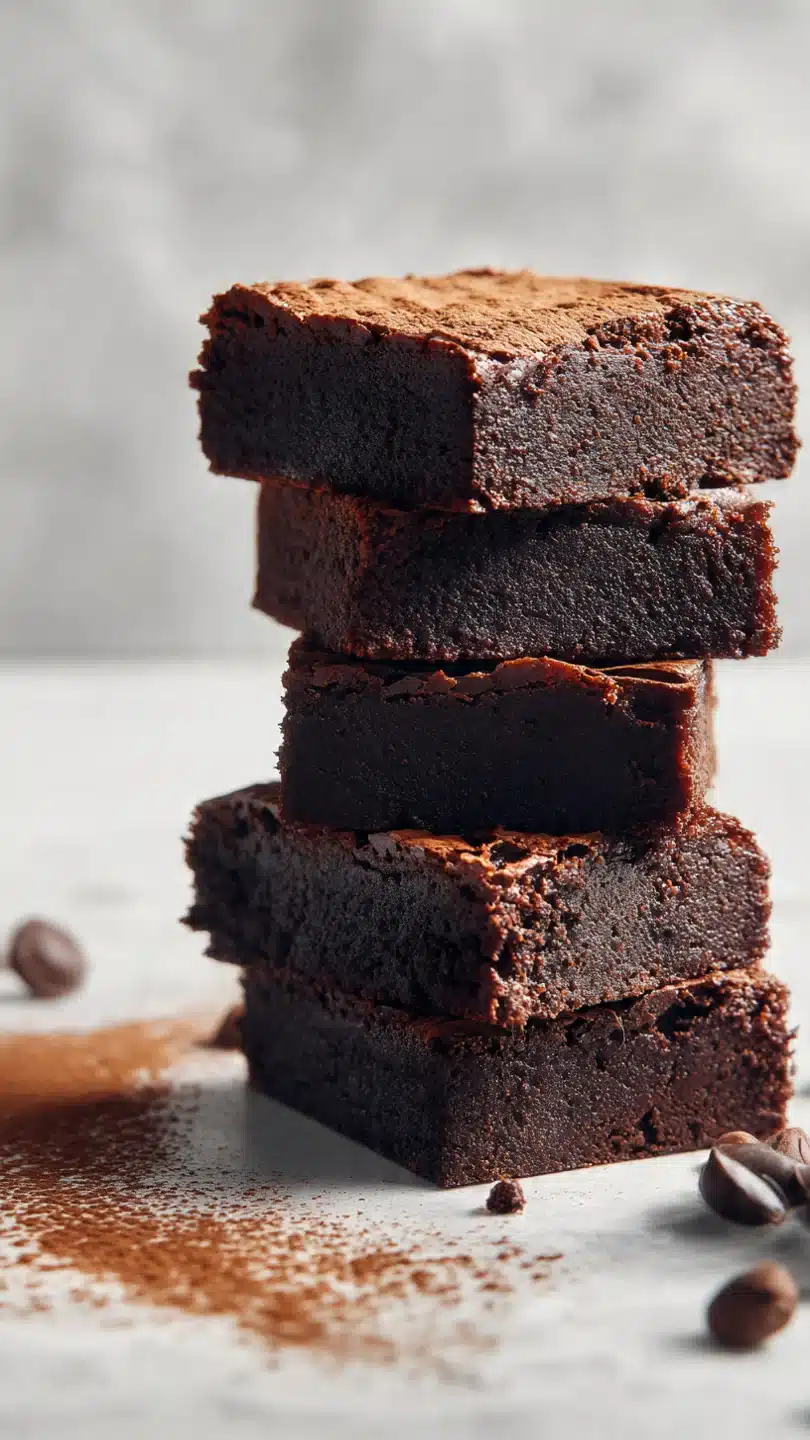
Fudgy Sweet Potato Brownies
Ingredients
Equipment
Method
- Preheat your oven to 350°F (175°C). Line an 8×8 inch baking pan with parchment paper, leaving an overhang on two sides for easy removal. In a large mixing bowl, combine the mashed sweet potato, almond butter, maple syrup, eggs, and vanilla extract. Use a whisk to mix until completely smooth and well-incorporated. This wet base is the secret to the fudgy texture, so take a minute to ensure no lumps remain.
- In a separate medium bowl, sift together the cocoa powder, almond flour, baking powder, and sea salt. Sifting is crucial here—it prevents clumps of cocoa powder and ensures a perfectly smooth batter. Trust me, this extra 60 seconds makes a noticeable difference in the final texture.
- Gradually add the dry ingredients to the wet ingredients, folding gently with a spatula until just combined. Be careful not to overmix. Once the batter is nearly uniform, fold in 1/4 cup of the chocolate chips. The batter will be thick and fudgy—this is exactly what you want.
- Pour the batter into your prepared pan, using the spatula to spread it into an even layer. Sprinkle the remaining 1/4 cup of chocolate chips evenly over the top. Bake for 30-35 minutes. You’ll know they’re done when the top looks set and a toothpick inserted into the center comes out with a few moist crumbs, not wet batter.
- This is the hardest part: let the brownies cool completely in the pan on a wire rack for at least 1 hour. They continue to set as they cool. Once cool, use the parchment paper overhang to lift the entire slab out. Slice into 12 squares with a sharp knife. For clean cuts, wipe the knife between slices. Step back and admire your creation—these are seriously fudgy!


