
Brownies for two
There’s something deeply satisfying about a warm, fudgy brownie fresh from the oven. But what about those nights when you’re cooking for one or two, and a full 9×13 pan feels like a commitment—or a temptation? That’s where this recipe comes in.
As a chef who has scaled down countless restaurant desserts, I can tell you that making a perfect small-batch brownie is a skill worth having. This recipe delivers everything you love about a classic brownie—the crackly top, the dense, moist crumb, the intense chocolate flavor—in a perfectly portioned size that’s ready in under 30 minutes. It’s the ideal solution for a spontaneous date night, a personal treat, or simply avoiding food waste.
This small-batch brownie recipe is designed for success, convenience, and pure indulgence.
- Perfectly Portioned: No more wrestling with leftover temptation or stale brownies. This recipe makes two generous, restaurant-style servings.
- One-Bowl Wonder: Minimal dishes are a beautiful thing. You’ll mix everything in a single bowl for effortless cleanup.
- Fudgy, Not Cakey: The secret is in the egg yolk and precise baking time, guaranteeing a rich, dense, and moist texture every time.
- Ready in Under 30 Minutes: From pantry to plate in less than half an hour, making it the ultimate quick-fix dessert.
- Pantry-Staple Ingredients: You likely have everything you need already. No special trips to the store required.
- Endlessly Customizable: This is a fantastic base recipe. I’ll show you how to easily add nuts, swirls, or different chocolates to make it your own.
Ingredients You’ll Need
- Let’s gather our ingredients. The magic of this recipe lies in the balance of simple pantry staples. Using quality cocoa powder is my number one tip for deep chocolate flavor without needing expensive bar chocolate.
- Unsalted butter: Melted and slightly cooled. This provides the rich base and fudgy texture.
- Granulated sugar: Not only for sweetness but, when whisked with the warm butter, it helps create that signature shiny, crackly top we all love.
- Egg yolk: Using just the yolk (save the white for an omelet!) adds incredible richness and moisture without the extra structure a whole egg provides, ensuring a dense, fudgy bite.
- Vanilla extract: Pure extract enhances the chocolate flavor. Believe me, it makes a difference.
- All-purpose flour: The structural backbone. Be sure to spoon it into your measuring cup and level it off for accuracy.
- Unsweetened cocoa powder: This is where the chocolate flavor shines. I prefer natural cocoa for a more intense, slightly fruity note, but Dutch-processed works too.
- Salt: A must to balance the sweetness and make the chocolate flavor pop.
- Semi-sweet chocolate chips: Folded into the batter and sprinkled on top, they create glorious pockets of melted chocolate.

Note: You’ll find the complete list of ingredients, along with their exact measurements, in the printable recipe card at the bottom of this post.
Kitchen Equipment Needed
You don’t need any specialty gear for this recipe. A simple small baking dish is key.
- Small Baking Dish: A 5×7-inch or 6-inch round dish is perfect. An oversized dish will result in thin, over-baked brownies.
- Mixing Bowl & Whisk: A medium bowl and a good whisk for combining the butter and sugar.
- Spatula: For folding in the dry ingredients and chocolate chips without overmixing.
- Measuring Tools: For accuracy, especially with small-batch baking where proportions are critical.
How to Make Brownies for Two Recipe
Step 1: Prep and Melt
Preheat your oven to 350°F (175°C). Grease your small baking dish well, or line it with a sling of parchment paper for foolproof removal. In a microwave-safe bowl, melt the butter in short bursts.
Tip from me: let it cool for about 2 minutes after melting. If it’s too hot, it will start to cook the egg yolk when you add it, which we want to avoid for a smooth batter.
Step 2: Create the Shiny Base
Add the granulated sugar to the warm, melted butter. Now, whisk—really whisk—for a full 60 seconds. Trust me, this isn’t busy work.
You’re dissolving the sugar into the butter, which creates an emulsion that gives the baked brownies that beautiful, thin, crackly crust on top. The mixture will become glossy and smooth.
Step 3: Enrich and Flavor
Next, whisk in the single egg yolk and the vanilla extract. You’ll see the mixture become slightly thicker and pale, which is exactly what you want. This step incorporates air and ensures the yolk is fully blended, contributing to that rich, fudgy texture we’re after.
The vanilla adds a warm, aromatic depth that complements the chocolate perfectly.
Step 4: Gently Combine Dry Ingredients
Sift the flour, cocoa powder, and salt directly into the bowl. Sifting prevents lumps of cocoa and aerates the flour for a more tender crumb. Now, put down the whisk and pick up a spatula.
Gently fold the dry ingredients into the wet until you no longer see any dry streaks. The goal is to mix just until combined; overmixing develops gluten and leads to tough brownies.
Step 5: Bake to Fudgy Perfection
Fold in the chocolate chips, then scrape the thick, luxurious batter into your prepared pan. Smooth the top and sprinkle with a few extra chips. Bake for 16-18 minutes.
This is the most critical step. Start checking at 16 minutes. The edges should look set, and a toothpick inserted into the center should come out with a few moist crumbs clinging to it.
If it comes out clean, they’re overbaked. Let them cool in the pan for at least 15 minutes—this allows them to set fully for a clean cut.
Small-batch baking requires a slightly different touch than full-pan recipes. Here’s my tested advice.
- Pan Size is Non-Negotiable: Using too large a pan will spread the batter thin, causing it to bake too quickly and dry out. Stick to the recommended 5×7-inch or 6-inch round size.
- The Toothpick Truth: For fudgy brownies, you want moist crumbs on the toothpick, not a clean pull. A clean toothpick means cakey, overdone brownies.
- Cool Before Cutting: I know it’s hard to wait, but letting the brownies cool for 15-20 minutes allows the structure to set. You’ll get a clean slice instead of a gooey mess.
- Quality Cocoa Matters: Since cocoa powder provides the primary chocolate flavor, using a good-quality brand like Ghirardelli, Valrhona, or Droste makes a noticeable difference in depth and richness.
- Room Temperature Yolk: A cold egg yolk can cause the warm butter to seize up slightly. Taking the egg out 30 minutes ahead makes for a smoother incorporation.
Recipe Variations
- This recipe is a wonderful canvas. Here are a few of my favorite tested twists.
- Salted Caramel Swirl: Before baking, drizzle 2 tablespoons of thick salted caramel sauce over the batter and use a knife to gently swirl it in.
- Nutty Delight: Fold in 3 tablespoons of chopped walnuts, pecans, or toasted hazelnuts along with the chocolate chips for added crunch and flavor.
- Espresso Boost: Add 1/2 teaspoon of instant espresso powder to the dry ingredients. It won’t make them taste like coffee, but it will amplify the chocolate flavor incredibly.
- Peanut Butter Pocket: Drop 4-5 small dollops of creamy peanut butter onto the batter after spreading it in the pan, then swirl gently with a knife.
- Mint Chocolate: Replace the vanilla extract with 1/4 teaspoon of pure peppermint extract and use mint chocolate chips.
- Gluten-Free Option: Substitute the all-purpose flour with an equal weight (30g) of a 1:1 gluten-free flour blend. The texture will be nearly identical.
- Blonde Brownies: Replace the cocoa powder with an additional 2 tablespoons of flour and use butterscotch chips instead of chocolate chips.
What to Serve With This Recipe
These brownies are a star on their own, but a few simple pairings can elevate them into a memorable dessert.
Serve them warm, straight from the pan, with a scoop of high-quality vanilla bean ice cream. The contrast of hot and cold is classic for a reason. For a decadent touch, a drizzle of homemade salted caramel or a simple raspberry coulis adds a lovely sweet-tart note.
If you’re serving them as part of a dessert board for two, pair them with fresh berries, a few pieces of dark chocolate, and a glass of tawny port or a rich stout beer. They’re perfect for a cozy night in, a romantic anniversary, or as a special treat after a weeknight dinner.
Storage & Make-Ahead Instructions
- Since this recipe is designed for immediate enjoyment, storage is straightforward.
- Room Temperature: Store any leftovers (unlikely, I know!) in an airtight container at room temperature for 1-2 days. They are best enjoyed within 24 hours.
- Freezing for Later: You can freeze the baked and cooled brownies. Wrap individual portions tightly in plastic wrap, then place in a freezer bag. They will keep for up to 2 months. Thaw at room temperature or warm gently in the microwave.
- Make-Ahead Batter: The batter can be mixed, poured into the prepared pan, covered, and refrigerated for up to 24 hours before baking. You may need to add 1-2 minutes to the baking time if baking straight from the fridge.
- Reheating: To recapture that fresh-from-the-oven magic, warm a brownie portion in the microwave for 10-15 seconds.
Frequently Asked Questions
Q: Can I use a whole egg instead of just the yolk?
A: I don’t recommend it. The white adds more protein, which creates additional structure, leading to a cakier, less fudgy brownie. The yolk alone provides the perfect fat and richness for our desired texture.
Q: What if I don’t have a 5×7-inch pan?
A: A 6-inch round cake pan is an excellent substitute. You can also use a standard loaf pan, but the brownies will be thinner and may bake a minute or two faster, so keep a close eye on them.
Q: My brownies didn’t get a shiny, crackly top. What happened?
A: The key is thoroughly whisking the sugar into the warm butter to create that emulsion. If the butter was too hot or too cold, or if you didn’t whisk long enough, the crust may not form as prominently. They’ll still taste delicious!
Q: Can I double this recipe?
A: Absolutely. Double all ingredients and bake in an 8×8-inch square pan. The baking time will increase to about 22-25 minutes.
Use the same toothpick test for doneness.
Q: Is Dutch-process or natural cocoa powder better?
A: Both work! Natural cocoa (like Hershey’s) is more acidic and provides a classic, tangy brownie flavor. Dutch-process cocoa (like Droste) is alkalized, resulting in a darker color and mellower, smoother chocolate taste.
Use what you have or prefer.
Q: How do I get a clean slice?
A: For picture-perfect squares, let the brownies cool completely, then chill them in the pan for 30 minutes. Use a sharp knife, run it under hot water, wipe it dry, and make your cut. Repeat for each slice.
Q: Can I make these dairy-free?
A: Yes. Use a plant-based butter stick (not spread) and ensure your chocolate chips are dairy-free. The results are very similar.
Final Thoughts
This small-batch brownie recipe is a testament to the idea that great desserts don’t require complicated processes or massive quantities. It’s a practical, chef-tested formula that delivers maximum satisfaction with minimal fuss. Whether you’re avoiding waste, catering to a small household, or just want a quick chocolate fix, these fudgy, rich brownies are the answer.
The one-bowl method means easy cleanup, and the short bake time means you’re never far from a warm, gooey treat.
I encourage you to try the base recipe first, then play with the variations to find your favorite. Baking is a personal joy, and this recipe is wonderfully adaptable. When you make them, I’d love to hear how it went!
Share your results or your own creative twists. Now, go preheat that oven—your perfect dessert for two is just moments away.
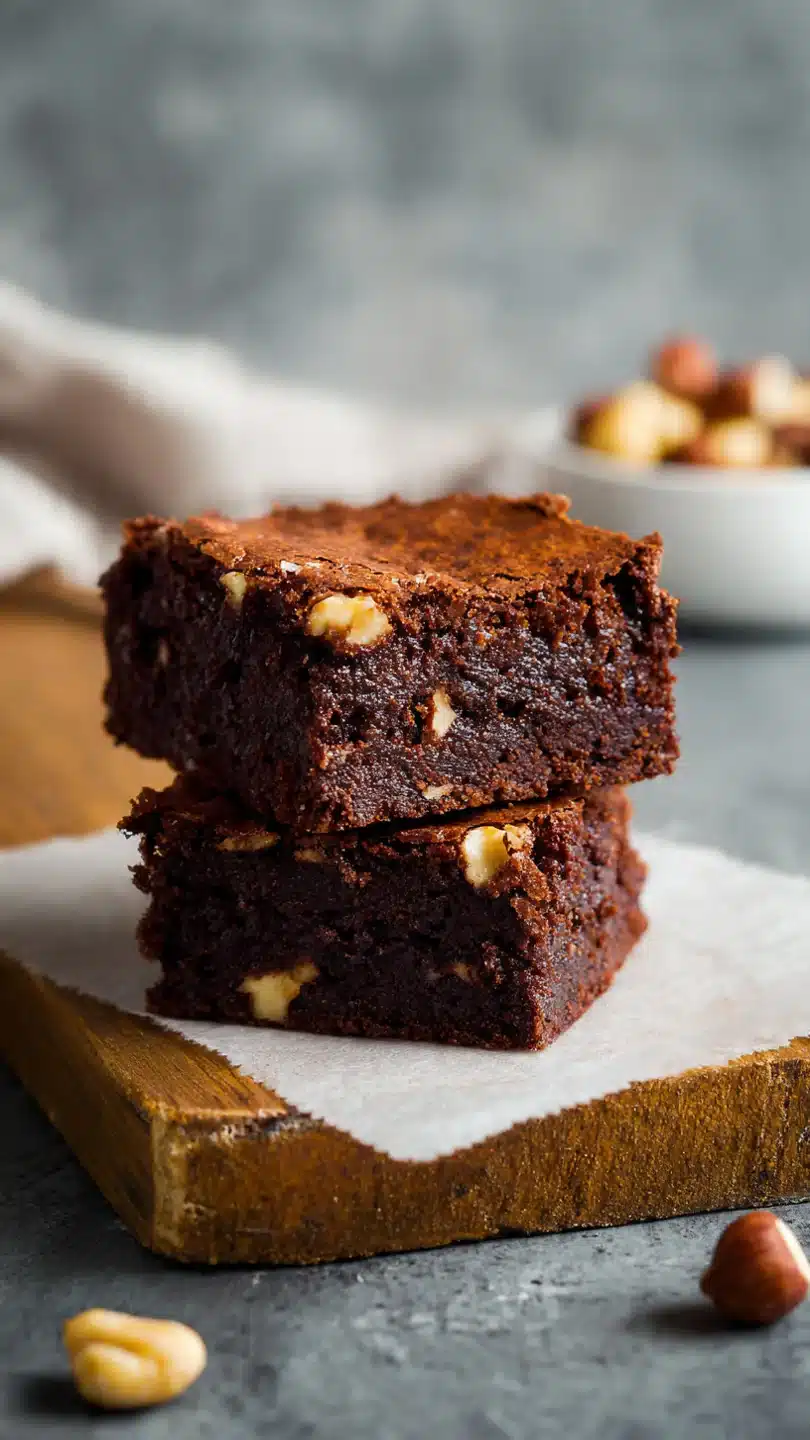
Small Batch Fudgy Brownies for Two
Ingredients
Equipment
Method
- Preheat your oven to 350°F (175°C). Grease a small 5×7-inch or 6-inch round baking dish, or line it with parchment paper for easy removal. In a medium microwave-safe bowl, melt the butter in 20-second bursts until just liquid. Let it cool for 2 minutes so it doesn’t cook the egg yolk.
- To the warm butter, add the granulated sugar. Whisk vigorously for a full minute until the mixture looks glossy and well combined. This step helps create that shiny, crackly top. Add the egg yolk and vanilla extract, and whisk again until smooth and slightly thickened, about 30 seconds.
- Sift the flour, cocoa powder, and salt directly into the wet ingredients. This prevents lumps and ensures even distribution. Use a spatula to fold the dry ingredients into the wet until just combined and no dry streaks remain. Be careful not to overmix.
- Fold in the 1/4 cup of chocolate chips. The batter will be thick and glossy. Transfer it to your prepared pan, spreading it evenly into the corners. Sprinkle a few extra chocolate chips on top for visual appeal and extra pockets of melted chocolate.
- Bake for 16-18 minutes. Start checking at 16 minutes—a toothpick inserted into the center should come out with a few moist crumbs attached, not completely clean. The edges will look set. Trust me, pulling them out a touch early is key for fudginess. Let cool in the pan for at least 15 minutes before slicing and serving warm.


