
Almond joy brownies
Imagine the perfect intersection of a rich, fudgy brownie and your favorite candy bar. That’s exactly what you get with these Almond Joy Brownies. As a professional recipe developer, I’ve tested countless brownie variations, but this one consistently earns rave reviews for its incredible texture and flavor harmony.
A dense chocolate base acts as the foundation for a sweet, chewy coconut layer, studded with crunchy toasted almonds and finished with a glossy chocolate drizzle. It’s a dessert that looks impressive but comes together with straightforward, pantry-friendly ingredients. Whether you’re catering to a chocolate craving or need a show-stopping treat for a potluck, this recipe delivers professional-level results right from your home kitchen.
This recipe is a guaranteed crowd-pleaser for several key reasons that combine ease with extraordinary results.
- Candy Bar Transformation: It perfectly captures the beloved flavors of an Almond Joy—chocolate, coconut, and almond—in a more substantial, shareable dessert form.
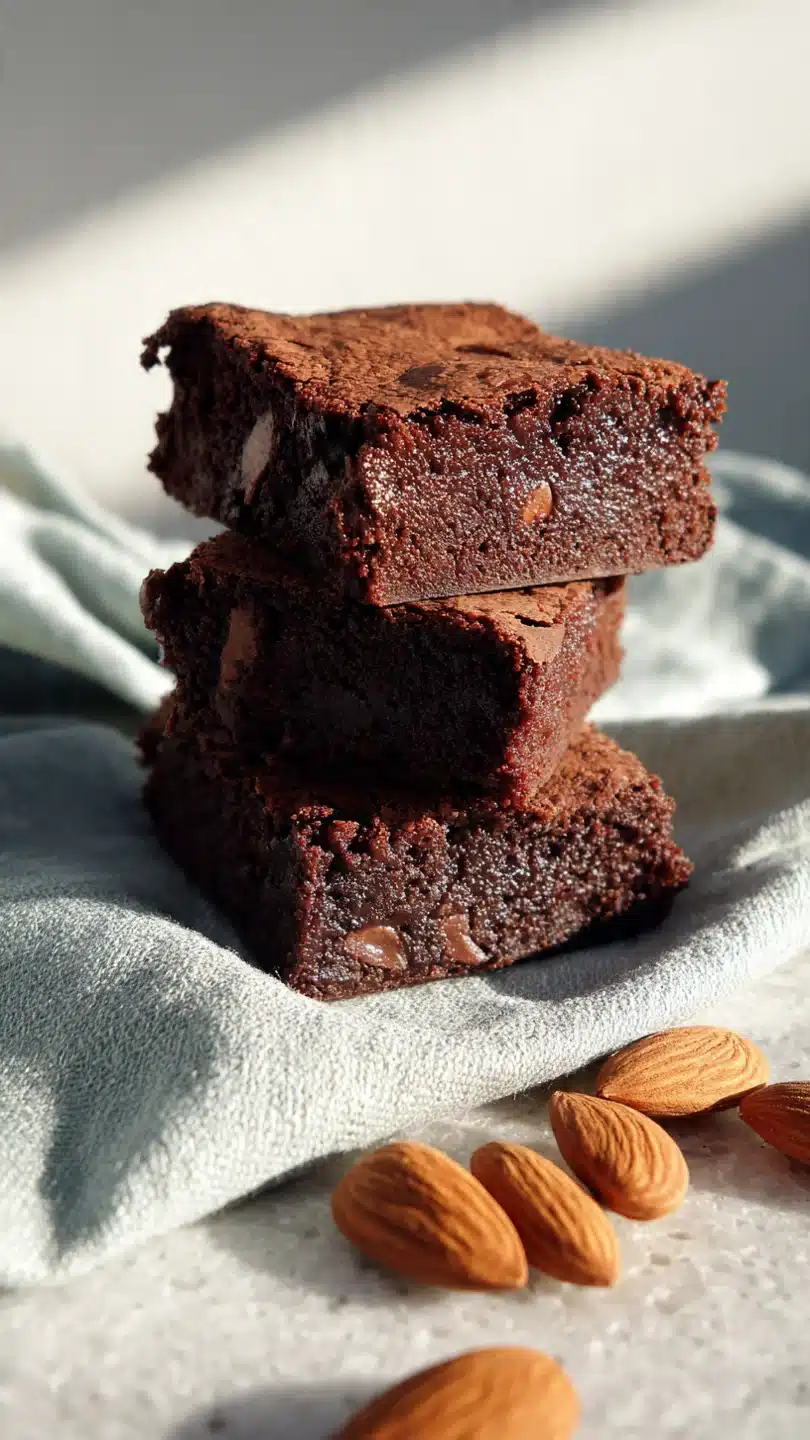
- Foolproof Fudgy Base: The brownie layer is engineered for a dense, moist crumb that can support the toppings without becoming cakey or dry.
- Minimal Special Equipment: You don’t need a stand mixer or any fancy tools. A couple of bowls, a whisk, and a baking pan are all it takes.
- Make-Ahead Friendly: These brownies taste even better the next day as the flavors meld, making them perfect for planning ahead for parties or gifts.
- Customizable: While delicious as written, the recipe is a fantastic canvas for your own twists, like using different nuts or adding a sprinkle of sea salt.
- Visual Wow Factor: The layered look with the chocolate drizzle makes these brownies look like they came from a professional bakery.
Ingredients You’ll Need
- Let’s gather our ingredients. This recipe works because each component plays a specific role. The brownie base provides deep chocolate flavor and structure, the coconut layer adds sweetness and chew, and the almonds offer a necessary textural contrast. Using quality staples here makes all the difference.
- Unsalted Butter: Melted butter creates a fudgy texture. I prefer unsalted to control the overall salt level.
- Granulated Sugar: Sweetens the brownies and contributes to that shiny, crackly top we all love.
- Large Eggs: Use room-temperature eggs for better emulsion with the butter and sugar, leading to a smoother batter.
- Pure Vanilla Extract: A splash enhances the chocolate flavor. Avoid imitation extract for the best taste.
- All-Purpose Flour: Spoon and level your flour to avoid a dry, cakey result. This provides the necessary structure.
- Unsweetened Cocoa Powder: This is your primary chocolate flavor. I tested with both natural and Dutch-processed; both work wonderfully.
- Salt: A must to balance the intense sweetness. It makes the chocolate taste more chocolatey.
- Sweetened Shredded Coconut: This is key for the authentic Almond Joy flavor. I don’t recommend unsweetened here, as the layer needs that sweetness.
- Sweetened Condensed Milk: The magic binder for the coconut layer. It creates a cohesive, chewy topping that bakes perfectly with the brownie.
- Whole Almonds: Toasting them beforehand is non-negotiable. It unlocks their nutty flavor and ensures they stay crunchy after baking.
- Semi-Sweet Chocolate Chips: For the final drizzle. You can use milk or dark chocolate based on your preference.

Note: You’ll find the complete list of ingredients, along with their exact measurements, in the printable recipe card at the bottom of this post.
Kitchen Equipment Needed
You likely have everything you need already. A 9×13 inch metal baking pan is ideal for even heating and the right brownie thickness. Parchment paper with overhangs is your best friend for clean, easy removal.
You’ll need a large mixing bowl for the brownie batter, a medium bowl for the coconut mixture, a whisk, and a rubber spatula. An offset spatula makes spreading the thick batter much easier, but a regular knife or spoon works too. Finally, a wire cooling rack is essential for allowing the brownies to cool properly and set up for slicing.
How to Make Almond Joy Brownies Recipe
Step 1: Build the Fudgy Brownie Base
Start by preheating your oven to 350°F (175°C) and lining your pan. In your large bowl, whisk the melted butter and granulated sugar together for a good minute. This isn’t just mixing; you’re helping dissolve the sugar into the butter, which contributes to that classic shiny crust.
Add your room-temperature eggs one at a time, whisking vigorously after each until the mixture is smooth, slightly pale, and thickened. This incorporation of air is important for texture. Stir in the vanilla.
Trust me, taking your time here builds the foundation for a superior brownie.
Step 2: Combine Dry and Wet Ingredients
In your separate bowl, sift together the flour, cocoa powder, and salt. Sifting the cocoa is crucial—it prevents lumps and ensures a perfectly smooth batter. Add the dry ingredients to the wet ingredients.
Now, switch to a rubber spatula and fold gently. You want to mix just until the last streaks of flour disappear. Overmixing develops gluten, leading to tough, cake-like brownies.
The batter will be very thick and glossy. Pour it into your prepared pan and spread it evenly into the corners. An offset spatula makes this simple.
Step 3: Create the Coconut-Almond Layer
This is where the magic happens. In your medium bowl, stir together the shredded coconut and the entire can of sweetened condensed milk. Mix until every strand of coconut is coated and the mixture is uniform.
Dollop this over the uncooked brownie batter. Here’s a pro tip: lightly wet your fingers or the back of a spoon. This prevents sticking and allows you to gently spread the coconut into a smooth, even layer without disturbing the brownie batter underneath.
Once spread, sprinkle the toasted, chopped almonds evenly over the top and press them down lightly so they anchor into the coconut.
Step 4: Bake to Perfection
Place the pan in the center of your preheated oven. Bake for 30-35 minutes. You’ll know they’re done when the edges look fully set and are pulling away from the sides of the pan, and the coconut topping is a light golden brown.
The most reliable test is the toothpick test: insert it into the center of the brownie portion (avoid hitting a big almond). It should come out with a few moist crumbs attached, not wet batter. Believe me, pulling them out at this point guarantees a fudgy center.
Step 5: Cool, Drizzle, and Serve
This is the hardest part—patience. Place the pan on a wire rack and let the brownies cool completely in the pan, about 2 hours. They need this time to set up for clean slicing.
Once cool, use the parchment paper “handles” to lift the entire slab out. For the drizzle, melt the chocolate chips in short bursts in the microwave, stirring until smooth. Drizzle artistically over the top with a fork.
Let the chocolate set for 10 minutes, then use a sharp knife to cut into squares. Step back and admire your beautiful, professional-looking creation.
A few insights from my years in the kitchen will help you nail this recipe every single time.
- Toast Your Nuts: Don’t skip toasting the almonds. Spread them on a baking sheet and toast at 350°F for 8-10 minutes until fragrant. This deepens their flavor and ensures they stay crunchy in the final bake.
- The Cooling Rule: I cannot stress this enough. You must let the brownies cool completely before slicing. If you cut them warm, the layers will smear and you’ll have a gooey mess. The wait is worth it for perfect squares.
- Pan Choice Matters: A light-colored metal pan is best. Dark pans or glass can cause the edges to overbake before the center is done. If you only have a dark pan, reduce the oven temperature by 25°F.
- Measuring Flour: The most common mistake is using too much flour. Always spoon the flour into your measuring cup and level it off with a knife. Don’t scoop directly from the bag.
- Test for Doneness: The toothpick test is your best friend. Look for moist crumbs, not a clean pick. A clean pick means you’ve overbaked toward cakey territory.
Recipe Variations
- This recipe is wonderfully adaptable. Here are some tested variations that work beautifully.
- Dark Chocolate Delight: Use dark chocolate cocoa powder in the brownie base and drizzle with melted dark chocolate for a more intense, less sweet experience.
- Nut-Free Version: Simply omit the almonds. The brownies will still be delicious with just the coconut and chocolate. You could add a handful of chocolate chips to the coconut layer for texture.
- Sea Salt Sensation: After drizzling the chocolate, sprinkle the tops with a tiny bit of flaky sea salt. The sweet-salty contrast is phenomenal.
- Mounds Bar Style: For a pure coconut-chocolate experience, leave out the almonds entirely. You’ll have a fantastic Mounds bar brownie.
- Gluten-Free Adaptation: Substitute the all-purpose flour with a 1:1 gluten-free baking blend. I’ve had great success with brands like Bob’s Red Mill.
- Extra Chewy Coconut: Use a 14-ounce bag of sweetened flaked coconut instead of shredded for a slightly different, chewier texture.
What to Serve With This Recipe
These brownies are decadent enough to stand alone, but they can be elevated for special occasions. For an unforgettable dessert, serve a square slightly warmed with a scoop of high-quality vanilla ice cream or a dollop of freshly whipped cream. The contrast of temperatures and textures is divine.
For a coffee break, pair them with a strong cup of espresso or a latte to cut through the sweetness. If you’re building a dessert platter, complement these rich brownies with something lighter and fruit-forward, like fresh berries or citrus segments. They’re perfect for potlucks, bake sales, holiday gatherings, or as a special homemade gift.
Storage & Make-Ahead Instructions
- Proper storage is key to maintaining texture and flavor.
- Room Temperature Storage: Once cooled and sliced, store brownies in an airtight container at room temperature for up to 4 days. Place parchment between layers if stacking.
- Refrigerator Storage: For longer storage, up to one week, keep them in the fridge in an airtight container. Let them come to room temperature for about 30 minutes before serving for the best texture.
- Freezer-Friendly: These brownies freeze exceptionally well. Wrap individual squares tightly in plastic wrap, then place in a freezer bag. They will keep for up to 3 months. Thaw overnight in the refrigerator or at room temperature.
- Make-Ahead Strategy: You can bake the brownies (without the final chocolate drizzle) up to two days in advance. Store the whole slab, tightly wrapped, at room temperature. Add the chocolate drizzle on the day you plan to serve them for the freshest look.
- Reheating Tip: To revive a brownie or serve it warm, microwave a single square for 10-15 seconds. This softens the layers and makes the chocolate drizzle gooey again.
Frequently Asked Questions
Q: Can I use a boxed brownie mix for the base?
A: You can in a pinch. Prepare the mix according to the “fudgy” style directions on the box for a 9×13 inch pan. Spread it in your pan, then proceed with adding the coconut and almond layers as directed in the recipe.
The bake time may need slight adjustment based on the mix’s instructions.
Q: My coconut layer is browning too fast. What should I do?
A: If the almonds and coconut are getting too dark before the brownie is done, loosely tent the pan with aluminum foil for the last 10-15 minutes of baking. This will shield the topping while allowing the center to cook through.
Q: Can I use almond extract?
A: Absolutely! For an even stronger almond flavor, replace 1/2 teaspoon of the vanilla extract with pure almond extract. A little goes a long way, so don’t overdo it.
Q: Why did my coconut layer sink into the brownie batter?
A: This happens if the brownie batter is too thin or if you overmix the batter, creating a less stable structure. Ensure your batter is thick and you’re spreading the coconut layer gently on top without pressing down.
Q: How do I get really clean cuts?
A: For picture-perfect squares, chill the completely cooled brownies (with drizzle) in the pan for 30 minutes. Use a sharp chef’s knife, wiping it clean with a hot, damp cloth between each cut.
Q: Can I double this recipe?
A: I don’t recommend simply doubling and baking in one giant pan, as it won’t bake evenly. Instead, make two separate batches and bake them in two 9×13 pans.
Q: Is sweetened condensed milk the same as evaporated milk?
A: No, they are not interchangeable. Sweetened condensed milk is thick and sugary, which is essential for binding the coconut. Evaporated milk is unsweetened and much thinner, and will not work in this recipe.
Final Thoughts
After 15 years of developing recipes, I can confidently say these Almond Joy Brownies hit that sweet spot between nostalgic comfort and sophisticated flavor. They’re the kind of treat that disappears quickly from a party platter and has everyone asking for the recipe. The process is straightforward, but the layered result feels special.
Remember, the secret is in the details: toasting the almonds, being patient while they cool, and that final chocolate drizzle that ties it all together. I hope this recipe becomes a new favorite in your baking repertoire. When you make them, I’d love to hear how they turned out!
Share your results online and tag me. Happy baking
Almond Joy Brownies
Ingredients
Equipment
Method
- Preheat your oven to 350°F (175°C). Line a 9×13 inch metal baking pan with parchment paper, leaving an overhang on two sides for easy removal. Lightly grease any exposed pan. In a large bowl, whisk together the melted butter and sugar until well combined. Add the eggs one at a time, whisking vigorously after each addition until the mixture is smooth and slightly thickened. Stir in the vanilla extract.
- In a separate medium bowl, sift together the flour, cocoa powder, and salt. Add these dry ingredients to the wet ingredients. Use a rubber spatula to fold gently until just combined and no dry streaks remain. Be careful not to overmix. The batter will be thick and glossy. Spread this brownie batter evenly into your prepared pan using an offset spatula.
- In a medium bowl, combine the shredded coconut and sweetened condensed milk. Mix until the coconut is fully coated and the mixture is cohesive. Dollop this coconut mixture over the brownie batter in the pan. Use clean, slightly wet fingers or a spatula to gently spread it into an even layer, covering the brownie base completely.
- Sprinkle the chopped toasted almonds evenly over the coconut layer, pressing them down gently so they adhere. Bake in the preheated oven for 30-35 minutes. The edges will be set and pulling away from the pan, and a toothpick inserted into the center of the brownie layer (not the coconut) should come out with a few moist crumbs, not wet batter.
- Place the pan on a wire rack to cool completely, about 2 hours. This is crucial for clean slicing. Once cool, use the parchment overhang to lift the entire slab of brownies out of the pan. For the drizzle, melt the chocolate chips in a microwave-safe bowl in 20-second bursts, stirring between each, until smooth. Drizzle over the cooled brownies using a fork or a small piping bag. Let the chocolate set for 10 minutes before slicing into squares with a sharp knife.


