
Ferrero Rocher brownies
Imagine the rich, fudgy depth of a perfect brownie meeting the iconic crunch and hazelnut-chocolate bliss of a Ferrero Rocher. That’s exactly what you get with this recipe. As a chef, I’m always looking for ways to elevate classic desserts, and folding these beloved candies into a brownie batter is a guaranteed crowd-pleaser.
The result is a treat with multiple textures in every bite: a dense, moist crumb, melty pockets of chocolate-hazelnut filling, and a crunchy top studded with nuts and whole candies. It’s the ultimate dessert for when you want to impress with minimal fuss. Let’s make some magic.
This recipe is a standout for several key reasons that combine professional technique with home-cook simplicity.
- Professional-Grade Fudginess: The specific ratio of butter, sugar, and eggs, combined with a careful mixing method, guarantees that dense, moist texture every time.
- Texture Symphony: You get three perfect textures—chewy brownie, creamy candy filling, and crunchy nut—all in one bite.
- Surprisingly Simple: Despite the gourmet result, this is a straightforward one-bowl recipe with no special equipment needed.
- Perfect for Gifting: These brownies look and taste incredibly special, making them ideal for holiday trays, bake sales, or hostess gifts.
- Make-Ahead Friendly: They taste even better the next day as the flavors meld, and they freeze beautifully.
- Customizable Base: Master this fudgy brownie formula, and you can swap in different mix-ins for endless variations.
Ingredients You’ll Need
- Let’s gather our ingredients. Using quality components here makes a noticeable difference, as there are few places for subpar chocolate to hide.
You’ll need two main groups: the brownie base and the signature mix-ins. For the brownie base, we use unsalted butter for control over saltiness, granulated sugar for structure and crust, eggs at room temperature to bind and create lift, and pure vanilla extract for depth. The dry ingredients are all-purpose flour (measured correctly by spooning and leveling), unsweetened cocoa powder (I prefer Dutch-process for its smoother flavor), and a bit of salt to balance the sweetness.
The stars of the show are the Ferrero Rocher chocolates. You’ll chop most to distribute throughout the batter, saving a few whole ones for the top. Finally, toasted hazelnuts amplify the nutty flavor from the candies and add wonderful crunch.
If you can find skinned, toasted hazelnuts, it saves a step. If not, toast raw hazelnuts in a 350°F oven for 8-10 minutes, then rub them in a kitchen towel to remove most of the skins.

Note: You’ll find the complete list of ingredients, along with their exact measurements, in the printable recipe card at the bottom of this post.
Kitchen Equipment Needed
You don’t need any fancy gadgets for this recipe. A 9×13 inch metal baking pan is essential—glass or ceramic pans bake differently and can lead to overdone edges. Parchment paper with an overhang is your best friend for flawless removal.
You’ll need a large mixing bowl, a whisk for the wet ingredients, a spatula for folding, a wire cooling rack, and a sharp chef’s knife for clean cuts. A sifter for the dry ingredients is helpful but not mandatory; just be sure to whisk them together thoroughly to break up cocoa lumps.
How to Make Ferrero Rocher Brownies Recipe
Step 1: Prep and Combine Wet Ingredients
Preheat your oven to 350°F (175°C) and line your pan with parchment paper. In your large bowl, whisk the slightly cooled melted butter and granulated sugar together for a good minute. This step isn’t just mixing; you’re beginning to dissolve the sugar into the butter, which helps create that shiny, crackly top.
Then, add your room-temperature eggs one at a time, whisking vigorously after each until the mixture is smooth, slightly pale, and thickened. This incorporation of air is crucial. Stir in the vanilla.
Believe me, taking your time here builds the foundation for a superior texture.
Step 2: Incorporate Dry Ingredients Gently
Now, sift your flour, cocoa powder, and salt directly into the wet ingredients. Sifting prevents lumps and ensures even distribution. Here’s the key tip from my kitchen: switch to a spatula and fold the dry ingredients in with gentle, deliberate strokes.
Mix only until the last streak of flour disappears. Overmixing develops gluten, leading to tough, cakey brownies, and we are firmly in the fudgy camp. The batter will be very thick and glorious.
Step 3: Fold in the Goodies and Pan
This is the fun part. Add your roughly chopped Ferrero Rocher and about half of your chopped toasted hazelnuts to the batter. Fold them in just until evenly distributed.
The chopping is important—it ensures every bite gets a piece of that magical filling and wafer. Pour this thick, chunky batter into your prepared pan and spread it patiently to the corners. Now, artfully press the reserved whole Ferrero Rocher and remaining hazelnuts into the surface.
They’ll sink in just a bit during baking.
Step 4: Bake to Fudgy Perfection
Place the pan in the center of your preheated oven. Bake for 30-35 minutes. Start checking at the 30-minute mark.
The true test is the toothpick: insert it into the center and it should come out with a few moist crumbs clinging to it. If it comes out clean, the brownies are overbaked. The top will be set and have a beautiful, matte finish with some cracks.
Trust me, pulling them out when they seem almost done is the secret to that dense, melt-in-your-mouth center.
Step 5: The Crucial Cool and Serve
This is the step that requires the most willpower. You must let the brownies cool completely in the pan on a wire rack. Cutting into warm brownies is a recipe for a gooey mess.
As they cool, they finish setting up. Once cool, use the parchment paper “handles” to lift the entire slab onto a cutting board. For pristine squares, use a long, sharp knife and wipe it clean with a damp cloth between each cut.
Step back and admire your work before serving.
A few chef-level insights will guarantee your brownies are perfect every single time.
- Ingredient Temperature is Key: Using room-temperature eggs allows them to emulsify more easily with the butter and sugar, creating a stable batter that bakes evenly. Cold eggs can cause the melted butter to seize slightly.
- The Pan Matters: Always use a light-colored metal pan. Dark pans or glass absorb and radiate heat differently, often causing the edges to become hard and overbaked before the center is set.
- The Toothpick Truth: For fudgy brownies, you want moist crumbs, not a clean pick. A clean pick means the batter has fully set, which for brownies means they’ve crossed into cakey or dry territory.
- Cutting Cleanly: For absolutely flawless, crumb-free edges, chill the entire pan of cooled brownies in the refrigerator for 30 minutes before lifting and slicing. The fat in the brownies firms up, allowing the knife to glide through.
Recipe Variations
- This fantastic fudgy base is a canvas for endless creativity. Here are some tested variations that work beautifully.
- Double Nut Delight: Replace half the hazelnuts with chopped pecans or walnuts for a more complex nutty flavor profile.
- Salted Caramel Swirl: Before baking, drizzle 1/2 cup of thick salted caramel sauce over the batter and use a knife to swirl it gently for a marbled effect.
- Orange Zest Infusion: Add the finely grated zest of one large orange to the wet ingredients for a bright, sophisticated twist that complements the chocolate and hazelnut.
- Mint Chocolate Version: Substitute the vanilla extract with 1/2 teaspoon of pure peppermint extract and fold in 1/2 cup of chopped Andes mints along with the Ferrero Rocher.
- Gluten-Free Adaptation: Use a 1:1 gluten-free all-purpose flour blend. The result will be slightly more tender but still deliciously fudgy.
- Extra Chocolate Chunk: Add 3/4 cup of high-quality dark chocolate chunks or chips to the batter for even more intense chocolate pockets.
What to Serve With This Recipe
These brownies are a star dessert on their own, but a few pairings can turn them into a show-stopping finale. For a classic diner-style treat, serve a warm square topped with a scoop of high-quality vanilla bean ice cream. The hot-and-cold contrast is divine.
For a dinner party, plate a smaller square with a drizzle of raspberry coulis and a few fresh berries; the tart fruit cuts through the richness beautifully. Beverage-wise, they pair wonderfully with a glass of cold milk, a rich espresso, or even a glass of tawny port or Cabernet Sauvignon for the adults. They’re perfect for potlucks, birthday parties, or as the grand finale to a cozy family meal.
Storage & Make-Ahead Instructions
- Proper storage ensures your brownies stay delicious for days.
- Room Temperature Storage: Once completely cool, store brownies in an airtight container at room temperature for up to 4 days. Place a sheet of parchment between layers if stacking.
- Refrigerator Method: For longer storage (up to a week), refrigerate in an airtight container. Let them come to room temperature for about 30 minutes before serving for the best texture and flavor.
- Freezing for Later: These brownies freeze exceptionally well. Wrap individual squares or the whole slab tightly in plastic wrap, then in foil or a freezer bag. Freeze for up to 3 months. Thaw overnight in the refrigerator or at room temperature for a few hours.
- Make-Ahead Strategy: You can bake the brownies 1-2 days in advance. In fact, the flavor improves as it sits. Store the uncut slab tightly wrapped at room temperature and slice just before serving.
Frequently Asked Questions
Q: Can I use a different size pan?
A: I strongly recommend the 9×13 inch pan for the proper thickness and baking time. Using an 8×8 or 9×9 pan will result in much thicker brownies that will need a longer bake time and may not cook evenly in the center.
Q: My Ferrero Rocher sank to the bottom. What happened?
A: This usually occurs if the batter is too thin or the candies are too large/heavy. Ensure your batter is thick (as the recipe directs) and that you are chopping the candies into smaller, raisin-sized pieces. Pressing mix-ins into the top of the batter also helps.
Q: Can I make these without nuts due to an allergy?
A: Absolutely. Simply omit the toasted hazelnuts. The brownies will still be delicious with just the Ferrero Rocher.
You could also substitute with pretzel pieces for a salty crunch.
Q: How do I know if my cocoa powder is Dutch-process?
A: Check the label. It will typically say “Dutch-processed” or “alkalized.” Natural cocoa powder will work in a pinch, but Dutch-process has a milder, less acidic flavor that blends seamlessly here.
Q: Can I double this recipe?
A: For a double batch, I recommend making two separate batches in two pans for consistent results. Doubling and baking in one very large pan risks uneven baking.
Q: Why did my brownies turn out cakey?
A: The most common causes are overmixing the batter after adding the flour (which develops gluten) or overbaking. Remember to fold gently and check for moist crumbs on the toothpick.
Q: Can I use a boxed brownie mix as a base?
A: You can for a shortcut, but the texture and depth of flavor won’t be the same as this from-scratch version. If you do, choose a fudgy-style mix and fold in the chopped candies and nuts as directed.
Final Thoughts
These Ferrero Rocher Brownies are a perfect example of how a few quality ingredients and solid technique can create a dessert that feels truly special. They deliver that professional bakery-style decadence with the comfort of home baking. The contrast of the fudgy base, creamy candy centers, and crunchy nuts is an experience every chocolate lover deserves.
I’ve tested this recipe multiple times to ensure it’s foolproof, so you can bake with confidence. I hope this recipe becomes a new favorite in your repertoire. When you make them, I’d love to hear how they turned out!
Share your results and any creative variations you try. Happy baking
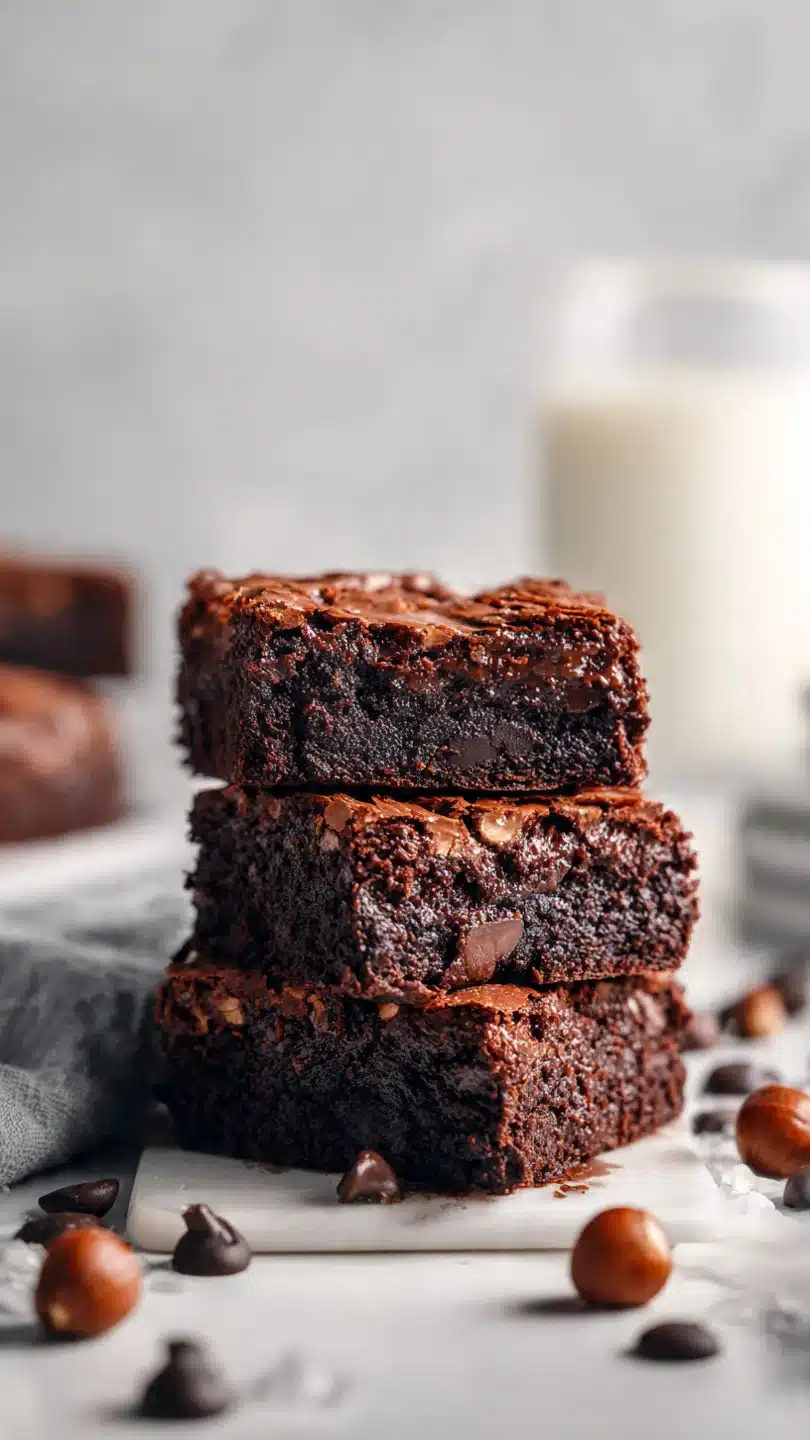
Ferrero Rocher Brownies
Ingredients
Equipment
Method
- Preheat your oven to 350°F (175°C). Line a 9×13 inch metal baking pan with parchment paper, leaving an overhang on two sides for easy removal. This is non-negotiable for clean cuts.
- In a large bowl, whisk together the melted butter and sugar for about a minute until well combined. Add the eggs one at a time, whisking vigorously after each addition until the mixture is smooth and slightly thickened. Stir in the vanilla extract.
- Sift the flour, cocoa powder, and salt directly into the wet ingredients. Use a spatula to fold gently until just combined and no dry streaks remain. Overmixing leads to cakey brownies, and we want fudgy. Fold in the chopped Ferrero Rocher and half of the chopped hazelnuts.
- Pour the thick batter into your prepared pan, spreading it evenly to the corners. Arrange the whole Ferrero Rocher chocolates and remaining hazelnuts on top, pressing them in slightly. This creates those gorgeous, crunchy pockets.
- Bake for 30-35 minutes. Start checking at 30 minutes—a toothpick inserted into the center should come out with a few moist crumbs, not wet batter. The top will be set and slightly cracked. Trust me, it’s better to slightly underbake than overbake for maximum fudginess.
- Let the brownies cool completely in the pan on a wire rack. This is the hardest part, but crucial for setting. Use the parchment overhang to lift the entire slab onto a cutting board. Use a sharp chef’s knife, wiped clean between cuts, to slice into squares.


