
Large batch brownies
There’s something magical about a pan of brownies that promises to feed a crowd. Whether you’re prepping for a school bake sale, a potluck, or just want a stash in the freezer for emergencies, a reliable large-batch recipe is a kitchen essential. But scaling up a standard recipe isn’t just about doubling ingredients; it’s a science of ratios, pan size, and baking time to preserve that perfect fudgy, chewy texture.
After years in professional kitchens and countless test batches, I’ve perfected this formula for a full sheet pan of brownies that deliver a deep chocolate flavor, a shiny, crackled top, and those coveted chewy edges every single time. Let’s bake a batch that will make you the hero of any gathering.
- Feeds a Crowd Effortlessly: One batch yields 24 substantial squares, eliminating the need to make multiple pans for parties, team events, or bake sales.
- Professional-Grade Texture: The precise balance of butter, chocolate, and eggs creates the ideal fudgy interior with a slightly chewy crust and that iconic shiny top.
- Make-Ahead & Freezer Friendly: These brownies hold their texture beautifully for days and freeze exceptionally well, making advanced preparation a breeze.
- Customizable Base: The rich chocolate foundation is perfect for adding your favorite mix-ins like nuts, swirls of peanut butter, or pockets of caramel.
- Simple Technique: No fancy equipment or complicated steps are required—just careful melting, vigorous whisking, and patient baking.
- Consistently Reliable: This recipe has been tested rigorously to account for the thermal dynamics of a large sheet pan, ensuring even baking from edge to center.
Ingredients You’ll Need
Let’s gather our ingredients—this is where quality truly shines in a simple recipe. Using good chocolate and real butter makes a noticeable difference in flavor and texture. You’ll notice we use a combination of granulated and brown sugar; the molasses in the brown sugar enhances moisture and chewiness, while the granulated sugar helps create that desirable crackly top.
Room-temperature eggs are non-negotiable here; they incorporate more easily into the warm chocolate mixture, leading to a smoother, more emulsified batter which is the secret to that glossy finish.
- Unsalted butter: Provides rich flavor and the fat necessary for a tender crumb. Using unsalted allows you to control the salt level precisely.
- Bittersweet chocolate (60-70%): The star of the show. A higher cocoa percentage gives a deep, sophisticated chocolate flavor without being overly sweet.
- Granulated sugar: Sweetens and, when whisked with the eggs, helps create the shiny, meringue-like top layer.
- Light brown sugar: Adds moisture, a hint of caramel flavor, and contributes to the chewy texture.
- Eggs (room temperature): Act as the primary binder and leavener. The vigorous whisking incorporates air, setting the structure.
- Pure vanilla extract: Enhances the depth of the chocolate flavor. Don’t skip it.
- All-purpose flour: Provides the necessary structure. Be sure to measure by spooning into the cup and leveling off for accuracy.
- Dutch-process cocoa powder: This alkalized cocoa has a darker color and smoother, less acidic flavor that blends seamlessly into the batter.
- Kosher salt: Balances the sweetness and intensifies the chocolate flavor. It’s a critical ingredient.
- Walnuts or pecans (optional): For added texture and a nutty contrast. Toast them lightly for maximum flavor.

Note: You’ll find the complete list of ingredients, along with their exact measurements, in the printable recipe card at the bottom of this post.
Kitchen Equipment Needed
You don’t need specialized gear, but a few key items will make the process smoother. The most important piece is a standard 18×13-inch half-sheet pan (rimmed baking sheet). This is the commercial-sized pan that fits in most home ovens and gives you the true large batch yield.
A large heatproof bowl that fits snugly over a saucepan creates an effective double boiler for gently melting the chocolate and butter without risk of burning. A large whisk is essential for properly emulsifying the eggs and sugar, and a sturdy spatula helps fold in the dry ingredients without overworking the batter. Finally, parchment paper with overhanging edges is your best friend for clean, easy removal of the entire brownie slab.
How to Make Large Batch Brownies Recipe
Step 1: Prep the Pan and Melt Chocolate
Start by preheating your oven to 350°F (175°C) to ensure it’s perfectly heated for even baking. Take your half-sheet pan and butter it generously—don’t be shy. Then, line it with a sheet of parchment paper that overhangs the two long sides, and butter the parchment as well.
This double layer of fat is my professional insurance policy against sticking. While the oven heats, place your chopped butter and chocolate in a large heatproof bowl over a saucepan with an inch of simmering water. Stir gently until the mixture is completely smooth and glossy.
Tip from me: Let this cool for about 5 minutes before adding the eggs; too-hot chocolate will cook them.
Step 2: Build the Shiny Batter Base
Now for the transformative step. Whisk both sugars into the warm chocolate mixture until they dissolve. Then, add your room-temperature eggs one at a time, whisking vigorously for a good 30 seconds after each addition.
Trust me, this effort is what creates that beautiful, shiny, paper-like top on the baked brownies. You’ll see the mixture thicken, become paler, and look almost like a thin chocolate pudding. This is the emulsion you want.
Whisk in the vanilla extract to round out the flavors.
Step 3: Gently Incorporate Dry Ingredients
In a separate large bowl, sift together the flour, Dutch-process cocoa powder, and salt. Sifting prevents lumps and ensures even distribution. Add these dry ingredients to your glossy wet batter in three additions.
Use a flexible spatula to fold gently, just until the last streaks of flour disappear. Overmixing at this stage develops gluten in the flour, which can make your brownies cakey or tough instead of fudgy. If you’re using nuts, fold them in with the last addition of flour.
Step 4: Bake to Fudgy Perfection
Pour the incredibly thick and luxurious batter into your prepared pan. Use the spatula to spread it evenly into all the corners. Place the pan in the center of your preheated oven.
Bake for 40-45 minutes. The true test is the toothpick: insert it into the center and pull it out. You want to see a few moist, fudgy crumbs clinging to it, not wet batter.
The top will be uniformly crackled. Believe me, pulling them out at this precise moment is the difference between fudgy and dry.
Step 5: Cool, Cut, and Serve
This is the hardest part—patience. Place the entire pan on a wire rack and let the brownies cool completely, which will take about 2 hours. They continue to set as they cool.
Once cool, use the parchment paper “handles” to lift the entire slab onto a cutting board. For picture-perfect, clean squares, use a large, sharp chef’s knife. Wipe the blade clean with a damp cloth between each cut.
Now, step back and admire your work before serving a square (or two) with a cold glass of milk.
- Temperature is Key: Using room-temperature eggs is non-negotiable. Cold eggs can cause the warm chocolate mixture to seize or result in a poor emulsion, leading to a greasy, separated batter.
- Don’t Skip the Sifting: Cocoa powder is notoriously clumpy. Sifting it with the flour ensures a perfectly smooth batter without any bitter pockets of dry cocoa.
- The Toothpick Truth Test: For fudgy brownies, you must pull them from the oven before the toothpick comes out clean. A few sticky crumbs are your sign of success. A clean toothpick means overbaked.
- Cool Completely for Clean Cuts: Cutting into warm brownies is tempting but results in a messy, crumbly slice. For sharp edges, let them cool fully. For the absolute cleanest cuts, chill the cooled slab for 20 minutes in the refrigerator first.
- High-Altitude Adjustment: If baking above 3,000 feet, reduce the sugar by 2 tablespoons and add an extra 2 tablespoons of flour to help stabilize the structure.
Recipe Variations & Customizations
- Salted Caramel Swirl: After spreading the batter, dollop 1 cup of thick salted caramel sauce over the top and use a knife to swirl it gently into the batter before baking.
- Espresso Infused: Dissolve 2 tablespoons of instant espresso powder into the warm melted chocolate and butter mixture. This deepens the chocolate flavor without making it taste like coffee.
- Mint Chocolate Chip: Add 1 teaspoon of peppermint extract with the vanilla and fold in 1 1/2 cups of dark chocolate chips or chunks.
- Gluten-Free Adaptation: Substitute the all-purpose flour with an equal weight (about 270g) of a high-quality 1:1 gluten-free flour blend. The texture will be slightly more tender but still delicious.
- Rocky Road: Fold in 1 cup of mini marshmallows and 1 cup of chopped walnuts or almonds along with the optional nuts. In the last 5 minutes of baking, scatter another cup of marshmallows on top.
- Blondie Version: Omit the cocoa powder. Replace the bittersweet chocolate with 1 1/2 pounds of white chocolate, melted with the butter. Increase the flour to 3 cups and fold in 2 cups of butterscotch chips.
What to Serve With This Recipe
These brownies are a complete dessert on their own, but they can easily be dressed up. For a classic diner-style treat, serve a square slightly warmed with a scoop of high-quality vanilla ice cream and a drizzle of hot fudge sauce. For a festive platter, arrange an assortment of brownie squares with other bar cookies like lemon bars and shortbread.
They pair wonderfully with fresh berries like raspberries or strawberries, which cut through the richness. Beverage-wise, you can’t go wrong with a cold glass of milk, a hot coffee, or even a glass of port or a rich stout beer for the adults. These are perfect for potlucks, birthday parties, holiday cookie trays, or as a comforting weekend baking project.
Storage & Make-Ahead Instructions
- Room Temperature Storage: Once completely cooled, store brownies in an airtight container at room temperature for up to 4 days. Place a sheet of parchment between layers if stacking.
- Freezer-Friendly: These brownies freeze exceptionally well. Wrap individual squares or the entire slab (once cooled) tightly in plastic wrap, then in foil or a freezer bag. Freeze for up to 3 months. Thaw overnight in the refrigerator or at room temperature for a few hours.
- Make-Ahead Strategy: The batter can be made, poured into the prepared pan, covered tightly, and refrigerated for up to 24 hours before baking. Let it sit at room temperature for 30 minutes while the oven preheats. You may need to add 2-3 minutes to the bake time.
- Reheating Tip: To revive the just-baked texture, warm individual squares in a 300°F (150°C) oven for 5-8 minutes or in the microwave for 10-15 seconds.
Frequently Asked Questions
Q: Can I use a 9×13-inch pan instead?
A: No, this recipe is specifically designed for the volume and surface area of an 18×13-inch half-sheet pan. Using a smaller pan will result in an extremely thick, undercooked center and burnt edges. For a 9×13 pan, you should halve the recipe.
Q: My brownies didn’t get a shiny top. What went wrong?
A: The shiny top comes from properly dissolving the sugar into the warm chocolate and then vigorously whisking in the eggs to create an emulsion. Ensure your eggs are room temperature and whisk energetically for the full 30 seconds after each addition.
Q: Can I use milk chocolate or semi-sweet chips?
A: You can, but the brownies will be much sweeter and the texture may be slightly different. I highly recommend bittersweet chocolate for a balanced, adult-friendly flavor.
Q: How do I know exactly when they are done?
A: Start checking at 40 minutes. Look for the edges to be set and pulling slightly away from the pan. The center should still have a slight wobble, and a toothpick should have a few moist crumbs.
It should not be wet with batter.
Q: Can I make these without a stand mixer?
A: Absolutely! This recipe is easily made by hand. A large whisk and a strong arm for the egg-whisking step are all you need.
Q: Are these brownies cakey or fudgy?
A: This recipe is firmly in the fudgy camp, with a dense, moist interior and chewy edges. The high fat-to-flour ratio and minimal whisking after adding flour ensure a rich, non-cakey texture.
Q: Can I double this recipe?
A: This recipe is already a large batch designed for a standard home oven’s capacity. Doubling it is not practical or recommended, as it would require baking in multiple pans and adjusting timing significantly.
Q: Why Dutch-process cocoa?
A: Dutch-process cocoa is treated with an alkali, neutralizing its acidity. It has a richer, smoother chocolate flavor that blends seamlessly with the melted chocolate, unlike natural cocoa which can sometimes taste sharp or bitter in such a large quantity.
Final Thoughts
Mastering a large-batch brownie recipe is a game-changer for anyone who loves to bake for others. This formula represents years of professional testing to solve the common pitfalls of scaling up: uneven baking, dry edges, and a lackluster top. By following the simple but specific techniques—the double-buttered pan, the vigorous egg whisking, and the courage to pull them out while still slightly underdone—you’re guaranteed a pan of spectacular, crowd-pleasing brownies every time.
They are the ultimate shareable dessert, embodying comfort and celebration in every fudgy bite. I hope this recipe becomes your new go-to for every party, potluck, and pantry stock-up. Give it a try, and please share your results and any creative variations you invent.
Happy baking
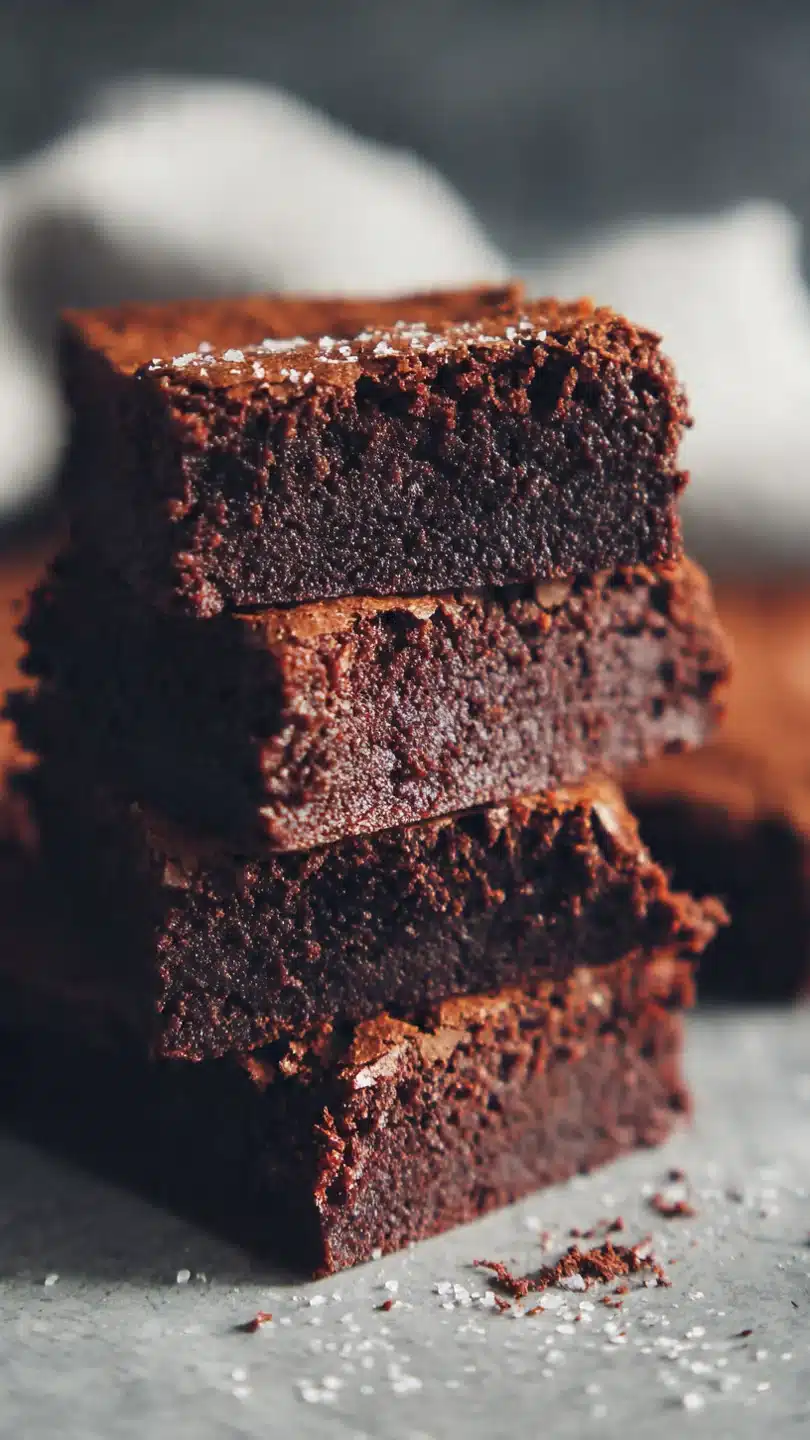
Ultimate Fudgy Large Batch Brownies
Ingredients
Equipment
Method
- Preheat oven to 350°F (175°C). Generously butter a standard 18×13-inch half-sheet pan (rimmed baking sheet). Line the bottom with parchment paper, leaving an overhang on the two long sides for easy removal. Butter the parchment as well. This double-buttering prevents any sticking—trust me, it’s worth the extra minute.
- Melt the butter and chocolate. In a large, heatproof bowl set over a saucepan of barely simmering water (double boiler), combine the chopped butter and chocolate. Stir gently and frequently until completely smooth and melted. Remove from heat and let cool for 5 minutes. This gentle melting prevents the chocolate from seizing and ensures a glossy batter.
- Combine wet ingredients. Whisk both sugars into the warm chocolate mixture until fully incorporated. Add the room-temperature eggs one at a time, whisking vigorously after each addition until the mixture is thick, glossy, and slightly paler in color. This step is crucial for creating that signature shiny, crackly top. Whisk in the vanilla extract.
- Incorporate dry ingredients. In a separate large bowl, sift together the flour, cocoa powder, and salt. Add these dry ingredients to the wet mixture in three additions, folding gently with a spatula until just combined and no dry streaks remain. Overmixing leads to tough brownies. If using nuts, fold them in now.
- Bake to perfection. Pour the thick batter into your prepared pan, spreading it evenly into the corners. Bake for 40-45 minutes. The brownies are done when a toothpick inserted into the center comes out with a few moist crumbs attached, not wet batter. The top will be shiny and crackled. Believe me, pulling them out at this stage is key for fudginess.
- Cool completely. Place the pan on a wire rack and let the brownies cool completely in the pan—this takes about 2 hours. Use the parchment overhang to lift the entire slab onto a cutting board. For clean cuts, use a large, sharp knife wiped clean between each slice. Now, step back and admire your masterpiece before serving.


