
Mini strawberry shortcake
There’s something undeniably charming about a dessert served in its own perfect, individual portion. A mini strawberry shortcake isn’t just a scaled-down version of the classic; it’s a promise of a personal treat, with the ideal ratio of tender biscuit, juicy berry, and cloud-like cream in every bite. It evokes memories of summer picnics and simple pleasures, yet when made from scratch, it feels like a special occasion.
As a chef who has plated thousands of desserts, I can tell you that mastering this trifecta of textures—flaky, juicy, and creamy—is a foundational skill that yields incredible rewards. This recipe breaks down each component with the precision I learned in professional kitchens, ensuring your shortcakes are not just good, but exceptional. Let’s create some edible sunshine.
This recipe is designed for success, whether you’re a baking novice or a seasoned cook looking to perfect a classic.
- Perfect Portion Control: Individual servings mean no messy slicing and everyone gets their own beautiful dessert, making it ideal for dinner parties or family gatherings.
- Textural Harmony: We focus on creating a biscuit that’s sturdy enough to hold the juicy berries but tender and flaky to eat, achieving the perfect balance that defines a great shortcake.
- Make-Ahead Friendly: Every component can be prepared in advance. Bake the biscuits, macerate the berries, and whip the cream separately, then assemble just before serving for stress-free entertaining.
- Seasonally Adaptable: While strawberries are the star, the method works beautifully with any macerated fruit, from peaches in late summer to mixed berries, allowing you to enjoy this dessert year-round.
- Simple, Quality Ingredients: This recipe relies on pantry staples and fresh produce. There are no artificial flavors or complicated steps—just great technique amplifying great ingredients.
- Endlessly Customizable: The basic formula is a canvas for your creativity. Add a hint of citrus zest to the biscuit, a splash of liqueur to the berries, or flavor the whipped cream with herbs.
Ingredients You’ll Need
- Let’s gather our ingredients. This shortcake succeeds on the quality and treatment of its few components. For the biscuits, we’re using the classic “biscuit method” where cold fat is cut into flour, creating those desirable flaky layers. The magic here is in the temperature and handling.
- All-Purpose Flour: This provides the right structure. I don’t recommend cake flour here, as we need the gluten strength to support the juicy toppings.
- Granulated Sugar: We use it three ways: a little in the biscuit dough for tenderness and flavor, mixed with the strawberries to draw out their juices, and a touch to sweeten the whipped cream.
- Baking Powder: This is our leavening agent, responsible for the biscuit’s rise and light texture. Make sure yours is fresh for the best lift.
- Fine Sea Salt: Balances the sweetness and enhances all the other flavors. I prefer fine sea salt for its even distribution.
- Unsalted Butter: Must be very cold. The cold butter steams in the oven, creating air pockets that result in a flaky, tender crumb. I often cube mine and freeze it for 15 minutes before starting.
- Heavy Cream: Used in the biscuit dough for richness and to bind it. The high fat content contributes to a tender texture. You’ll also need more for the whipped cream topping.
- Fresh Strawberries: Look for berries that are fragrant and bright red. We’ll hull and slice them, then macerate them with sugar to create a delicious natural syrup.
- Pure Vanilla Extract: A splash in the whipped cream adds a warm, aromatic depth. Use the real thing for the best flavor.

Note: You’ll find the complete list of ingredients, along with their exact measurements, in the printable recipe card at the bottom of this post.
Kitchen Equipment Needed
You don’t need any specialty gadgets for this recipe, just a few standard kitchen tools.
- Large Mixing Bowl: For combining your dry ingredients and cutting in the butter.
- Pastry Cutter or Fork: To work the cold butter into the flour. Your fingertips can work too, but work quickly so the butter doesn’t melt.
- 2.5-3 Inch Round Biscuit Cutter: A sharp-edged cutter (like a drinking glass or a proper biscuit cutter) is key. Avoid twisting it when cutting, as this seals the edges and inhibits rise.
- Baking Sheet & Parchment Paper: For easy baking and cleanup. The parchment prevents sticking and ensures even browning on the bottom.
- Wire Cooling Rack: Essential for letting the biscuits cool completely. Trapping steam underneath would make the bottoms soggy.
- Hand Mixer or Whisk: For whipping the cream. A stand mixer works too, but a hand mixer gives you more control to avoid over-whipping.
How to Make Mini Strawberry Shortcake Recipe
Step 1: Mix the Dry Ingredients and Cut in the Butter
Preheat your oven to 425°F (220°C)—this high heat is crucial for a good rise and golden color. In your large bowl, whisk together the flour, 2 tablespoons of the sugar, baking powder, and salt. This aerates the dry ingredients and ensures even distribution.
Now, add your very cold, cubed butter. Using a pastry cutter or your fingertips, work the butter into the flour until the mixture resembles coarse crumbs with some pea-sized butter pieces still visible. Trust me, these visible butter bits are your ticket to flaky layers.
If the butter starts to feel soft or greasy, pop the whole bowl in the freezer for 5 minutes.
Step 2: Form the Biscuit Dough
Make a well in the center of your flour-butter mixture. Pour in the 2/3 cup of heavy cream all at once. Using a fork, gently stir from the center outward, just until a shaggy, moist dough comes together.
There will still be some dry-looking bits—that’s okay. The biggest mistake here is overmixing, which develops gluten and leads to tough biscuits. Turn the shaggy mass out onto a lightly floured surface and gently pat it (don’t roll it) into a rectangle about 1-inch thick.
Step 3: Cut and Bake the Biscuits
Take your biscuit cutter and press it straight down into the dough. Do not twist it, as twisting seals the edges and prevents the biscuits from rising properly. Cut out as many rounds as you can, placing them 2 inches apart on your parchment-lined baking sheet.
Gently gather the scraps, pat them back together to 1-inch thickness, and cut the remaining biscuits. Brush the tops lightly with the reserved 2 tablespoons of cream and sprinkle with a pinch of sugar for a sparkly, crisp top. Bake for 12-15 minutes until they are beautifully puffed and golden brown.
Let them cool completely on a wire rack.
Step 4: Macerate the Strawberries
While the biscuits bake and cool, prepare the berries. Hull and slice your strawberries into a medium bowl. Sprinkle them with the remaining 2 tablespoons of sugar and toss gently.
Let them sit at room temperature for at least 20 minutes. Believe me, this maceration process is non-negotiable. The sugar draws out the strawberries’ natural juices, creating a light, flavorful syrup that soaks deliciously into the biscuit.
They’ll look glossy and smell incredible.
Step 5: Whip the Cream to Soft Peaks
For the whipped cream, start with a cold bowl and beaters—this helps the cream whip faster and more stably. Combine the cold heavy whipping cream, vanilla, and the final tablespoon of sugar. Beat on medium-high speed until soft peaks form.
Tip from me: soft peaks mean the cream will hold its shape when the beaters are lifted, but the tip will curl over gently. You want it pillowy and soft, not stiff like buttercream.
Step 6: Assemble and Serve
Now for the fun part: assembly. Using a serrated knife, carefully split each cooled biscuit in half horizontally. Place the bottom half on a serving plate.
Spoon a generous amount of macerated strawberries and their glorious syrup over the biscuit. Top with a large, fluffy dollop of your freshly whipped cream. Gently place the biscuit top at a slight angle over the cream.
Step back and admire your handiwork before serving immediately for the best texture contrast.
A few chef-level insights can elevate your shortcakes from good to “can I have the recipe?” great.
- Butter Temperature is Everything: Your butter must be cold. I cube mine and freeze it for 15 minutes before using. When the cold butter hits the hot oven, the water in it turns to steam, creating the flaky layers we love. If the butter melts before baking, you’ll get a dense, greasy biscuit.
- The No-Twist Cut: When cutting your biscuits, press the cutter straight down and lift it straight up. Twisting compresses the dough layers along the edges, sealing them and preventing a good rise. You want those layers to be able to separate and puff up freely.
- Macerate for Maximum Flavor: Don’t rush the strawberries. The 20-minute maceration does more than create juice; it slightly softens the berries and deepens their flavor. For an extra dimension, you can add a tiny pinch of black pepper or a teaspoon of balsamic vinegar to the berries—it sounds odd, but it heightens their sweetness beautifully.
- Whip Cream to Order: Whipped cream is at its best within an hour of being made. If you need to make it ahead, whip it to just under soft peaks, store it in the fridge, and give it one quick whisk before serving. Over-whipped cream can be saved by gently folding in a splash of additional cold cream.
- Cool Biscuits Completely: It’s tempting to assemble while the biscuits are warm, but a warm biscuit will melt the whipped cream and make the whole structure soggy. Patience here ensures a perfect bite with distinct, enjoyable textures.
Recipe Variations
- The classic formula is wonderful, but it’s also a fantastic foundation for creativity. Here are some tested variations I love.
- Lemon-Zested Biscuits: Add the finely grated zest of one lemon to the dry ingredients when making the biscuit dough. The bright citrus note cuts through the richness and pairs wonderfully with the berries.
- Basil-Infused Strawberries: Add 3-4 torn fresh basil leaves to the strawberries as they macerate. Remove the leaves before assembling. The herbal note is surprisingly refreshing and sophisticated.
- Ginger Snap Variation: Replace 1/4 cup of the all-purpose flour with finely ground ginger snap cookies and add 1/2 teaspoon of ground ginger to the dry ingredients for a warmly spiced biscuit.
- Vegan/Dairy-Free: Use a high-quality vegan butter (very cold) and full-fat coconut cream in the biscuits. For the topping, whip chilled coconut cream with a little sugar and vanilla. The flavor profile will be different but delicious.
- Mixed Berry Medley: Substitute half the strawberries with other seasonal berries like raspberries, blackberries, or blueberries. Their varying textures and tartness create a complex, juicy filling.
- Boozy Berries: For an adult gathering, add 1-2 tablespoons of orange liqueur (like Grand Marnier) or a berry liqueur to the macerating strawberries.
- Cornmeal Biscuits: Replace 1/2 cup of the all-purpose flour with fine-ground cornmeal for a biscuit with a delightful golden color and a subtle, pleasant grit.
What to Serve With This Recipe
Mini strawberry shortcakes are a star dessert that needs little accompaniment, but they fit beautifully into larger menus.
They are the quintessential finale to a summer barbecue or grilled dinner. Serve them after burgers, grilled chicken, or cedar-plank salmon. The lightness of the dessert provides a perfect contrast to smoky, savory mains.
For a more formal brunch or afternoon tea, pair them with a pot of Earl Grey or a citrus-infused iced tea. The shortcakes themselves are sweet, so I recommend serving beverages that are lightly sweetened or unsweetened to balance the palate. If you’re creating a dessert buffet, these shortcakes pair wonderfully with simpler items like fresh fruit skewers or dark chocolate-dipped strawberries, offering guests a choice between fruity and chocolatey treats.
Storage & Make-Ahead Instructions
- With components that can be prepared separately, this recipe is an entertainer’s dream.
- Biscuits: Once completely cooled, store unfilled biscuits in an airtight container at room temperature for up to 2 days. For longer storage, freeze them in a single layer on a baking sheet, then transfer to a freezer bag for up to 2 months. Thaw at room temperature and refresh in a 300°F oven for 5 minutes if desired.
- Macerated Strawberries: Can be refrigerated in an airtight container for up to 3 days. They will release more juice over time.
- Whipped Cream: Best used immediately but can be made up to 4 hours ahead. Store covered in the refrigerator. It may soften slightly; a quick re-whisk will bring it back.
- Assembled Shortcakes: I do not recommend storing fully assembled shortcakes for more than an hour or two, as the biscuit will become soggy. For make-ahead ease, prepare all three components and assemble them just before serving. It takes only a minute per serving and guarantees perfect texture.
Frequently Asked Questions
Q: Can I use frozen strawberries?
A: I don’t recommend it for the maceration step. Frozen strawberries release too much water when thawed, creating a diluted, watery syrup that will make your biscuit soggy. Fresh is best for texture and flavor concentration.
Q: My biscuits didn’t rise very much. What happened?
A: The most common culprits are old baking powder (it loses potency over time), overworking the dough (which develops gluten), twisting the cutter when cutting, or butter that was too warm and melted before baking. Ensure your baking powder is fresh and handle the dough as little as possible.
Q: Can I make the biscuit dough in a food processor?
A: You can, but be extremely cautious. Pulse the dry ingredients with the cold butter just until crumbly, then transfer to a bowl to stir in the cream by hand. It’s very easy to over-process in a machine, leading to tough biscuits.
Q: Is there a substitute for heavy cream in the biscuit dough?
A: Buttermilk is a classic substitute and will yield a slightly tangier, very tender biscuit. The acidity reacts with the baking powder for a good rise. Use the same volume, but you may need a tablespoon or two more flour as buttermilk is thinner.
Q: How do I know when the whipped cream is at “soft peaks”?
A: Lift the beaters out of the cream. The peak that forms should hold its shape but the very tip should curl over gracefully. If it stands straight up, it’s at stiff peaks, which is a bit too firm for this application.
Q: Can I make these gluten-free?
A: Yes. Use a 1:1 gluten-free all-purpose flour blend that contains xanthan gum. The texture will be slightly more crumbly but still delicious.
Handle the dough even more gently, as GF blends can be fragile.
Q: The strawberries aren’t very sweet. What can I do?
A: You can add an extra tablespoon of sugar to the macerating berries. A tiny pinch of salt can also help enhance their natural sweetness. Using the ripest, in-season berries you can find is always the best solution.
Final Thoughts
Mastering the mini strawberry shortcake is about embracing the simplicity of its components and respecting the techniques that make each one shine. It’s a dessert that feels celebratory yet comforting, impressive yet approachable. From the flaky layers of the biscuit you created by keeping the butter cold, to the glossy syrup that formed around the macerated berries, to the billowy cream you whipped just to the right consistency—each step is a small lesson in the craft of baking.
I encourage you to make this recipe your own. Try the variations, play with different fruits as the seasons change, and most importantly, share them with people you care about. Food made with attention is always a gift.
I’d love to hear how your shortcakes turn out. Share your creations online and tag me, or leave a comment below with your favorite variation. Happy baking
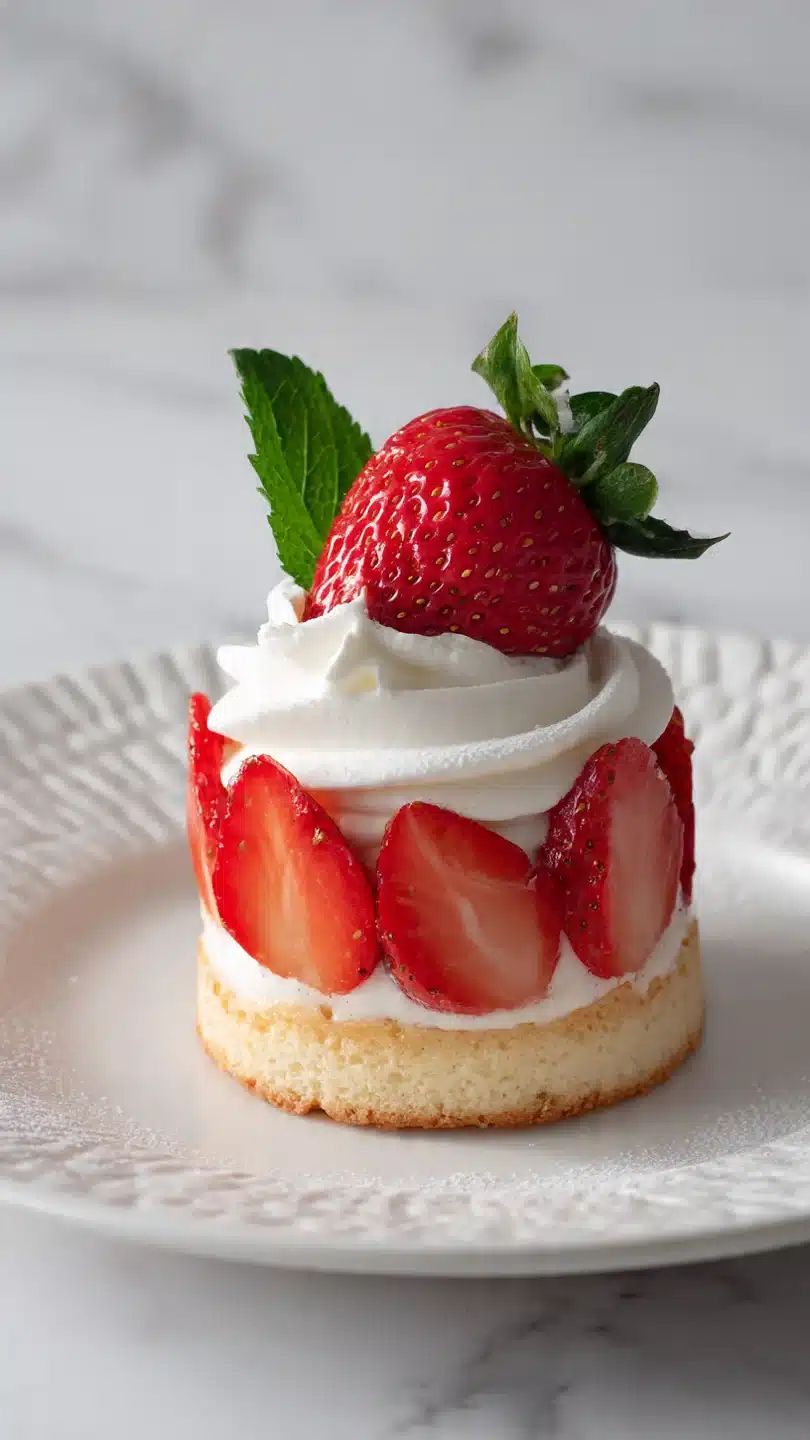
Mini Strawberry Shortcakes
Ingredients
Equipment
Method
- Preheat oven to 425°F (220°C) and line a baking sheet with parchment paper. In a large bowl, whisk together the flour, 2 tablespoons of the sugar, baking powder, and salt. Using a pastry cutter or your fingertips, work the cold, cubed butter into the flour mixture until it resembles coarse crumbs with some pea-sized pieces of butter remaining. This creates flaky layers.
- Make a well in the center of the flour mixture and pour in 2/3 cup of heavy cream. Use a fork to gently stir just until a shaggy dough forms. Do not overmix. Turn the dough out onto a lightly floured surface and gently pat it into a 1-inch thick rectangle.
- Using a 2.5 to 3-inch round biscuit cutter, press straight down (do not twist) to cut out 6 biscuits. Gently re-pat the scraps to cut the final biscuits. Place them 2 inches apart on the prepared baking sheet. Brush the tops with the remaining 2 tablespoons of heavy cream and sprinkle with a pinch of the remaining sugar. Bake for 12-15 minutes until golden brown and puffed. Transfer to a wire rack to cool completely.
- While biscuits bake, macerate the strawberries. In a medium bowl, combine the sliced strawberries with the remaining 2 tablespoons of sugar. Toss gently and let sit at room temperature for at least 20 minutes, until the berries release their juices and create a light syrup.
- Make the whipped cream. In a chilled bowl, using a hand mixer or whisk, beat the cold heavy whipping cream, vanilla, and the final 1 tablespoon of sugar until soft peaks form. Be careful not to over-whip into stiff peaks, as you want a soft, dollop-able texture.
- To assemble, carefully split each cooled biscuit in half horizontally with a serrated knife. Place the bottom half on a plate. Spoon a generous amount of macerated strawberries and their juices over it. Top with a large dollop of whipped cream. Place the biscuit top gently over the cream. Serve immediately.


