
Gluten free strawberry shortcake
There’s something undeniably special about strawberry shortcake. It’s the taste of summer celebrations, of sunny afternoons, and of simple, honest ingredients coming together in perfect harmony. But for those avoiding gluten, the classic version can feel off-limits, often replaced by dry, crumbly, or dense imitations.
My mission was to create a gluten free strawberry shortcake that doesn’t just accommodate a dietary need, but stands proudly on its own merits. After multiple rounds of testing in my kitchen, I’ve landed on a formula for biscuits that are tender, flaky, and lightly sweet—the ideal vessel for juicy, macerated berries and billowy whipped cream. This dessert is deceptively simple to make, and the result is a stunning, crowd-pleasing treat that everyone at your table will adore.
- Authentic Texture: Forget sandy or gummy GF baked goods. These biscuits use a specific technique to achieve a light, tender crumb that rivals any traditional shortcake.
- Simple Process: With just a few mixing bowls and basic steps, this dessert comes together in under an hour, with most of that time being hands-off for the strawberries to macerate.
- Make-Ahead Friendly: You can prepare each component—the biscuit dough, the macerated berries, and the whipped cream—ahead of time, making final assembly a breeze for entertaining.
- Customizable: Easily adapt the sweetness, add a hint of citrus to the berries, or even make it dairy-free with the tested variations provided below.
- Summer Celebration: This is the ultimate dessert for picnics, barbecues, and family gatherings, offering a beautiful, fresh finish to any meal.
Ingredients You’ll Need
Let’s gather our ingredients—this is where the magic starts. Using quality components and paying attention to temperature are the two secrets to this recipe’s success. For the flour, I insist on a trusted gluten free 1:1 baking blend that contains xanthan gum.
Brands like Bob’s Red Mill or King Arthur Measure for Measure are my go-tos because they’re consistently reliable. Your butter and cream must be very cold; I even pop my cubed butter into the freezer for 10 minutes before starting. This ensures those tiny pockets of cold butter create steam in the hot oven, leading to those desirable flaky layers.
For the strawberries, choose ripe, fragrant berries for the best natural sweetness and flavor.

Note: You’ll find the complete list of ingredients, along with their exact measurements, in the printable recipe card at the bottom of this post.
Kitchen Equipment Needed
You don’t need any specialty gadgets for this recipe. A large mixing bowl, a pastry cutter (or a fork and some patience), and a 3-inch round biscuit cutter are the main tools. A baking sheet lined with parchment paper prevents sticking and makes cleanup simple.
A stand mixer or hand mixer makes quick work of the whipped cream, though a whisk and strong arm will work too. Having everything measured and ready before you start (your mise en place) makes the process smooth and enjoyable.
How to Make Gluten Free Strawberry Shortcake Recipe
Step 1: Macerate the Strawberries
This first step is all about building flavor. Combining the sliced strawberries with sugar and letting them sit isn’t just passive waiting—it’s an active transformation. The sugar draws out the berries’ natural juices through osmosis, creating a sweet, ruby-red syrup that will soak deliciously into the biscuits.
Trust me, this simple maceration is what elevates the strawberries from a mere topping to the star of the show. Let them rest at room temperature for at least 30 minutes while you work on the biscuits.
Step 2: Combine Dry Ingredients & Cut in Butter
Preheat your oven to a hot 425°F—this high heat is crucial for getting a good rise and a golden top. In your large bowl, whisk the gluten free flour, sugar, baking powder, and salt thoroughly. This distributes the leavening agent evenly.
Now, add the cold, cubed butter. Using a pastry cutter or your fingertips, work the butter into the flour until the mixture looks like coarse sand with visible pea-sized butter bits. These cold butter pieces are your ticket to flakiness; they’ll melt in the oven and create steam pockets.
Step 3: Form the Biscuit Dough
Here’s where a light touch is key. Make a well in your flour-butter mixture and pour in the cold heavy cream. Use a fork to stir gently, just until the dough comes together in a shaggy mass.
It will look messy and uneven—that’s perfect. Overmixing activates the xanthan gum too much and can lead to toughness. Tip from me: turn the dough out onto a surface lightly dusted with more GF flour and gently pat it (don’t roll it) into a 1-inch thick rectangle.
Step 4: Cut and Bake the Biscuits
Dip your biscuit cutter in GF flour to prevent sticking. Press it straight down into the dough to cut out your biscuits; do not twist. Twisting seals the edges and hinders their ability to rise tall and proud.
Re-pat the scraps gently to cut the remaining biscuits. Place them on your parchment-lined sheet, brush the tops with cream for browning, and sprinkle with sugar for a sweet, sparkly crunch. Believe me, that extra sugar on top makes a delightful difference.
Step 5: Whip Cream and Assemble
While the biscuits bake and then cool slightly, make your whipped cream. Start with a cold bowl and cold cream—it whips faster and holds its shape better. Whip it with the powdered sugar and vanilla just until soft peaks form; over-whipping leads to grainy butter.
Now for the fun part: assembly. Split a warm biscuit, place the bottom on a plate, and spoon over a generous amount of strawberries and their glorious syrup. Top with a cloud of whipped cream and crown it with the biscuit top.
Step back and admire your beautiful creation before diving in.
- The Cold Factor: For the flakiest layers, your butter and cream should feel icy cold. I cube my butter and freeze it for 10-15 minutes before using it. You can also chill your mixing bowl and pastry cutter.
- Handling the Dough: Gluten free dough is more fragile than wheat-based dough. Handle it as little as possible. Pat it, don’t knead it. When re-rolling scraps, just press them together gently; the biscuits from the second pass will be slightly less uniform, but just as tasty.
- Baking Powder Freshness: Baking powder loses potency over time. If yours has been in the pantry for over 6 months, it may not give you the lift you need. To test it, stir 1 teaspoon into 1/3 cup of hot water. It should bubble vigorously immediately.
- Doneness Check: The biscuits are done when they are puffed, the tops are golden brown, and the bottoms sound hollow when tapped lightly. A toothpick inserted near the center should come out clean.
Recipe Variations
- Dairy-Free Delight: Use a high-fat, unsweetened coconut cream (chilled) in place of heavy cream for both the biscuits and the topping. Use vegan butter sticks for the biscuit fat. The result is subtly coconutty and delicious.
- Lemon Zest Brightness: Add the finely grated zest of one lemon to the dry ingredients for the biscuits. The citrus note cuts through the sweetness beautifully and complements the strawberries.
- Balsamic Berries: Add 1 teaspoon of good quality balsamic vinegar to the strawberries as they macerate. It sounds unusual, but it intensifies the berry flavor and adds a sophisticated depth.
- Individual Mini Shortcakes: Use a 2-inch cutter to make 10-12 smaller biscuits. Perfect for parties or when you want a more petite dessert portion.
- Herb-Infused: For a truly gourmet twist, add 1 tablespoon of finely chopped fresh basil or mint to the macerating strawberries. The herbal note is incredibly refreshing.
What to Serve With This Recipe
This strawberry shortcake is a complete dessert on its own, but it shines as part of a summer menu. For a relaxed backyard barbecue, serve it after grilled lemon-herb chicken and a crisp green salad. For a more elegant dinner party, it pairs wonderfully with a main course like seared salmon or herb-crusted pork tenderloin.
Beverage-wise, a glass of Prosecco, a crisp Riesling, or even a sparkling lemonade makes a lovely companion. It’s the perfect finale for holidays like the Fourth of July, Mother’s Day brunch, or any occasion that calls for a touch of sweet, seasonal celebration.
Storage & Make-Ahead Instructions
- Component Prep: You can macerate the strawberries up to 4 hours ahead; cover and refrigerate. The biscuit dough can be cut, placed on the baking sheet, covered, and refrigerated for up to 2 hours before baking—just add 1-2 minutes to the bake time. Whipped cream can be made up to 2 hours ahead and kept chilled.
- Storage: Store any leftover components separately. Biscuits can be kept in an airtight container at room temperature for 1 day or frozen for up to 1 month. Thaw at room temperature and warm slightly before serving. Macerated strawberries will keep for 2-3 days in the fridge.
- Reheating: Briefly warm split biscuits in a 300°F oven for 5 minutes to refresh them before assembling. Do not assemble the full shortcakes until you are ready to serve, as the biscuits will become soggy.
Frequently Asked Questions
Q: Can I use frozen strawberries?
A: I don’t recommend it for macerating. Frozen berries release too much water, creating a diluted, watery syrup. They are better suited for cooking into a compote.
Fresh is best for this application.
Q: My biscuits didn’t rise very much. What happened?
A: The most common culprits are old baking powder, overmixing the dough, or twisting the cutter when cutting. Ensure your leavener is fresh, mix just until combined, and press the cutter straight down.
Q: Can I make these biscuits vegan?
A: Yes, see the Dairy-Free variation above. Use a certified gluten free flour blend, vegan butter, and full-fat coconut cream. The texture will be slightly more dense but still delicious.
Q: Why is my whipped cream turning grainy or buttery?
A: You’ve over-whipped it. Stop as soon as soft peaks form—when you lift the whisk, the peak should gently curl over. If it goes too far, you can try to salvage it by gently folding in another tablespoon of cold cream.
Q: How do I know when the biscuits are done baking?
A: Look for a golden-brown top and bottom. They should feel firm to a light touch on top, and a toothpick inserted near the center should come out clean, not wet with dough.
Q: Can I use a different gluten free flour, like almond flour?
A: No, a 1:1 baking blend is essential for structure. Almond flour alone is too dense and oily and will not create a biscuit-like texture. Stick with a trusted blend designed to replace all-purpose flour.
Q: Is there a way to make this less sweet?
A: Absolutely. You can reduce the sugar in the biscuit dough by 1-2 tablespoons, and use only 1 tablespoon for macerating the strawberries. The whipped cream can be made with just a teaspoon of sugar or none at all.
Final Thoughts
This gluten free strawberry shortcake recipe is a testament to the fact that dietary restrictions don’t mean sacrificing flavor or tradition. With a focus on technique and quality ingredients, you can create a dessert that’s not just an alternative, but a first-choice favorite. The tender, flaky biscuits, the sweet-tart burst of strawberry syrup, and the light whipped cream come together in a symphony of textures and tastes that truly captures the essence of summer.
I encourage you to give it a try, share it with friends and family, and savor every bite. Don’t forget to rate the recipe below and let me know how it turned out in your kitchen. Happy baking
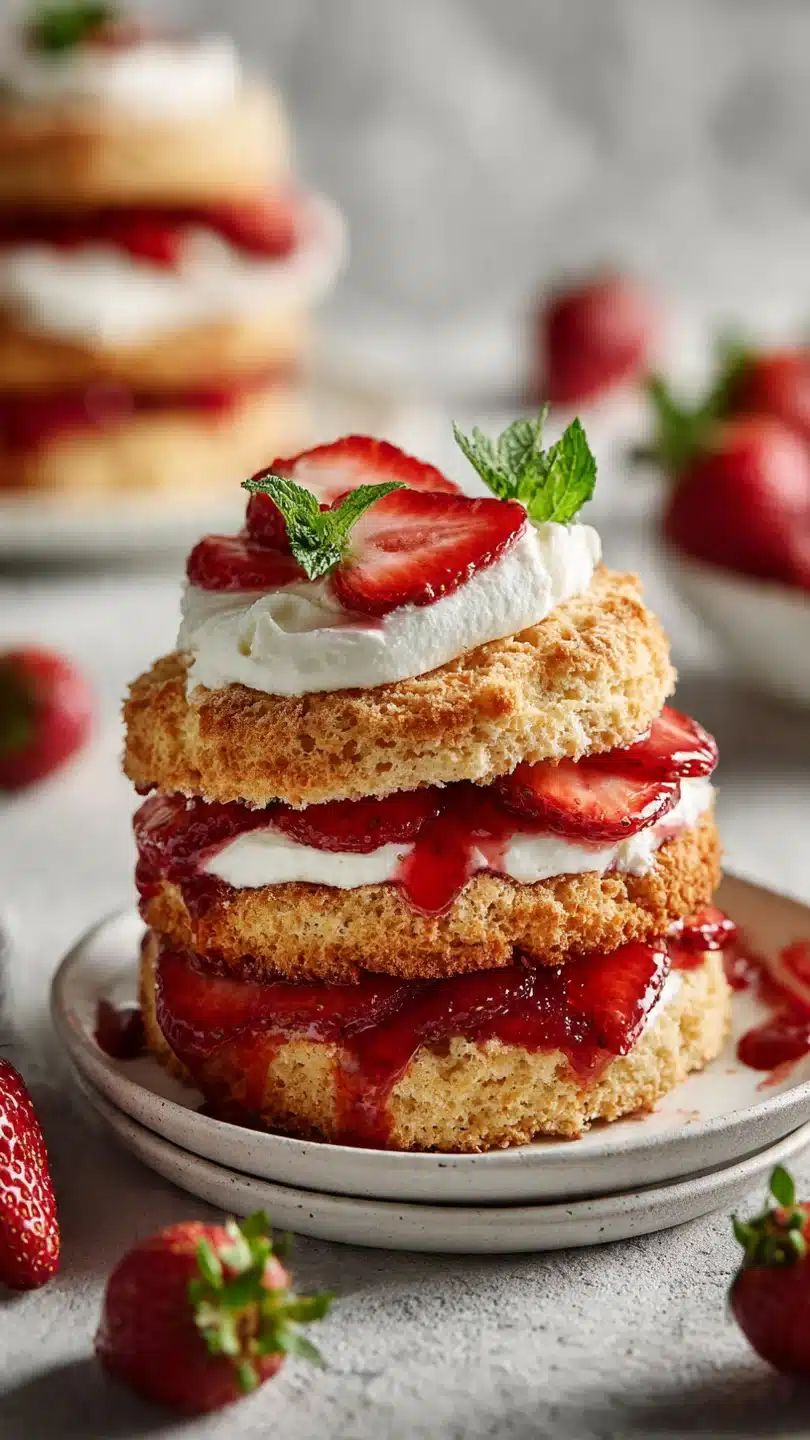
Gluten Free Strawberry Shortcake
Ingredients
Equipment
Method
- Begin by macerating the strawberries. In a medium bowl, combine the sliced strawberries and 2 tablespoons of granulated sugar. Stir gently, then set aside at room temperature for at least 30 minutes. This draws out the berries’ natural juices, creating a delicious syrup.
- Preheat your oven to 425°F (220°C) and line a baking sheet with parchment paper. In a large bowl, whisk together the gluten free flour, 1/3 cup sugar, baking powder, and salt. Add the cold, cubed butter. Using a pastry cutter or your fingertips, work the butter into the flour until the mixture resembles coarse crumbs with some pea-sized pieces of butter remaining.
- Make a well in the center of the flour mixture and pour in 2/3 cup of cold heavy cream. Use a fork to gently stir just until a shaggy dough forms. Do not overmix. Turn the dough out onto a lightly floured surface (use GF flour) and gently pat it into a 1-inch thick rectangle.
- Using a 3-inch round biscuit cutter dipped in flour, cut out biscuits. Press straight down without twisting to ensure clean edges and maximum rise. Gently re-pat the scraps to cut more biscuits; you should get 6. Place them on the prepared baking sheet, brush the tops with the remaining 2 tbsp of cream, and sprinkle with the extra tablespoon of sugar.
- Bake for 14-16 minutes, or until the biscuits are puffed and golden brown on top. Transfer to a wire rack to cool slightly. While they cool, make the whipped cream: In a chilled bowl, whip the 1 cup of cold heavy cream with the powdered sugar and vanilla until soft peaks form.
- To assemble, split the warm biscuits in half horizontally. Place the bottom halves on plates. Spoon a generous amount of the macerated strawberries and their syrup over each. Top with a large dollop of whipped cream, then place the biscuit tops gently over the cream. Serve immediately.


