
Sheet pan brownies
There’s something undeniably magical about a pan of brownies, but when you need to feed a crowd without spending all day in the kitchen, the standard 9×13-inch pan just doesn’t cut it. Enter the sheet pan brownie: your new secret weapon for potlucks, bake sales, game day, or any gathering where dessert demand is high. As a chef who has scaled more recipes than I can count, I can tell you that simply doubling a recipe and baking it longer doesn’t always work.
This recipe was developed specifically for the unique geometry of a half-sheet pan. The result? A thinner slab that bakes in under 30 minutes, yielding brownies with an ideal ratio of crisp, crackly top to dense, fudgy center in every single bite.
It’s practical baking at its most delicious.
- One-Pan Simplicity: Everything mixes in one bowl and bakes on one pan, meaning minimal cleanup and maximum efficiency.
- Foolproof Fudgy Texture: The carefully tested ratio of butter, eggs, and chocolate guarantees a rich, moist interior that never turns cakey or dry.
- Fast Bake Time: Baking in a thin layer on a large sheet pan cuts the oven time nearly in half compared to a deep dish, getting dessert to the table faster.
- Feeds a Crowd: This single recipe yields two dozen substantial brownies, making it the perfect solution for parties, classroom events, or office gatherings.
- Endlessly Customizable: The base recipe is a perfect canvas for your favorite mix-ins, from nuts and candies to swirls of caramel or peanut butter.
- Make-Ahead Friendly: These brownies taste even better the next day and freeze beautifully, allowing you to prep dessert well in advance.
Ingredients You’ll Need
Let’s gather our ingredients—this is where simple pantry staples transform into something spectacular. Using quality cocoa powder is my number one pro tip here; it’s the primary flavor driver. I prefer Dutch-processed cocoa for its deeper, less acidic chocolate notes, but natural unsweetened cocoa works perfectly too.
Room-temperature eggs are non-negotiable for proper emulsification, creating that signature shiny, crackly top. Believe me, taking 10 minutes to let your eggs sit on the counter makes a visible difference.
- Unsalted Butter: Melted and slightly cooled. It provides the rich foundation and fudgy texture.
- Granulated Sugar: Sweetens and, crucially, helps create that beautiful glossy, crackled crust as it caramelizes.
- Large Eggs: At room temperature. They bind the batter and give structure; using them cold can cause the batter to seize.
- Pure Vanilla Extract: Enhances the depth of the chocolate flavor. Don’t skip it.
- All-Purpose Flour: Spooned and leveled into your measuring cup to avoid a dense, dry brownie.
- Unsweetened Cocoa Powder: The star of the show. For the richest flavor, use a high-quality Dutch-processed cocoa.
- Salt: Balances the sweetness and intensifies the chocolate flavor.
- Semi-Sweet Chocolate Chips: Divided. Some melt into the batter for extra richness, and some are scattered on top for pockets of gooey chocolate.

Note: You’ll find the complete list of ingredients, along with their exact measurements, in the printable recipe card at the bottom of this post.
Kitchen Equipment Needed
You don’t need any fancy gadgets for this recipe, but the right pan is essential. A standard 18×13-inch rimmed half-sheet pan is what I use and recommend. The rim prevents any batter from spilling, and the large surface area is key to the quick, even bake.
Parchment paper with an overhang is a game-changer for clean removal and slicing. A large bowl, a sturdy whisk, and a rubber spatula are your main mixing tools. An offset spatula makes spreading the thick batter effortless, and a sharp chef’s knife is vital for cutting clean squares.
How to Make Sheet Pan Brownies Recipe
Step 1: Prep Your Pan and Oven
Preheat your oven to 350°F (175°C). This ensures a consistent temperature from the moment the batter goes in, leading to even baking. Take your half-sheet pan and either grease it thoroughly with butter or, my preferred method, line it with parchment paper.
Leave a couple of inches of overhang on the two long sides—this creates “handles” that will let you lift the entire slab of brownies out after cooling, which makes for infinitely easier and cleaner cutting.
Step 2: Combine the Wet Ingredients
In your largest mixing bowl, whisk together the melted butter and granulated sugar. The butter should be warm, not hot, to avoid cooking the eggs. Whisk for a good minute until the mixture looks well-blended and glossy.
Now, add your room-temperature eggs one at a time, whisking vigorously after each addition until fully incorporated before adding the next. Tip from me: This patient incorporation is what helps create that shiny, paper-like top. Finally, whisk in the vanilla extract.
Your mixture will be thick, smooth, and pale.
Step 3: Incorporate the Dry Ingredients
Here’s where we build the chocolate foundation. Sift the flour, cocoa powder, and salt directly into the bowl with the wet ingredients. Sifting is not just for show—it breaks up any lumps in the cocoa and flour, aerates them, and ensures you won’t have dry pockets in your finished brownies.
Use a rubber spatula to gently fold the dry ingredients into the wet. Fold just until the last streaks of flour disappear. Overmixing at this stage develops gluten, which can make your brownies tough instead of tender.
Step 4: Fold, Spread, and Top
Now for the chocolate bonus. Fold in 1 and 1/2 cups of the chocolate chips, saving the rest for the top. The batter will be very thick and luxurious.
Pour it onto your prepared sheet pan and use an offset spatula or the back of a spoon to spread it into a perfectly even layer, nudging it into all the corners. Sprinkle the remaining 1/2 cup of chocolate chips evenly over the surface. They’ll sink in slightly as they bake, creating delightful melty spots.
Step 5: Bake to Fudgy Perfection
Place the pan in the center of your preheated oven. Bake for 22 to 27 minutes. Start checking at the 22-minute mark.
You’re looking for a set top with a beautiful network of cracks, and the edges will have just started to pull away from the pan. The most reliable test is the toothpick test: insert it into the center. It should come out with a few moist crumbs clinging to it, not wet batter.
Trust me, it’s better to pull them out a minute early than a minute late for that ideal fudgy texture.
Step 6: Cool Completely and Slice
This is the hardest part: patience. Place the entire pan on a wire rack and let the brownies cool completely right in the pan. If you try to cut them while warm, they’ll fall apart.
Once completely cool, use the parchment paper handles to lift the entire slab onto a cutting board. For impeccably clean cuts, use a large, sharp chef’s knife and wipe it clean with a damp cloth between each slice. Step back and admire your work—a massive sheet of perfect, fudgy brownies ready to share.
- The Room-Temperature Egg Rule: This is my non-negotiable pro tip. Cold eggs don’t emulsify as well with the butter and sugar, which can result in a greasy layer or a lack of that classic shiny top. If you forgot to take them out, place the whole eggs in a bowl of warm water for 5-10 minutes.
- Measuring Flour Correctly: The most common cause of dry brownies is too much flour. Always spoon the flour into your measuring cup and level it off with a knife. Scooping directly from the bag packs in up to 25% more flour.
- The Doneness Test: Ovens vary, so visual and tactile cues are key. The brownies are done when the center feels set to a light touch and no longer jiggles. The toothpick with moist crumbs is your best friend. They will continue to set as they cool on the rack.
- For an Extra Crackly Top: After whisking in the eggs, continue to whisk the sugar-butter-egg mixture vigorously for another 45-60 seconds. This incorporates more air and helps dissolve the sugar, which promotes that beautiful, papery crust.
- Cutting Clean Squares: For picture-perfect squares, chill the entire cooled slab in the refrigerator for 30 minutes before cutting. Use a sharp knife and a straight up-and-down slicing motion—no sawing.
Recipe Variations & Customizations
- Nutty Delight: Fold 1 1/2 cups of chopped walnuts, pecans, or toasted almonds into the batter along with the chocolate chips for added crunch and flavor.
- Salted Caramel Swirl: After spreading the batter, drizzle 1/2 cup of thick salted caramel sauce over the top. Use a knife or toothpick to swirl it gently into the batter before baking.
- Mint Chocolate Chip: Replace the vanilla extract with 1 teaspoon of pure peppermint extract. Fold in 1 cup of chocolate chips and 1 cup of Andes mint baking chips.
- Gluten-Free Adaptation: Substitute the all-purpose flour with an equal weight (about 195g) of a 1:1 gluten-free flour blend. The texture will be slightly more tender but still delicious.
- Rocky Road: After baking, immediately scatter 2 cups of mini marshmallows and 1 cup of chopped peanuts over the hot brownies. Return to the oven for 2-3 minutes until marshmallows are puffy, then drizzle with melted chocolate.
- Blonde Brownie Base: Omit the cocoa powder. Increase the flour to 2 1/4 cups and add 2 teaspoons of baking powder. Fold in 2 cups of white chocolate chips and 1 cup of chopped macadamia nuts.
- Espresso Boost: Dissolve 1-2 tablespoons of instant espresso powder into the melted butter before mixing. It won’t make the brownies taste like coffee, but it will deepen and enrich the chocolate flavor profoundly.
What to Serve With This Recipe
These brownies are a superstar dessert on their own, but they can anchor an entire dessert spread. For a classic, unbeatable pairing, serve a square slightly warm with a scoop of high-quality vanilla ice cream and a drizzle of hot fudge sauce. For a casual gathering, cut them into smaller, bite-sized pieces and serve them on a platter alongside other finger desserts like cookies and fruit skewers.
Beverage pairings are flexible: a cold glass of milk is timeless, but they also stand up beautifully to a cup of strong black coffee, a rich stout beer, or a glass of port. For a brunch or afternoon tea, these brownies make a perfect sweet offering alongside fresh fruit and savory tea sandwiches.
Storage & Make-Ahead Instructions
- Room Temperature Storage: Once completely cool, store brownies in an airtight container at room temperature for up to 4 days. Place a sheet of parchment between layers if stacking.
- Refrigerator Storage: For longer storage or a firmer, fudgier texture, refrigerate in an airtight container for up to a week. Let them come to room temperature before serving for the best flavor and texture.
- Freezing for Later: These brownies freeze exceptionally well. Wrap the entire uncut slab or individual squares tightly in plastic wrap, then place in a freezer bag or airtight container. Freeze for up to 3 months. Thaw overnight in the refrigerator or at room temperature for a few hours.
- Make-Ahead Strategy: You can bake the brownies 1-2 days in advance. Store the uncut slab tightly wrapped at room temperature. For best results, cut them the day you plan to serve them to maintain fresh edges.
- Reheating Tip: To recreate that fresh-from-the-oven experience, microwave a square for 10-15 seconds or warm it in a 300°F oven for 5 minutes.
Frequently Asked Questions
Q: Can I use a 9×13 inch pan instead of a sheet pan?
A: I don’t recommend it for this specific recipe. The ingredient quantities and bake time are calibrated for the thin layer of a half-sheet pan. Using a deeper pan would require significantly longer baking and would result in a different texture—more like a traditional thick brownie, which may not bake evenly with this batter.
Q: My brownies didn’t get a shiny, crackly top. What happened?
A: The shiny top comes from properly dissolving the sugar into the wet ingredients. Ensure you whisk the sugar and butter/eggs vigorously enough. Also, using room-temperature eggs is critical for good emulsification.
Don’t worry—they’ll still taste amazing!
Q: How do I know if they are underbaked or overbaked?
A: Underbaked brownies will be overly gooey, may sink in the center after cooling, and can have a raw flour taste. Overbaked brownies will be dry, cakey, and hard around the edges. The toothpick-with-moist-crumbs test is your best guide.
Q: Can I make these brownies dairy-free?
A: Yes. Substitute the butter with an equal amount of a plant-based butter stick (not spread from a tub) and use dairy-free chocolate chips. The texture should be very similar.
Q: Why do I have to cool them completely before cutting?
A: Brownies finish setting as they cool. Cutting them warm causes them to crumble and squish because the internal structure hasn’t solidified. For clean, sharp squares, patience is key.
Q: Can I double this recipe?
A: This recipe is already designed to fill a standard half-sheet pan, so doubling is not possible in one pan. If you need a truly massive batch, you must bake two separate sheets, one oven rack at a time, rotating the pans halfway through baking.
Q: What’s the best way to cut brownies without making a mess?
A: Use a long, sharp chef’s knife. Run it under very hot water, wipe it dry, and make your cut. The heat helps slice cleanly through the fudgy texture.
Wipe the blade clean and re-heat between each cut for perfect squares.
Final Thoughts
This sheet pan brownie recipe is the culmination of many tests to solve a simple, common problem: how to make a lot of incredible dessert with very little fuss. It delivers on every promise—deep chocolate flavor, that perfect fudgy-yet-firm bite, and the kind of practicality that makes you wonder why you ever baked brownies any other way for a group. It’s a recipe that respects your time without compromising on quality, which, in my 15 years of cooking professionally, is the hallmark of a truly great home recipe.
I encourage you to make it your own with the variations provided. Once you master the base, a world of easy, crowd-pleasing desserts opens up. I’d love to hear how your batch turns out!
Leave a comment below with your favorite mix-in or to share a photo of your beautiful, crackly-topped creation. Don’t forget to rate the recipe—it helps other bakers find this reliable guide. If you loved this large-format baking approach, explore my other sheet pan desserts for more simple, scalable sweet treats.
Happy baking
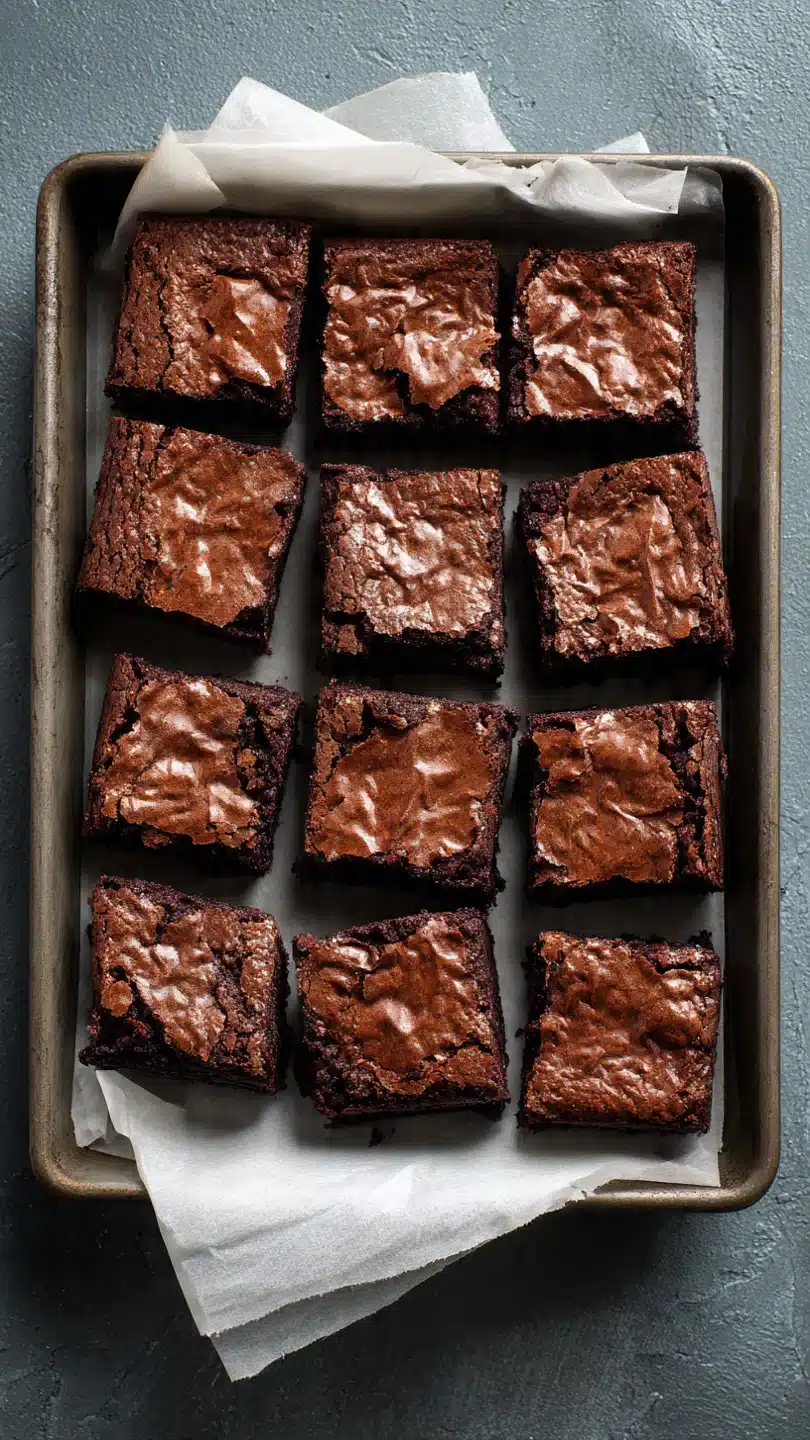
Ultimate Fudgy Sheet Pan Brownies
Ingredients
Equipment
Method
- Preheat your oven to 350°F (175°C). Generously grease an 18×13-inch rimmed sheet pan (half-sheet pan) with butter or line it with parchment paper, leaving an overhang on the long sides for easy removal.
- In a very large mixing bowl, whisk together the melted, cooled butter and granulated sugar for about 1 minute until well combined. Whisk in the room-temperature eggs, one at a time, ensuring each is fully incorporated before adding the next. Stir in the vanilla extract. The mixture will be thick and glossy.
- Sift the flour, cocoa powder, and salt directly into the wet ingredients. This prevents lumps and ensures an even, smooth batter. Use a spatula to gently fold the dry ingredients into the wet until just combined and no dry streaks remain. Be careful not to overmix.
- Fold in 1 1/2 cups of the chocolate chips, reserving the remaining 1/2 cup for the top. Pour the thick batter onto the prepared sheet pan. Use an offset spatula to spread it into an even layer, reaching all corners. Sprinkle the reserved chocolate chips evenly over the top.
- Bake for 22-27 minutes. Start checking at 22 minutes. The brownies are done when the top is set and shiny with a crackly surface, and a toothpick inserted into the center comes out with a few moist crumbs (not wet batter). Trust me, slightly underbaked is better than overbaked for fudgy texture.
- Place the pan on a wire rack and let the brownies cool completely in the pan—this is crucial for clean slicing. Once cool, use the parchment overhang to lift the entire slab out. Cut into squares with a sharp knife, wiping it clean between cuts for neat edges.


