
Nutella brownies
There’s something magical about a dessert that delivers maximum decadence with minimal effort. As a chef who has whisked countless egg whites and tempered delicate chocolates, I hold a special appreciation for recipes that are brilliantly simple yet profoundly delicious. These Nutella brownies are exactly that.
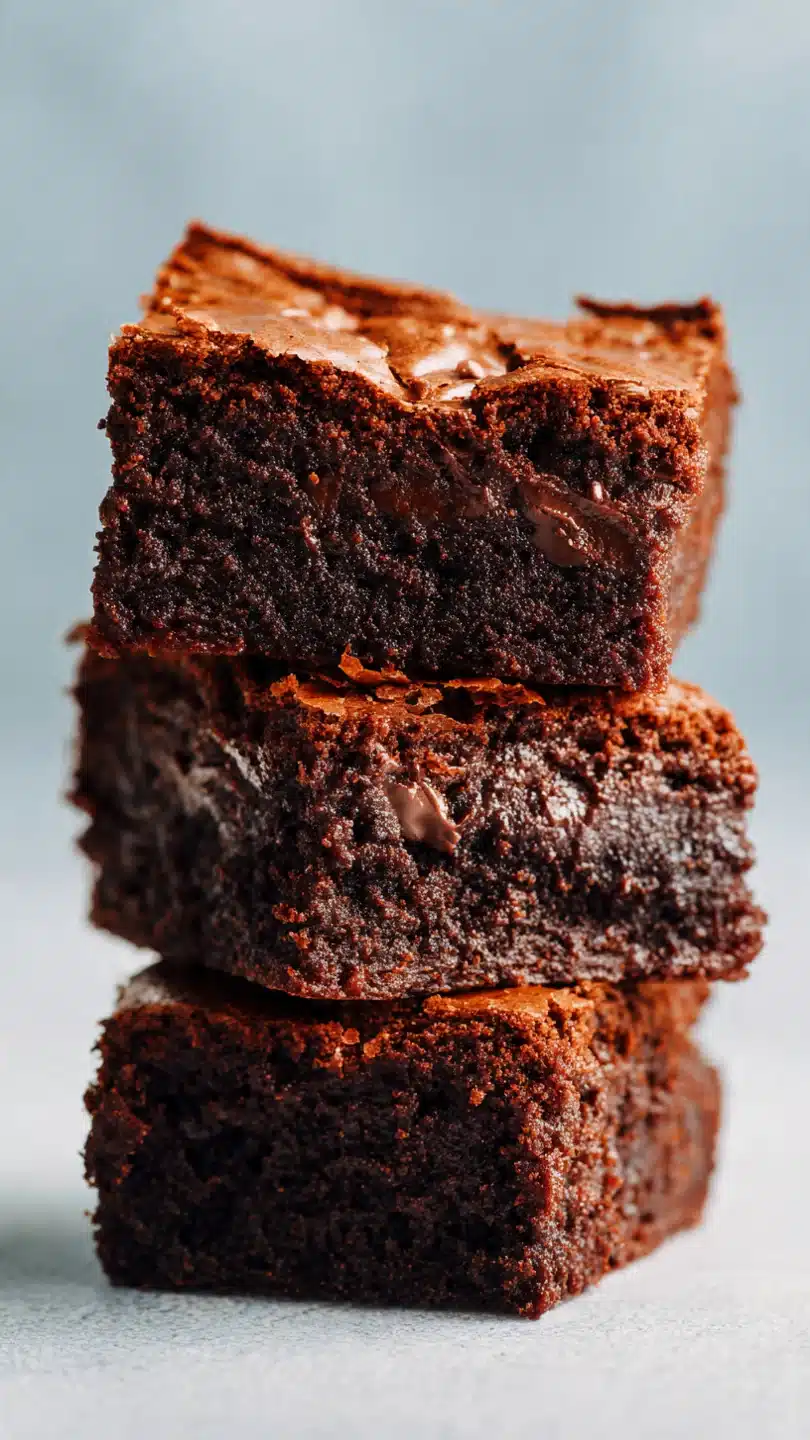
With just one bowl and five core ingredients, they transform into the fudgiest, most chocolate-hazelnut intense brownies you’ll ever taste. They boast that iconic crackly top and a center so gooey it’s almost like a baked truffle. If you’re craving a show-stopping dessert but want to be out of the kitchen in 30 minutes, you’ve found your recipe.
- One-Bowl Simplicity: No mixer, no fuss. You’ll mix everything in a single bowl, meaning less cleanup and more time enjoying your dessert.
- Five-Ingredient Magic: With just Nutella, eggs, flour, salt, and an optional add-in, these brownies are a pantry hero. It’s astonishing how such simple components create such complexity.
- Foolproof Fudginess: The specific method of emulsifying the Nutella and eggs guarantees a dense, moist, and incredibly fudgy texture every single time—no cakey brownies here.
- Quick & Impressive: From bowl to oven in under 10 minutes, these are perfect for last-minute guests or sudden chocolate cravings. They look and taste like you spent hours.
- Endlessly Customizable: This recipe is a perfect canvas. Fold in nuts, swirl in peanut butter, or add a sprinkle of sea salt on top to make it your own.
Ingredients You’ll Need
Let’s gather our ingredients—this is where the magic begins. The beauty of this recipe lies in the quality and balance of these few items. Using a good, name-brand Nutella is my professional recommendation here; its specific cocoa and hazelnut paste ratio is formulated for spreadability and baking, which directly impacts our texture.
Room-temperature eggs incorporate more easily, creating that crucial emulsion that gives the brownies body without needing baking powder or soda. When measuring the flour, please spoon it into your measuring cup and level it off with a knife. This avoids packing in extra flour, which is the primary culprit for dry, cakey brownies.
The pinch of salt isn’t optional—it’s a flavor amplifier that makes the chocolate taste richer and more pronounced.

Note: You’ll find the complete list of ingredients, along with their exact measurements, in the printable recipe card at the bottom of this post.
Kitchen Equipment Needed
You won’t need any specialty gear for this recipe. An 8×8-inch square metal baking pan is ideal for the right thickness and baking time. Parchment paper is my non-negotiable tool for easy, clean removal and slicing.
A large mixing bowl, a sturdy whisk for the initial mixing, and a flexible spatula for folding are all you need for the batter. A wire cooling rack is helpful for allowing air to circulate and cool the brownies evenly after baking. If you want perfectly neat squares, a long, sharp chef’s knife is the final key.
How to Make Nutella Brownies Recipe
Step 1: Prep Your Pan
Preheat your oven to 350°F (175°C). Take a moment to properly line your 8×8-inch pan with parchment paper, leaving an overhang on two opposite sides. Believe me, this simple step is what separates a messy, crumbly extraction from beautiful, photogenic brownie squares.
A light spray of cooking oil on the pan before the parchment helps it stick in place.
Step 2: Create the Base Emulsion
In your large bowl, combine the entire jar of Nutella (about 1 1/4 cups) and the two room-temperature eggs. Now, whisk with conviction! You’re not just mixing; you’re emulsifying.
Do this for a full 1-2 minutes until the mixture is completely uniform, smooth, and has a slight sheen. This emulsion traps air and provides the lift and structure for our brownies, replacing any chemical leaveners.
Step 3: Gently Incorporate Dry Ingredients
Add the measured flour and salt directly into the Nutella mixture. Put down the whisk and pick up your spatula. The goal here is gentle incorporation.
Fold the flour in using broad, sweeping motions until you see no more dry, white streaks. Overmixing at this stage develops gluten, which leads to toughness. If you’re adding chocolate chips or nuts, fold them in now until just distributed.
Step 4: Pan and Smooth the Batter
Pour the thick, luxurious batter into your prepared pan. It will be quite dense. Use your spatula to spread it evenly into all four corners.
A pro tip: dipping your spatula in a tiny bit of water makes smoothing the top much easier without the batter sticking. The surface should be mostly level.
Step 5: Bake to Fudgy Perfection
Place the pan in the center of your preheated oven. Set your timer for 20 minutes, but trust your eyes more than the clock. The brownies are done when the top is set and looks dry with a glossy, crackly appearance.
The true test? A toothpick inserted into the center should come out with a few sticky, moist crumbs clinging to it. If it’s covered in wet batter, bake for another 2-3 minutes.
If it comes out completely clean, they’re overdone—remember this for next time.
Step 6: The Crucial Cool and Serve
This is the ultimate test of patience. You must let the brownies cool completely in the pan on a wire rack. As they cool, they finish setting up from residual heat, achieving that perfect, sliceable-yet-fudgy texture.
Once cool, use the parchment paper “handles” to lift the entire slab out. Place it on a cutting board, slice into 9 squares, and get ready for the compliments.
- The Emulsion is Key: Whisking the Nutella and eggs thoroughly is the most important step. It incorporates air and binds the fat and liquids, creating a stable base that results in a crackly top and chewy interior.
- Don’t Overbake: In a professional kitchen, we say “carryover cooking” will finish the job. The brownies continue to set as they cool. Pull them out when the center still looks a bit soft and the toothpick has moist crumbs.
- For Super Clean Slices: For absolute perfection, once the brownies are fully cooled at room temperature, pop the whole slab (still on the parchment) into the fridge for 30 minutes. The slight chill firms up the fat, allowing a hot knife to glide through without dragging crumbs.
- Ingredient Temperature Matters: Using room-temperature eggs isn’t just a suggestion. Cold eggs can cause the Nutella to seize up slightly, making it harder to achieve a smooth, homogenous batter.
Recipe Variations
- Salted Caramel Swirl: Before baking, dollop 1/4 cup of thick salted caramel sauce over the batter and use a knife to swirl it gently for a gorgeous marbled effect and a sweet-salty contrast.
- Double Chocolate Chunk: Fold in 1/2 cup of chopped dark chocolate or dark chocolate chunks along with the flour for intense, melty pockets of pure chocolate throughout.
- Espresso Boost: Dissolve 1-2 teaspoons of instant espresso powder into the Nutella and egg mixture. The coffee won’t make them taste like coffee; it will deepen and magnify the chocolate flavor incredibly.
- Peanut Butter Lover’s: Drop spoonfuls of 1/4 cup of creamy peanut butter onto the batter and swirl with a knife for the ultimate chocolate-hazelnut-peanut butter trifecta.
- Gluten-Free Adaptation: Simply replace the all-purpose flour with an equal weight (about 60g) of a 1:1 gluten-free baking blend. The texture will be nearly identical.
- Add Crunch: Fold in 1/2 cup of chopped toasted hazelnuts or pecans for a wonderful textural contrast to the fudgy base.
What to Serve With This Recipe
These brownies are a star on their own, but they can anchor a fantastic dessert spread. For a classic pairing, serve a warm square à la mode with a scoop of high-quality vanilla bean ice cream—the hot/cold, fudgy/creamy contrast is sublime. For a dinner party, plate a smaller square with a dollop of freshly whipped cream and a few raspberries for a touch of elegance and acidity to cut the richness.
Beverage-wise, they are perfect with a glass of cold milk, a shot of espresso, or even a glass of tawny port or Cabernet Sauvignon for the adults. They’re ideal for bake sales, potlucks, or as the grand finale to a casual weeknight meal.
Storage & Make-Ahead Instructions
- Room Temperature Storage: Once completely cooled, store brownies in an airtight container at room temperature for up to 4 days. Place a piece of parchment between layers if stacking.
- Freezer-Friendly: These brownies freeze beautifully. Wrap individual squares or the whole slab tightly in plastic wrap, then in foil or a freezer bag. Freeze for up to 3 months. Thaw at room temperature or warm gently in the microwave.
- Make-Ahead Strategy: You can bake the brownies 1-2 days in advance. Store them whole, unsliced, in an airtight container at room temperature. Slice just before serving for the freshest appearance.
- Reheating Tip: To recapture that fresh-from-the-oven warmth and gooeyness, microwave a square for 10-15 seconds. For a larger portion, warm in a 300°F oven for 5-8 minutes.
Frequently Asked Questions
Q: Can I double this recipe?
A: Absolutely. Double all ingredients and bake in a 9×13-inch pan. The baking time may increase by 5-10 minutes.
Always rely on the visual and toothpick test for doneness.
Q: My brownies turned out cakey. What happened?
A: The most common causes are overmixing the batter after adding the flour (which develops gluten) or using too much flour. Ensure you’re measuring flour correctly by spooning and leveling, and fold gently until just combined.
Q: Can I use a different chocolate-hazelnut spread?
A: I’ve tested with generic brands, and while they work, the texture and flavor can vary. Name-brand Nutella has a specific consistency and cocoa content that this recipe is calibrated for. Off-brands may be oilier or sweeter, affecting the final result.
Q: How do I know for sure they’re done baking?
A: Look for a set, matte top with a network of fine cracks. The edges may pull away slightly from the pan. The toothpick test is your best friend: it should have a few moist, fudgy crumbs, not wet batter or be completely clean.
Q: Can I make these without eggs?
A: I haven’t found a reliable egg substitute for this specific recipe. The eggs are crucial for binding and creating the emulsion that gives the brownies structure. A flax egg typically results in a greasy, dense product that doesn’t set properly here.
Q: Why did my brownies sink in the middle?
A: This usually indicates underbaking. The center wasn’t set enough to hold its structure as it cooled. Next time, bake for a few minutes longer until the center passes the toothpick test with moist crumbs.
Q: Can I add cocoa powder to make them more chocolatey?
A: I don’t recommend adding dry cocoa powder directly, as it can dry out the batter. If you want a more intense chocolate hit, fold in high-quality chocolate chips or chunks instead.
Final Thoughts
This Nutella brownie recipe embodies what I love most about cooking: transforming a handful of simple, humble ingredients into something extraordinary with just a bit of know-how. It’s a recipe that respects your time without compromising on decadence. That glossy, crackled top giving way to an almost molten, fudgy center is a experience every chocolate lover deserves.
I’ve shared this recipe with countless friends and students, and it never fails to amaze with its simplicity and powerful results.
So, grab that jar of Nutella and give it a try. Pay attention to the emulsification, trust the toothpick, and practice the patience of cooling. I’m confident you’ll end up with a batch of brownies that will become your new secret weapon.
When you make them, I’d love to hear how it went! Share your photos and variations with me. And if you’re looking for another easy, crowd-pleasing dessert, explore my recipe for one-bowl chocolate chip cookies—they follow the same brilliant, minimalist philosophy.
Happy baking
Ultimate Nutella Brownies
Ingredients
Equipment
Method
- Preheat your oven to 350°F (175°C). Line an 8×8-inch baking pan with parchment paper, leaving an overhang on two sides for easy removal. This is non-negotiable for clean slices.
- In a large bowl, combine the Nutella and eggs. Using a sturdy whisk or a spatula, mix vigorously for about 1-2 minutes until the mixture is completely smooth, glossy, and slightly thickened. Trust me, this initial emulsification is what gives the brownies structure.
- Add the flour and salt to the Nutella mixture. Switch to a spatula and fold gently until just combined and no dry streaks of flour remain. Overmixing will develop gluten and make the brownies tough. If using, fold in the chocolate chips or hazelnuts now.
- Pour the thick batter into your prepared pan. Use the spatula to spread it evenly into the corners. The batter will be quite thick. Tip from me: a slightly wet spatula helps smooth the top without sticking.
- Bake for 20-25 minutes. Start checking at 20 minutes. The brownies are done when the top is set and looks dry with a slight sheen, and a toothpick inserted into the center comes out with a few moist crumbs (not wet batter). The center will still look soft—this is perfect.
- Let the brownies cool completely in the pan on a wire rack. This is the hardest part, but crucial! Cooling allows them to set for that perfect fudgy texture. Once cool, use the parchment overhang to lift them out, slice, and serve.


