
Easy strawberry shortcake recipe
There’s a moment of pure, simple joy that comes with a perfect strawberry shortcake. It’s not just a dessert; it’s a taste of sunshine, a celebration of ripe berries, and the satisfying contrast of tender biscuit, juicy fruit, and cloud-like cream. As a chef, I’ve always believed the best recipes are those that honor quality ingredients with straightforward technique.
This version strips away any fuss, focusing on a from-scratch biscuit that’s flaky and rich, berries that macerate into their own syrup, and freshly whipped cream. The result is a dessert that feels special enough for a celebration but is genuinely easy enough for a weeknight treat. Let’s make it.
This recipe is designed for success, balancing classic flavor with practical, chef-tested methods.
- Perfectly Flaky Biscuits: The secret is cold butter and a simple folding technique, creating layers that are tender yet sturdy enough to hold the juicy berries.
- Juicy, Not Soggy Berries: Macerating the strawberries with sugar draws out their natural juices, creating a flavorful syrup that soaks into the biscuit without making it mushy.
- Quick & Simple Process: From bowl to table in about 40 minutes, with most of that time being hands-off for baking and macerating.
- Make-Ahead Friendly: You can prepare each component—biscuits, berries, cream—a few hours ahead, making assembly a breeze when guests arrive.
- Endlessly Customizable: This is a fantastic template. Swap the fruit, add herbs to the biscuits, or flavor the cream to match the season.
- Crowd-Pleasing Appeal: It’s a universally loved dessert that looks impressive but requires no fancy decorating skills.
Ingredients You’ll Need
- Let’s gather our ingredients. This recipe is a beautiful example of how a few pantry staples, combined with the star of the show—fresh strawberries—can create something truly magical. Quality matters here, especially for the berries and the dairy.
- All-Purpose Flour: The foundation of our biscuits. I don’t recommend substituting with self-rising flour here, as we’re adding precise amounts of baking powder and salt.
- Granulated Sugar: We use a little in the biscuit dough for tenderness and flavor, and more to macerate the strawberries.
- Baking Powder: This is our leavening agent, responsible for the biscuit’s rise. Make sure yours is fresh for the best lift.
- Fine Sea Salt: Balances the sweetness and enhances all the other flavors. I prefer fine sea salt for its even distribution.
- Unsalted Butter: Must be cold. The small, solid pieces of butter will steam in the oven, creating those desirable flaky pockets.
- Heavy Cream: Used cold in the biscuit dough for richness and to bind it. We’ll also use more, chilled, for the whipped topping.
- Egg: Adds structure and richness to the biscuit. Keep it cold.
- Fresh Strawberries: Look for berries that are fragrant, bright red, and firm. Avoid any with white shoulders or soft spots.
- Powdered Sugar: Dissolves instantly in the whipped cream, preventing graininess.
- Pure Vanilla Extract: A splash in the whipped cream adds a warm, aromatic note.

Note: You’ll find the complete list of ingredients, along with their exact measurements, in the printable recipe card at the bottom of this post.
Kitchen Equipment Needed
You don’t need any specialty tools for this recipe. A few basics will get you there.
- Large Mixing Bowl: For combining your dry ingredients and cutting in the butter.
- Pastry Cutter or Fork: To work the cold butter into the flour. Your fingertips work too, just work quickly so the butter doesn’t melt.
- Baking Sheet & Parchment Paper: For baking the biscuits. Parchment prevents sticking and makes cleanup simple.
- 3-Inch Round Biscuit Cutter: A sharp-edged cutter gives the cleanest rise. A glass can be used in a pinch.
- Stand Mixer or Hand Mixer: Whipping cream by hand is possible but a mixer makes quick, stable whipped cream with minimal effort.
- Wire Cooling Rack: Essential for letting the biscuits cool evenly so they don’t get soggy on the bottom.
How to Make Strawberry Shortcake Recipe
Step 1: Mix the Dry Ingredients and Cut in the Butter
Preheat your oven to 425°F (220°C)—a hot oven is key for a good rise. In your large bowl, whisk together the flour, sugar, baking powder, and salt. This ensures even distribution.
Now, add your cold, cubed butter. Using a pastry cutter or your fingertips, work the butter into the flour until the mixture looks like coarse sand with visible pea-sized butter bits. Trust me, these butter pieces are what will create steam and flakiness in the oven.
Don’t aim for a uniform, fine meal.
Step 2: Form the Dough with Cold Liquid
In a separate small bowl or measuring cup, whisk the cold heavy cream and cold egg until just combined. Make a well in the center of your flour-butter mixture and pour the liquid in. Using a fork, stir gently from the center outward.
The goal is to moisten the flour until a shaggy, somewhat sticky dough comes together. The moment there are no dry flour patches, stop mixing. Overworking develops gluten and leads to tough biscuits.
Step 3: Fold and Cut the Biscuits
Lightly flour your work surface. Turn the shaggy dough out onto it and gently pat it into a 1-inch thick rectangle. Now, fold it in half like a book.
Pat it out again to 1-inch thickness and fold once more. Believe me, this simple folding technique is a chef’s trick for creating distinct, flaky layers. Finally, pat the dough into a 1-inch thick round.
Using your biscuit cutter, press straight down without twisting. Twisting seals the edges and hinders the rise. Re-roll scraps gently for the remaining biscuits.
Step 4: Bake to Golden Perfection
Place your biscuits about 2 inches apart on the parchment-lined baking sheet. This gives them room to expand. Brush the tops lightly with a bit of extra heavy cream—this promotes browning—and sprinkle with a pinch of sugar for a slight crunch.
Bake for 14-16 minutes. You’ll know they’re done when they’re puffed high and have a beautiful, even golden-brown top. Transfer them to a wire rack immediately to cool completely.
This step is non-negotiable; assembling with warm biscuits will melt the cream.
Step 5: Macerate the Berries and Whip the Cream
While the biscuits cool, prepare the toppings. In a medium bowl, combine your sliced strawberries and the 1/4 cup of granulated sugar. Stir gently and let them sit for at least 20-30 minutes.
Tip from me: You’ll see a pool of ruby-red syrup form at the bottom—that’s liquid gold for your shortcake. For the whipped cream, ensure your bowl and beaters are cold. Whip the heavy cream, powdered sugar, and vanilla on medium-high speed until soft peaks form.
Stop before it becomes grainy or buttery.
Step 6: Assemble and Serve Immediately
Now comes the fun part. Using a fork or serrated knife, split each cooled biscuit in half horizontally. Place the bottom half on a plate.
Spoon a generous amount of strawberries and their glorious syrup over it. Top with a large, billowy dollop of your freshly whipped cream. Crown it with the biscuit top, placing it slightly askew so all the layers are visible.
Step back and admire your creation, then serve right away for the ultimate texture experience.
A few insights from the professional kitchen can elevate your shortcake from good to exceptional.
- Temperature is Everything: The number one rule for flaky biscuits is keeping everything cold. I even chill my flour and bowl for 10 minutes before starting on a warm day. If the butter melts before baking, you lose the flaky layers.
- Handle with Care: Biscuit dough is not bread dough. The less you handle it, the more tender it will be. Mix until just combined and pat—don’t knead.
- The Maceration Magic: Don’t skip macerating the strawberries. The sugar doesn’t just sweeten them; it breaks down the cell walls slightly, intensifying the flavor and creating that essential syrup. If your berries aren’t super sweet, you can add an extra tablespoon of sugar.
- Whipped Cream Stability: For cream that holds its shape a bit longer, ensure everything is cold. You can also add a tiny pinch of cream of tartar (about 1/8 tsp) while whipping.
- Serving Strategy: Always assemble individual portions just before serving. If you need to prep for a crowd, arrange all components on the table and let guests build their own. This keeps the biscuits from becoming soggy.
Recipe Variations & Customizations
- This classic recipe is a wonderful canvas for creativity. Here are some tested variations I love.
- Lemon Zest Shortcake: Add the finely grated zest of one lemon to the dry ingredients when making the biscuit dough. It adds a beautiful, bright fragrance that pairs wonderfully with the berries.
- Cornmeal Biscuits: Substitute 1/2 cup of the all-purpose flour with fine-ground yellow cornmeal. This adds a delightful texture and a subtle, toasty flavor to the shortcakes.
- Balsamic Strawberries: Add 1-2 teaspoons of good quality balsamic vinegar to the strawberries as they macerate. It sounds unusual, but it deepens the berry flavor incredibly.
- Herbed Whipped Cream: Infuse your heavy cream by warming it gently with a few sprigs of fresh mint or basil, then chilling it completely before whipping. Strain out the herbs first.
- Mixed Berry Medley: Use a combination of strawberries, raspberries, and blueberries for a more complex fruit layer. You may need to adjust the macerating sugar slightly.
- Gluten-Free Option: Substitute the all-purpose flour with a 1:1 gluten-free baking blend. The texture will be slightly more crumbly but still delicious.
- Vegan Variation: Use a high-quality vegan butter and chilled full-fat coconut cream for both the biscuit liquid and the whipped topping. The flavor will be different but still tasty.
What to Serve With This Recipe
Strawberry shortcake is a star dessert that needs little accompaniment, but it fits beautifully into larger menus.
This dessert is perfect for ending a casual summer barbecue or a more formal spring luncheon. For a barbecue, serve it after grilled chicken or burgers and corn on the cob. The lightness of the shortcake is a perfect contrast to smoky, savory foods.
For a brunch or tea, it pairs wonderfully with quiche or a simple green salad. Beverage-wise, it’s fantastic with a glass of cold milk, a crisp Prosecco, or a cup of lightly sweetened iced tea. If you’re creating a full dessert spread, consider offering a small cheese plate beforehand or some dark chocolate truffles alongside for those who want a richer option.
Storage & Make-Ahead Instructions
- With a little planning, you can enjoy this dessert with minimal last-minute effort.
- Component Make-Ahead: You can bake the biscuits up to 8 hours ahead. Cool completely, then store in an airtight container at room temperature. Macerate the strawberries up to 4 hours ahead and keep them covered in the refrigerator. Whip the cream up to 2 hours ahead and keep it chilled.
- Storing Leftovers: Store any uneaten, assembled shortcakes loosely covered in the refrigerator for up to 24 hours. The biscuits will soften considerably but will still taste good. It’s best to store the components separately if possible.
- Freezing Biscuits: The baked and cooled biscuits freeze beautifully for up to 2 months. Wrap them individually in plastic wrap and place in a freezer bag. Thaw at room temperature and warm gently in a 300°F oven for 5 minutes before serving.
- Do Not Freeze assembled shortcakes or the whipped cream, as the texture will be ruined upon thawing.
Frequently Asked Questions
Q: Can I use frozen strawberries?
A: Yes, but thaw them completely and drain off most of the excess liquid before macerating with sugar. Frozen berries release much more water and can make your shortcake soggy if not drained.
Q: My biscuits didn’t rise very high. What happened?
A: The most common culprits are old baking powder, overworking the dough, or twisting the cutter. Also, ensure your oven is fully preheated to the correct temperature before baking.
Q: Can I make the biscuits without an egg?
A: Yes, you can replace the egg with an additional 3 tablespoons of cold heavy cream. The texture will be slightly less rich but still very good.
Q: How do I know when the whipped cream is ready?
A: Soft peaks mean that when you lift the beaters, the cream forms a peak that gently curls over at the tip. Stop here for shortcake. Stiff peaks stand straight up and are better for piping.
Q: Is there a substitute for heavy cream in the biscuit dough?
A: Full-fat buttermilk is an excellent substitute and will add a pleasant tang. The baking time may be slightly shorter, so keep an eye on them.
Q: Can I use store-bought biscuits or pound cake?
A: You can, and it will be tasty, but the texture and flavor of a homemade, flaky biscuit are truly what define a classic shortcake. It’s worth the extra 15 minutes.
Q: My berries aren’t very sweet. What can I do?
A: Add an extra tablespoon or two of sugar when macerating. You can also add a tiny pinch of salt to the berries, which can actually enhance their perceived sweetness.
Final Thoughts
This easy strawberry shortcake recipe is a testament to the power of simple, quality ingredients treated with care. It captures the essence of a classic dessert—the tender, buttery crumb of the biscuit, the burst of sweet-tart berry juice, and the cool, creamy finish—without any complicated techniques. As a professional, I’ve made countless versions, and this straightforward, tested method consistently delivers the perfect balance of flavor and texture that makes everyone ask for seconds.
I encourage you to give it a try, especially when strawberries are at their peak. Remember the key tips: keep everything cold for the biscuits, let the berries macerate to create their syrup, and assemble just before serving. Once you taste the difference a homemade biscuit makes, you’ll understand why this dessert has remained a beloved favorite for generations.
I’d love to hear how it turns out for you—share your creations online and tag me. Enjoy every delicious bite
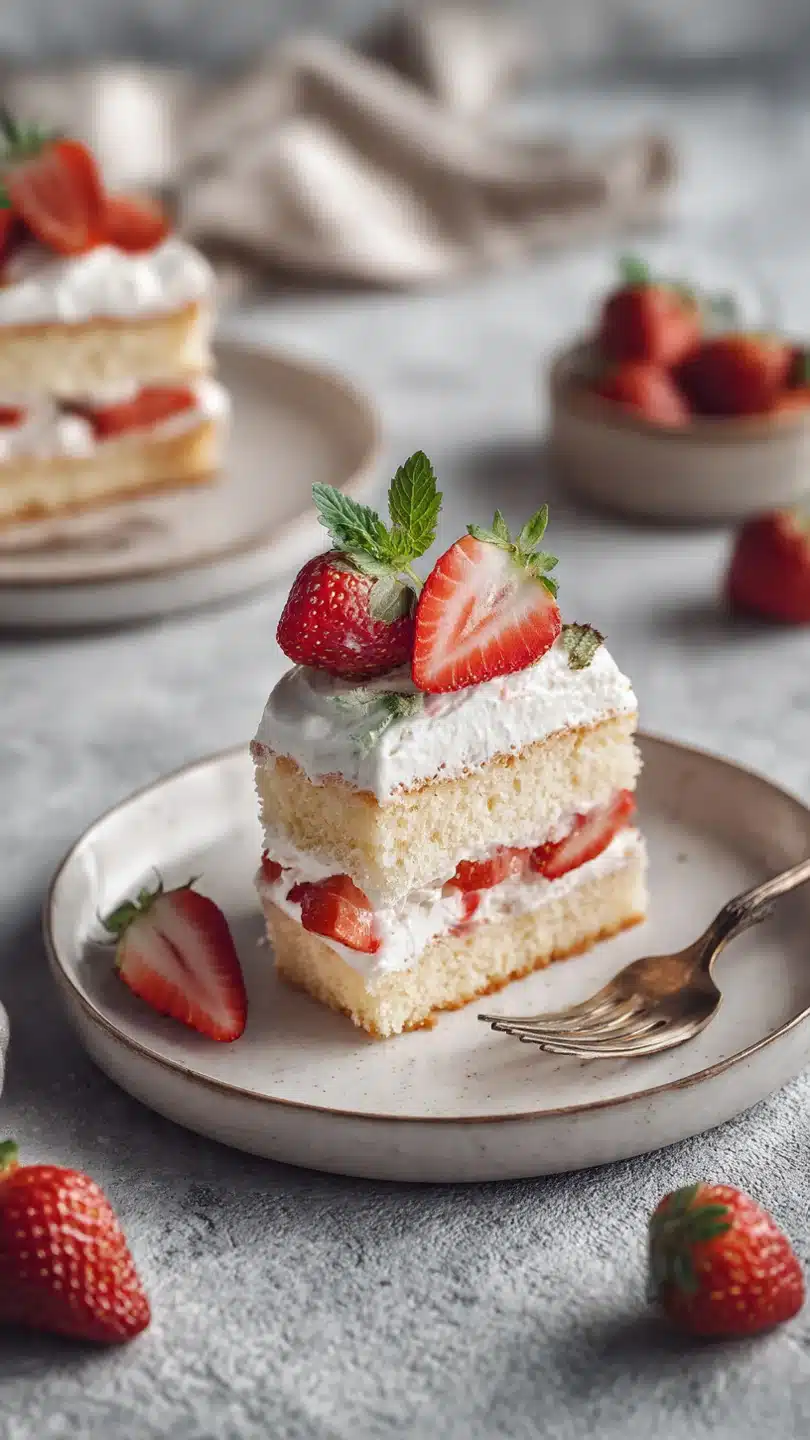
Classic Strawberry Shortcake
Ingredients
Equipment
Method
- Preheat your oven to 425°F (220°C) and line a baking sheet with parchment paper. In a large bowl, whisk together the flour, 1/4 cup sugar, baking powder, and salt. Using a pastry cutter or your fingertips, work the cold butter into the flour mixture until it resembles coarse crumbs with some pea-sized pieces of butter remaining. This creates flaky layers.
- In a small bowl or measuring cup, whisk together the 2/3 cup cold heavy cream and the cold egg until smooth. Make a well in the center of your dry ingredients and pour the cream mixture in. Using a fork, gently stir just until a shaggy dough forms. Do not overmix.
- Turn the dough out onto a lightly floured surface. Gently pat it into a 1-inch thick rectangle. Fold the dough in half, then pat it out again to 1-inch thickness. Repeat this folding process one more time. This builds flaky layers. Finally, pat the dough into a 1-inch thick round.
- Using a 3-inch round biscuit cutter or a glass, cut straight down into the dough without twisting. Gather the scraps, gently pat together, and cut remaining biscuits. You should get 6 biscuits. Place them 2 inches apart on the prepared baking sheet. Brush the tops lightly with heavy cream and sprinkle with a pinch of sugar.
- Bake for 14-16 minutes, or until the biscuits are puffed and golden brown on top. Transfer to a wire rack to cool completely. While they cool, prepare the strawberries and cream.
- In a medium bowl, combine the sliced strawberries and 1/4 cup granulated sugar. Stir gently, then let sit for at least 20-30 minutes. The sugar will draw out the juices, creating a delicious syrup. For the whipped cream, use a chilled bowl and beaters. Whip the 1 cup of cold heavy cream, powdered sugar, and vanilla on medium-high speed until soft peaks form.
- To assemble, split each cooled biscuit in half horizontally with a fork or serrated knife. Place the bottom half on a plate. Spoon a generous amount of the macerated strawberries and their juices over it. Top with a large dollop of whipped cream. Place the biscuit top slightly askew on the cream. Serve immediately.


