
Millionaire brownies
Imagine a dessert so decadent it feels like a luxury purchase, yet you made it with your own hands. That’s the magic of a perfect millionaire brownie. As a chef, I’ve always been fascinated by layered desserts—the technical challenge of getting each component just right, and the incredible payoff when you slice into that perfect cross-section.
This recipe is my tested-and-perfected version, born from a desire to create something truly special for birthdays, holidays, or just because. We’re building three distinct layers: a dense, fudgy chocolate foundation, a soft and chewy caramel center that doesn’t ooze messily, and a glossy dark chocolate ganache cap that cracks satisfyingly under your fork. The result is a textural symphony and a flavor bomb that will make you feel like a pastry pro.
- Three Perfect Textures: Experience the ideal contrast of fudgy, chewy, and smooth in every single bite.
- Make-Ahead Friendly: These brownies need to set in the fridge, making them the perfect dessert to prepare a day before your event.
- Impressively Homemade: While store-bought versions exist, the flavor and texture of homemade caramel and ganache are incomparable and will wow any guest.
- Customizable Foundation: The brownie base is a classic, reliable recipe you can use for countless other desserts.
- Sensory Satisfaction: From the smell of melting chocolate to the visual reward of those clean layers, the entire process is deeply satisfying.
- Diet-Flexible Options: With a few simple swaps (noted in the variations), you can adapt this recipe for different dietary needs.
Ingredients You’ll Need
Let’s gather our ingredients—this is where quality truly matters. Using high-percentage dark chocolate (I recommend 60-70% cacao) and real butter will give you a sophisticated, not-too-sweet result. Dutch-process cocoa powder is less acidic and provides a deeper chocolate color and flavor in the brownie base.
For the caramel, light corn syrup or golden syrup helps prevent crystallization, ensuring a smooth, creamy texture. Don’t be tempted to skip the sifting of dry ingredients; it incorporates air and prevents lumps, leading to a more tender crumb. Trust me, each component has a purpose in building this masterpiece.

Note: You’ll find the complete list of ingredients, along with their exact measurements, in the printable recipe card at the bottom of this post.
Kitchen Equipment Needed
You don’t need any specialty gadgets, but a few key tools will make the process smoother. A 9×9-inch square pan is ideal for achieving the right layer height. Parchment paper with overhanging edges is non-negotiable for clean removal.
A heavy-bottomed saucepan is essential for making the caramel; it distributes heat evenly and prevents scorching. A heatproof spatula will be your best friend for stirring the caramel and scraping bowls clean. Finally, a sharp chef’s knife run under hot water will give you those pristine, photogenic slices.
How to Make Millionaire Brownies Recipe
Step 1: Melt and Mix the Brownie Base
Begin by creating your double boiler. Place a heatproof bowl over a saucepan with an inch of simmering water—ensure the bowl doesn’t touch the water. Add the butter and chopped chocolate, stirring gently until you have a velvety, uniform mixture.
This gentle heat prevents the chocolate from seizing. While that cools slightly, whisk your sugar and room-temperature eggs vigorously. This isn’t just mixing; you’re dissolving the sugar and incorporating air, which gives the brownie structure.
Slowly stream in the warm chocolate, whisking constantly to gently cook the eggs without curdling them.
Step 2: Fold and Bake to Fudgy Perfection
Now, sift your dry ingredients—flour, cocoa, and salt—directly over the chocolate batter. Tip from me: sifting aerates the flour and breaks up any lumps in the cocoa, ensuring an even texture. Use a flexible spatula to fold gently.
Stop as soon as you no longer see dry flour; overmixing develops gluten and leads to a cakey, tough brownie. Pour this luxuriously thick batter into your prepared pan, smoothing the top. Bake until the top is set and shiny, and a toothpick emerges with a few clinging crumbs.
Believe me, pulling them out at this point is the secret to ultimate fudginess.
Step 3: Craft the Creamy Caramel Layer
Patience is key here. The brownie base must be completely cool before you start the caramel. In your heavy-bottomed saucepan, combine all the caramel ingredients.
Cook over medium heat, stirring constantly with your spatula to prevent the bottom from burning. Once it reaches a gentle boil, reduce the heat and let it simmer. You’ll see it thicken and darken to a lovely golden hue.
This takes about 5-7 minutes; rushing it won’t develop the proper flavor or texture. Stir in the vanilla off the heat, then pour it over the cool brownie, spreading it into an even, tempting layer.
Step 4: Create the Glossy Chocolate Ganache
This is the elegant finishing touch. Chop your chocolate finely so it melts evenly. Heat the cream just until you see small bubbles form around the edges—it should be steaming but not boiling vigorously.
Pour the hot cream over the chocolate and let it sit, untouched, for a full 3 minutes. This allows the chocolate to soften gradually. Then, start whisking slowly from the center.
You’ll see the magic happen as it emulsifies into a smooth, shiny, and pourable ganache. Pour it over the set caramel, tilting the pan to cover every corner.
Step 5: Set, Slice, and Serve
Now comes the hardest part: waiting. Carefully transfer the pan to the refrigerator. Let it chill for at least one hour, or until the ganache is firm to the touch.
To slice, use the parchment paper sling to lift the entire block onto a cutting board. Warm a sharp knife under hot water, dry it thoroughly, and make clean, confident cuts. For a professional touch, wipe the knife clean between each cut.
Step back and admire your work—those perfect layers are a testament to your skill. Serve slightly chilled.
- Temperature is Everything: Room temperature eggs incorporate more easily into the batter, and cool brownies are essential before adding the warm caramel. If the brownie is warm, the caramel will sink in and create a muddy layer.
- Caramel Consistency: The caramel will continue to thicken as it cools. If you cook it until it’s very thick in the pan, it may set too firm. Aim for a texture that thickly coats the back of your spoon.
- Ganache Guarantee: If your ganache looks split or greasy, it’s often because the cream was too hot. All is not lost! Add a tablespoon of room-temperature milk and whisk vigorously to bring it back together.
- Clean Slices: For absolutely perfect squares, chill the entire block until very firm, then score the ganache lightly with a knife before making your final cuts with a hot blade.
- Avoiding Cracks: Let the brownie cool gradually in the pan on a wire rack to prevent the top from cracking due to a sudden temperature change.
Recipe Variations
- Salted Caramel Twist: Add an extra 1/2 teaspoon of fine sea salt to the caramel layer and use a flaky salt like Maldon for the garnish to heighten the sweet-and-salty contrast.
- Nutty Millionaire: Press 3/4 cup of toasted pecans or walnuts into the top of the warm brownie base before it cools. The caramel will settle around them for added crunch.
- Orange Zest Infusion: Add the finely grated zest of one large orange to the brownie batter and use an orange-flavored dark chocolate for the ganache for a sophisticated citrus note.
- Espresso Boost: Dissolve 1 tablespoon of instant espresso powder into the vanilla extract before adding it to the brownie batter. This deepens the chocolate flavor without making it taste like coffee.
- Gluten-Free Adaptation: Substitute the all-purpose flour with a 1:1 gluten-free baking blend. The brownie’s fudgy texture makes it very forgiving for this swap.
- Dulce de Leche Shortcut: For a quicker caramel layer, you can use a 13.4 oz can of store-bought dulce de leche. Warm it slightly to make it spreadable.
- Milk Chocolate Topping: For a sweeter, family-friendly version, use high-quality milk chocolate for the ganache instead of dark.
What to Serve With This Recipe
These brownies are a rich, stand-alone dessert, but they can be elevated for special occasions. Serve a small square alongside a scoop of vanilla bean ice cream or a dollop of freshly whipped cream to cut through the richness. For a dinner party, pair them with a shot of espresso or a glass of tawny port.
They are perfect for holiday cookie platters, birthday celebrations, or as the grand finale to a steak dinner. I love gifting them in a nice box—they keep well and travel beautifully, making them a much-appreciated homemade present.
Storage & Make-Ahead Instructions
- Refrigeration: Due to the dairy-based caramel and ganache, these brownies must be stored in the refrigerator. Place them in a single layer in an airtight container, with parchment between layers if stacking. They will keep for up to 5 days.
- Freezing: These freeze exceptionally well. Wrap individual squares tightly in plastic wrap, then place them in a freezer bag or container. Freeze for up to 3 months. Thaw overnight in the refrigerator.
- Make-Ahead Strategy: This is an ideal make-ahead dessert. Prepare the brownies completely 1-2 days before you need them. The flavors meld and improve, and the layers set firmly, making them easier to slice cleanly.
- Serving Temperature: I recommend serving them straight from the fridge for about 15 minutes. This allows the flavors to bloom while maintaining the distinct texture of each layer.
Frequently Asked Questions
Q: Can I use a boxed brownie mix for the base?
A: You can, but the result won’t be as fudgy or flavorful. A box mix tends to be more cake-like. If you do, choose a “fudge” style mix and prepare it according to the directions for a 9×9 pan, slightly underbaking it.
Q: Why did my caramel turn grainy?
A: Graininess is caused by sugar crystals forming. To prevent this, ensure you stir constantly while the sugar dissolves initially, and use corn syrup which interferes with crystallization. Don’t stir vigorously once it’s boiling.
Q: How do I know when the caramel is done cooking?
A: It should coat the back of a spoon thickly and hold a line when you run your finger through it. The color will be a light golden brown, and it will have thickened noticeably but still be pourable.
Q: My ganache is too runny and won’t set. What happened?
A: This usually means the ratio of cream to chocolate is off, or the chocolate wasn’t chopped finely enough. To fix it, add more finely chopped chocolate (a tablespoon at a time) to the warm ganache and stir until melted and incorporated.
Q: Can I make these without corn syrup?
A: Yes, golden syrup is a perfect substitute. You can also use honey, though it will impart its own flavor. Without any invert sugar, the caramel is more prone to crystallization.
Q: How do I get my layers perfectly even?
A: Use the back of a spoon or a small offset spatula to spread each layer. Pour the caramel and ganache into the center of the pan and gently tilt the pan in all directions to let gravity do the work of spreading it evenly.
Q: Are these too sweet?
A: Using high-percentage dark chocolate (60-70%) for both the brownie and ganache balances the sweetness of the caramel beautifully. The result is rich and decadent, not cloyingly sweet.
Final Thoughts
Creating these millionaire brownies is more than just following a recipe—it’s a rewarding culinary project that teaches fundamental techniques like tempering, caramelization, and emulsion. The moment you slice through and reveal those three flawless layers is a genuine thrill. This recipe is built on professional principles but designed for the home cook, with clear steps to guide you to success.
I encourage you to try it, to share it with people you care about, and to savor the pride that comes from making something truly extraordinary. Don’t forget to let me know how it turned out! Share your creations online and tag me.
Once you’ve mastered this classic, explore my other layered dessert recipes for your next baking adventure. Happy baking
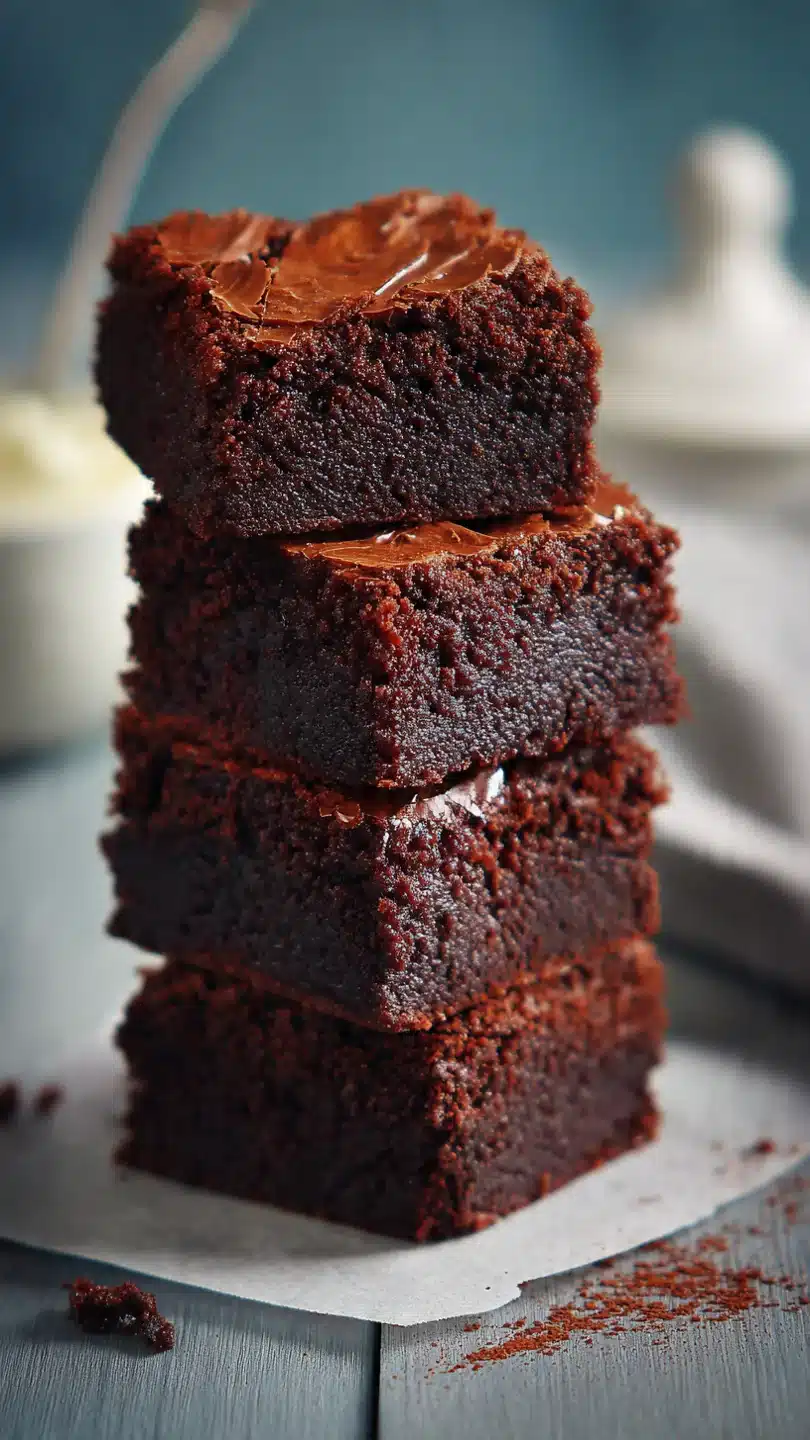
Millionaire Brownies
Ingredients
Equipment
Method
- Preheat your oven to 350°F (175°C). Grease a 9×9-inch square baking pan with butter, then line it with parchment paper, leaving an overhang on two opposite sides. This creates a sling for easy removal. In a heatproof bowl set over a saucepan of gently simmering water (double boiler), melt the 1 cup of butter with the 8 oz of chopped dark chocolate. Stir until completely smooth, then remove from heat and let cool slightly.
- In a large mixing bowl, whisk together the granulated sugar, room temperature eggs, and 1 tsp vanilla extract until the mixture is pale and slightly thickened, about 2 minutes. Slowly pour the warm (not hot) chocolate mixture into the egg mixture while whisking constantly. This tempers the eggs to prevent scrambling.
- Sift the flour, cocoa powder, and 1/2 tsp fine sea salt directly into the chocolate batter. Use a spatula to fold gently until just combined and no dry streaks remain. Be careful not to overmix. Pour the thick batter into your prepared pan, smoothing it into an even layer.
- Bake for 30-35 minutes. The brownie is done when the top is set and shiny, and a toothpick inserted into the center comes out with a few moist crumbs (not wet batter). Trust me, slightly underbaked is better than overbaked for fudgy texture. Place the pan on a wire rack to cool completely.
- While the brownie cools, make the caramel. In a medium, heavy-bottomed saucepan, combine the sweetened condensed milk, brown sugar, 1/2 cup butter, and corn syrup. Cook over medium heat, stirring constantly with a heatproof spatula, until the butter and sugar have melted. Bring to a gentle boil, then reduce heat to low and simmer for 5-7 minutes, stirring continuously, until the mixture thickens slightly and turns a light golden caramel color. Remove from heat, stir in the 1 tsp vanilla, and pour evenly over the completely cooled brownie base. Let set at room temperature for at least 30 minutes.
- For the ganache, heat the heavy cream in a small saucepan until it just begins to simmer (small bubbles around the edges). Pour the hot cream over the 8 oz of chopped chocolate in a bowl. Let it sit for 3 minutes, then whisk slowly from the center outwards until you have a smooth, glossy ganache. Pour over the set caramel layer, tilting the pan to spread it evenly. If desired, sprinkle with flaky sea salt. Refrigerate for at least 1 hour, or until the ganache is fully set, before slicing.


