
Thick brownies
There’s something truly satisfying about sinking your teeth into a thick, fudgy brownie. The rich chocolate flavor, the chewy texture, and the glossy top all combine to create a dessert that’s hard to resist. Whether you’re baking for a special occasion or just craving a sweet treat, these thick brownies are the perfect choice.
In this post, I’ll share my tried-and-true recipe, along with professional tips and techniques to ensure your brownies turn out perfect every time.
- Decadent Chocolate Flavor: These brownies are packed with cocoa and chocolate chips for an intense chocolate experience.
- Thick and Chewy Texture: The higher ratio of sugar to flour results in a dense, fudgy brownie that’s sure to satisfy.
- Easy to Make: With simple ingredients and straightforward steps, even novice bakers can achieve great results.
- Versatile: Enjoy them on their own, or pair with ice cream, whipped cream, or your favorite toppings.
- Customizable: Add nuts, different types of chocolate, or even swirl in some peanut butter for a personalized touch.
- Perfect for Any Occasion: Whether it’s a party, a family gathering, or a quiet night in, these brownies are always a hit.
Ingredients You’ll Need
Let’s gather our ingredients—these simple pantry staples create magic together to produce the perfect thick brownies.
For the Brownies:- Unsalted Butter: 1 cup, melted and cooled slightly. The butter adds richness and moisture to the brownies.
- Granulated Sugar: 2 cups. Sugar not only sweetens the brownies but also contributes to their thick, chewy texture.
- Large Eggs: 4. Eggs help bind the ingredients and add structure to the brownies.
- Vanilla Extract: 1 teaspoon. Vanilla enhances the overall flavor of the brownies.
- All-Purpose Flour: 1 cup. Flour provides structure without making the brownies cakey.
- Unsweetened Cocoa Powder: 1 cup. Cocoa is the star of the show, giving the brownies their deep chocolate flavor.
- Baking Powder: 1/2 teaspoon. A small amount of baking powder helps the brownies rise slightly.
- Salt: 1/4 teaspoon. Salt enhances the flavors and balances the sweetness.
- Chocolate Chips: 1 cup (optional). Chocolate chips add extra chocolatey goodness and a bit of texture.
When choosing your ingredients, opt for high-quality cocoa powder and chocolate chips for the best flavor. If you’re looking for substitutions, you can use salted butter and reduce the added salt, or use dark chocolate chips for a more intense chocolate experience.

Note: You’ll find the complete list of ingredients, along with their exact measurements, in the printable recipe card at the bottom of this post.
Kitchen Equipment Needed
To make these thick brownies, you’ll need a few basic pieces of equipment:
- 9×9 inch baking pan: This size is perfect for achieving the right thickness.
- Parchment paper: For easy removal and clean cuts.
- Large mixing bowl: To combine your wet and dry ingredients.
- Whisk: For mixing the batter smoothly.
- Sifter: To ensure your dry ingredients are well combined and lump-free.
How to Make Thick Brownies Recipe
Step 1: Prepare the Baking Pan
Start by preheating your oven to 350°F (175°C). Grease your 9×9 inch baking pan and line it with parchment paper, leaving some overhang for easy removal. Trust me, this step makes all the difference in achieving perfect, easy-to-cut brownies.
Step 2: Mix the Wet Ingredients
In a large bowl, whisk together the melted butter and sugar until well combined. Add the eggs one at a time, whisking well after each addition. Stir in the vanilla extract.
Believe me, taking the time to fully incorporate the eggs ensures a smooth, even texture.
Step 3: Combine the Dry Ingredients
In a separate bowl, sift together the flour, cocoa powder, baking powder, and salt. Gradually add the dry ingredients to the wet ingredients, mixing until just combined. Fold in the chocolate chips if using.
Tip from me: avoid overmixing to keep your brownies tender and fudgy.
Step 4: Bake the Brownies
Pour the batter into the prepared baking pan and spread it evenly. Bake for 25-30 minutes, or until a toothpick inserted into the center comes out with a few moist crumbs. Now comes the fun part—watching your brownies transform into a glossy, crackly-topped delight.
Step 5: Cool and Serve
Allow the brownies to cool completely in the pan before cutting into squares and serving. Step back and admire your handiwork—these thick, fudgy brownies are sure to impress. Enjoy them on their own, or with a scoop of ice cream for an extra treat.
Pro tip: To ensure your brownies have the perfect thick and chewy texture, use a higher ratio of sugar to flour. This helps create a denser, more fudgy brownie. Temperature matters: Use room temperature eggs for easier incorporation into the batter. Cold eggs can cause the melted butter to solidify, leading to an uneven texture. Visual cues: Look for a shiny, crackly top and slightly firm edges as signs that your brownies are done. A toothpick inserted into the center should come out with a few moist crumbs, not completely clean. Common mistake: Avoid overbaking your brownies. They will continue to cook a bit after being removed from the oven, so err on the side of slightly underbaking for the fudgiest results.Recipe Variations & Customizations
- Nutty Delight: Fold in 1/2 cup of chopped walnuts or pecans for added crunch and flavor.
What to Serve With This Recipe
These thick brownies are delicious on their own, but they also pair well with a variety of accompaniments. Serve them warm with a scoop of vanilla ice cream for a classic dessert. For a more sophisticated touch, pair them with a drizzle of caramel sauce or a dollop of whipped cream.
If you’re hosting a party, consider serving them alongside a selection of fresh berries or a fruit compote for a refreshing contrast.
For beverages, a glass of cold milk is the perfect complement to the rich chocolate flavor. Coffee or espresso also pairs well, especially if you’re looking for a more adult dessert option. These brownies are versatile enough to fit into any menu, whether it’s a casual family dinner or a more formal gathering.
Storage & Make-Ahead Instructions
- To store your thick brownies, keep them in an airtight container at room temperature for up to 3 days. For longer storage, refrigerate them for up to a week or freeze for up to 3 months. When freezing, wrap the brownies tightly in plastic wrap and then in aluminum foil to prevent freezer burn.
To reheat, simply let the brownies come to room temperature or warm them in the microwave for a few seconds. Avoid reheating in the oven, as this can dry them out.
For make-ahead convenience, you can prepare the batter and store it in the refrigerator for up to 24 hours before baking. This is a great option if you want to bake fresh brownies for a party or event.
Nutritional Benefits
- While brownies are a treat, they can offer some nutritional benefits. Cocoa powder is rich in antioxidants, which can help combat oxidative stress in the body. Moderate consumption of dark chocolate has been linked to improved heart health and better cognitive function. Of course, enjoy these brownies in moderation as part of a balanced diet.
Frequently Asked Questions
Q: Can I make this recipe ahead of time?
Yes, you can prepare the batter and store it in the refrigerator for up to 24 hours before baking. The baked brownies can also be stored at room temperature for up to 3 days.
Q: What can I use instead of chocolate chips?
You can use chopped chocolate bars, nuts, or even dried fruit for a different texture and flavor. Feel free to get creative with your mix-ins.
Q: How do I know when the brownies are done?
Look for a shiny, crackly top and slightly firm edges. A toothpick inserted into the center should come out with a few moist crumbs, not completely clean.
Q: Can I freeze these brownies?
Yes, you can freeze the brownies for up to 3 months. Wrap them tightly in plastic wrap and then in aluminum foil to prevent freezer burn.
Q: How can I adjust the flavor of the brownies?
You can add extracts like peppermint or orange, or mix in different types of chocolate chips or nuts to customize the flavor to your liking.
Q: What’s the best way to cut brownies cleanly?
Use a sharp knife and wipe it clean between cuts for the cleanest slices. Chilling the brownies slightly before cutting can also help.
Q: Can I make these brownies gluten-free?
Yes, you can use a 1:1 gluten-free flour blend in place of all-purpose flour for a gluten-free version.
Q: What if my brownies turn out too cakey?
To achieve a fudgier texture, use less flour and slightly underbake the brownies. The higher sugar content in this recipe also helps create a denser, chewier brownie.
Final Thoughts
These thick brownies are a testament to the joy of simple, delicious baking. With their decadent chocolate flavor and chewy texture, they’re sure to become a favorite in your dessert repertoire. The professional tips and techniques I’ve shared will help you achieve perfect results every time, whether you’re a seasoned baker or just starting out.
I encourage you to give this recipe a try and let me know how it turns out. Your feedback and ratings are invaluable, so please share your thoughts in the comments below. And don’t forget to share your thick brownies on social media—I’d love to see your creations!
For more delicious recipes and baking inspiration, be sure to explore my blog further. Happy baking, and enjoy every bite of these irresistible thick brownies!
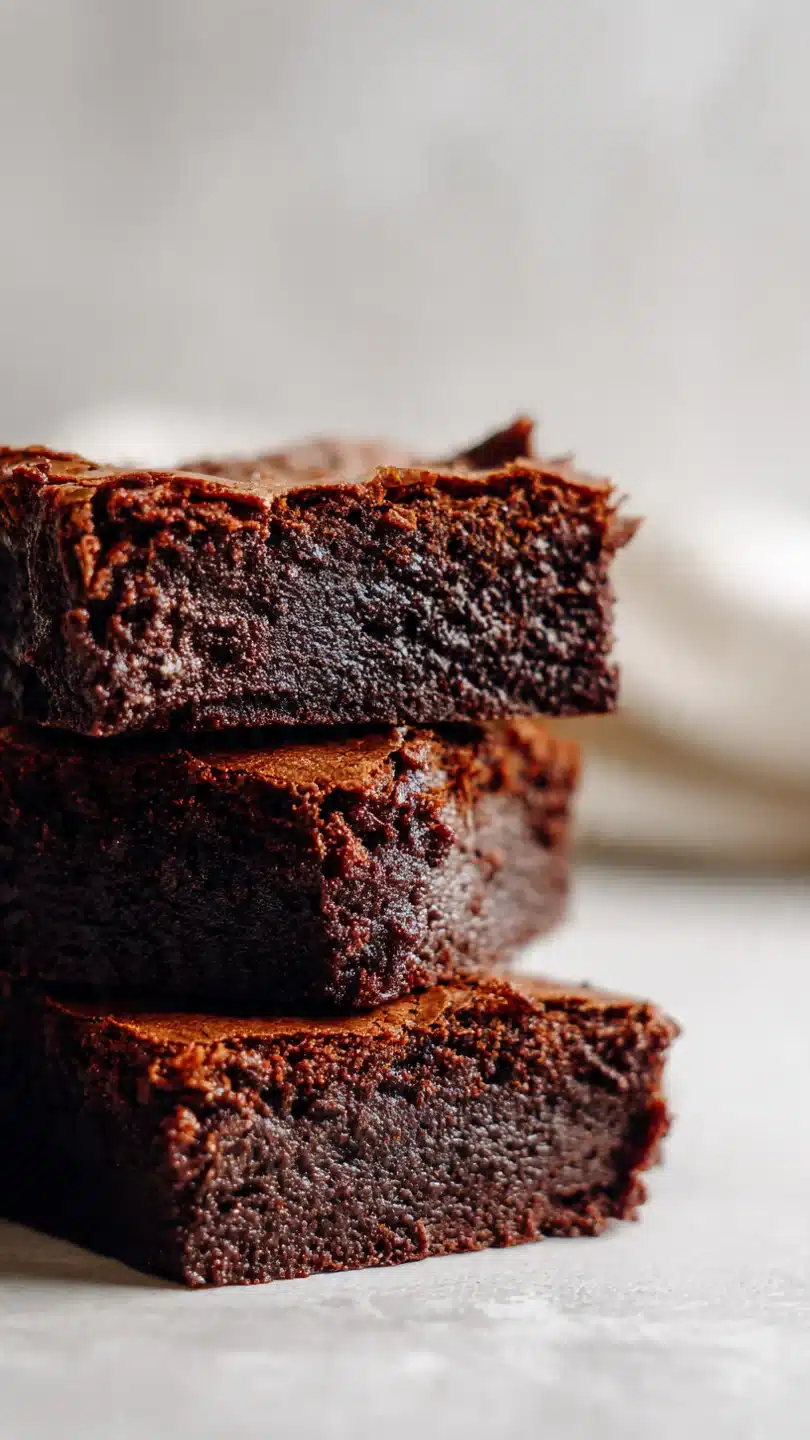
Thick Brownies
Ingredients
Equipment
Method
- Preheat your oven to 350°F (175°C). Grease a 9×9 inch baking pan and line it with parchment paper for easy removal.
- In a large bowl, whisk together the melted butter and sugar until well combined. Add the eggs one at a time, whisking well after each addition. Stir in the vanilla extract.
- In a separate bowl, sift together the flour, cocoa powder, baking powder, and salt. Gradually add the dry ingredients to the wet ingredients, mixing until just combined. Fold in the chocolate chips if using.
- Pour the batter into the prepared baking pan and spread it evenly. Bake for 25-30 minutes, or until a toothpick inserted into the center comes out with a few moist crumbs.
- Allow the brownies to cool completely in the pan before cutting into squares and serving. Enjoy your thick, fudgy brownies!


