
Toffee brownies
There’s something magical about the moment a warm, fudgy brownie meets the cool creaminess of vanilla ice cream. Now, imagine that classic experience elevated with a buttery, crunchy surprise in every bite. That’s the promise of these toffee brownies.
As a chef who has made more brownie batches than I can count, I’ve refined this recipe to deliver the ideal texture: a dense, moist interior that practically melts, those coveted chewy edges, and a top with that professional, shiny crackle. The addition of toffee bits isn’t just a mix-in; it’s a transformation, adding a caramelized depth and a delightful textural contrast that makes these impossible to resist. Whether you’re baking for a potluck, a family treat, or just because, this recipe is your reliable path to dessert perfection.
This recipe is designed for success and maximum enjoyment. Here’s why it’s a keeper:
- One-Bowl Simplicity: You’ll mix everything in a single bowl, meaning less cleanup and more time enjoying your creation.
- Texture Triumph: We achieve the holy grail of brownie textures: fudgy center, chewy edges, and a crunchy toffee topping.
- Forgiving Method: No need for a mixer or fussy techniques. The simple whisk-and-fold method is foolproof.
- Customizable Base: Love nuts? Prefer dark chocolate? This fudgy base is the perfect canvas for your favorite additions.
- Crowd-Pleasing Flavor: The combination of rich chocolate and buttery toffee appeals to virtually every sweet tooth.
- Make-Ahead Friendly: These brownies taste even better the next day and store beautifully, making them perfect for planning.
Ingredients You’ll Need
- Let’s gather our ingredients—this short list of pantry staples is about to create some serious magic. The quality of your cocoa powder is the star here, so choose one you love the taste of. Dutch-processed cocoa will give a darker, milder chocolate flavor, while natural cocoa offers a more robust, slightly fruity note. Both work wonderfully.
- Unsalted butter: Melted and slightly cooled. It provides rich flavor and that dense, fudgy crumb.
- Granulated sugar: Sweetens the batter and, when whisked with the eggs, is key to forming that shiny, crackly top layer.
- Eggs: Use large eggs at room temperature. They bind the batter and their proteins set the structure as the brownies bake.
- Pure vanilla extract: A flavor enhancer that rounds out the chocolate notes.
- All-purpose flour: Spooned and leveled to avoid over-measuring. Just enough to provide structure without making the brownies cakey.
- Unsweetened cocoa powder: Sifted to prevent lumps. This is our primary chocolate flavor, so skip the drinking chocolate mix.
- Salt: A critical ingredient that intensifies all the other flavors and balances the sweetness.
- Toffee bits: I recommend the Heath brand bits for consistent quality. We’ll use most in the batter and save some for a crunchy topping.
- Semi-sweet chocolate chips (optional): For those who believe there’s no such thing as too much chocolate. They create little pockets of meltiness.

Note: You’ll find the complete list of ingredients, along with their exact measurements, in the printable recipe card at the bottom of this post.
Kitchen Equipment Needed
You don’t need any specialty gear for this recipe. A 9×13 inch metal baking pan is ideal because it heats quickly and evenly, promoting those chewy edges. Parchment paper with an overhang is your best friend for flawless removal.
A large mixing bowl, a whisk for incorporating air, and a spatula for folding are the only other essentials. A fine-mesh sieve for sifting your cocoa powder will ensure a perfectly smooth batter. Finally, a wire cooling rack is important for allowing air to circulate and stop the cooking process evenly.
How to Make Toffee Brownies Recipe
Step 1: Prep Your Pan and Oven
Preheat your oven to 350°F (175°C). Trust me, an accurate oven temperature is the first secret to perfect baking. Line your metal 9×13 inch pan with parchment paper, leaving a couple of inches of overhang on the two long sides.
Lightly grease any exposed pan. This setup isn’t just for easy cleanup; it guarantees you can lift the entire brownie slab out for pristine, crumb-free cutting. A well-prepped pan is a non-negotiable step in any professional kitchen.
Step 2: Build the Base Batter
In your large bowl, combine the melted (and slightly cooled) butter with the granulated sugar. Whisk them together for a good minute until they’re fully combined. Now, add your room-temperature eggs one at a time, whisking vigorously after each addition.
Believe me, this is where the magic starts. You’re looking for the mixture to become thick, smooth, and slightly paler in color. This step incorporates air, which is what gives you that beautiful, shiny, paper-like crust on top.
Whisk in the vanilla extract.
Step 3: Incorporate Dry Ingredients and Mix-Ins
Sift the flour, cocoa powder, and salt directly into the wet ingredients. Tip from me: sifting prevents lumps of cocoa and aerates the flour, leading to a more tender brownie. Now, put the whisk away.
Switch to a spatula and gently fold the dry ingredients into the wet until just combined and no dry streaks remain. Overmixing is the enemy of fudgy brownies, as it develops gluten. Once the batter is nearly mixed, fold in one cup of the toffee bits and the chocolate chips if you’re using them.
Step 4: Bake to Perfection
Pour the thick, luxurious batter into your prepared pan, using the spatula to spread it evenly into all the corners. Sprinkle the remaining half-cup of toffee bits evenly over the top—this creates that irresistible crunchy topping. Bake on the center rack for 30 to 35 minutes.
Here’s the pro test: a toothpick inserted about two inches from the edge should come out with a few moist crumbs clinging to it. If it comes out completely clean, the brownies are overbaked. The center should look set and not jiggly.
Step 5: Cool, Cut, and Serve
Transfer the pan to a wire cooling rack. This is the ultimate test of patience: you must let the brownies cool completely in the pan, about 2 hours. I know it’s hard, but they continue to set and develop flavor as they cool.
Cutting into warm brownies results in a gooey mess. Once completely cool, use the parchment paper overhang to lift the entire slab onto a cutting board. Use a sharp knife, wiping it clean between cuts, to slice into squares.
Step back and admire your work—then dig into the perfect blend of fudgy, chewy, and crunchy.
A few chef’s secrets will elevate your brownies from good to exceptional.
- The Egg Whisk: Don’t rush whisking the eggs and sugar. That 2-3 minutes of vigorous whisking is what creates the stable emulsion and air bubbles that rise during baking, forming the signature shiny, crackly crust.
- Baking Pan Material: Always use a light-colored metal pan. Glass or dark metal pans retain heat differently and often lead to over-baked edges and an under-cooked center. The recipe timing is calibrated for metal.
- The Doneness Test: Look for the “crumb, not clean” signal. A few sticky crumbs on the toothpick means a fudgy center. A clean toothpick means you’ve crossed into cakey or dry territory.
- Cooling is Part of Baking: Resisting the urge to cut is crucial. As the brownies cool, the structure solidifies. Cutting too soon releases steam and moisture, making them gummy and difficult to slice cleanly.
- For Ultra-Clean Cuts: For picture-perfect squares, chill the completely cooled brownie slab in the refrigerator for 20-30 minutes before slicing. Use a sharp chef’s knife and dip it in hot water, wiping it dry between each cut.
Recipe Variations
- This fantastic fudgy base is incredibly versatile. Here are some tested variations to make it your own.
- Salted Caramel Toffee: Drizzle 1/2 cup of warm salted caramel sauce over the batter just before adding the final toffee topping. The salt enhances the buttery toffee flavor beautifully.
- Espresso Toffee: Dissolve 1 tablespoon of instant espresso powder into the melted butter before adding the sugar. It won’t make the brownies taste like coffee, but it will deepen and enrich the chocolate flavor profoundly.
- Nutty Delight: Replace 1/2 cup of the toffee bits in the batter with 1 cup of chopped toasted pecans or walnuts. The nuttiness pairs wonderfully with the toffee.
- Mint Chocolate Toffee: Add 1 teaspoon of peppermint extract with the vanilla. Use Andes mint baking chips instead of, or in addition to, the chocolate chips for a refreshing twist.
- Gluten-Free Adaptation: Substitute the all-purpose flour with a 1:1 gluten-free baking blend. The result is equally fudgy and delicious.
- Dark Chocolate Sea Salt: Use dark chocolate chips and sprinkle the top with a few pinches of flaky sea salt along with the toffee bits for a sophisticated, bittersweet profile.
What to Serve With This Recipe
These brownies are a star on their own, but they can anchor an unforgettable dessert spread. For the classic, unbeatable pairing, serve a warm square à la mode with a scoop of high-quality vanilla bean ice cream. The hot-cold contrast is sublime.
For a dinner party, crumble a brownie into a glass, layer with chocolate pudding and whipped cream for an easy deconstructed parfait. They’re perfect for bake sales, lunchboxes, or as a sweet ending to a casual weeknight meal. Beverage pairings include a cold glass of milk, a rich stout beer, or a cup of black coffee to balance the sweetness.
Storage & Make-Ahead Instructions
- Proper storage ensures your brownies stay fresh and delicious.
- Room Temperature Storage: Once completely cooled, store brownies in an airtight container at room temperature for up to 4 days. Place a sheet of parchment between layers if stacking.
- Freezing for Longevity: These brownies freeze exceptionally well. Wrap the whole slab or individual squares tightly in plastic wrap, then place in a freezer bag. They will keep for up to 3 months. Thaw at room temperature or warm gently in the microwave.
- Make-Ahead Strategy: You can bake the brownies 1-2 days in advance. In fact, many believe they taste even better the next day as the flavors meld. Store the uncut slab tightly wrapped at room temperature.
- Reheating Tip: To recapture that fresh-from-the-oven warmth and softness, microwave a square for 10-15 seconds. Avoid overheating, as it can melt the toffee bits into a sticky mess.
Frequently Asked Questions
Q: Can I use a glass or ceramic baking dish instead of metal?
A: You can, but you’ll need to adjust. Glass retains heat longer, which can lead to over-baked edges. If using glass, reduce the oven temperature by 25°F (to 325°F) and start checking for doneness a few minutes earlier.
The texture might be slightly different.
Q: My toffee bits sank to the bottom. How can I prevent this?
A: This is common with heavier mix-ins. Toss the toffee bits meant for the batter in a tablespoon of the measured flour before folding them in. The light coating helps suspend them throughout the batter.
Q: Can I make these without toffee bits?
A: Absolutely! You’ll have a fantastic classic fudgy brownie. You can keep the recipe as-is or replace the toffee bits with an equal amount of another mix-in like chocolate chips, nuts, or dried cherries.
Q: How do I get a really shiny, crackly top on my brownies?
A: The shine comes from the sugar dissolving and rising to the surface. The key is thoroughly whisking the granulated sugar and eggs until the mixture is thick and smooth. This step cannot be rushed.
Also, avoid overmixing once the flour is added.
Q: Are these brownies cakey or fudgy?
A: This recipe is specifically designed for a fudgy and chewy texture. The high fat-to-flour ratio (from butter and eggs) and minimal mixing after adding flour ensure a dense, moist crumb, not a light, cakey one.
Q: Can I double this recipe?
A: I don’t recommend doubling it to bake in one giant pan, as it won’t bake evenly. Instead, make two separate batches and bake them in two 9×13 pans, rotating them in the oven halfway through.
Q: Why is it important to use room temperature eggs?
A: Room-temperature eggs incorporate more easily and create a better emulsion with the butter and sugar, leading to a smoother, more voluminous batter. Cold eggs can cause the melted butter to seize up slightly.
Q: Can I use homemade toffee?
A: Yes, but chop it into small, pea-sized pieces. Be aware that homemade toffee is often softer than the commercially stabilized bits and may melt more during baking, creating delicious caramel pockets.
Final Thoughts
This toffee brownie recipe represents everything I love about baking: simple techniques, quality ingredients, and a spectacular payoff. It’s the recipe I turn to when I need a guaranteed crowd-pleaser or a personal treat that feels indulgent. The contrast of the rich, fudgy chocolate with the buttery crunch of toffee is a combination that never fails to delight.
I’ve shared all my professional tips and tested every variation so you can bake with confidence. Remember, the secret is in the whisk, the patience to let them cool, and the joy of sharing. I hope this recipe becomes a cherished staple in your kitchen.
If you make it, I’d love to hear how it turned out! Share your results and any creative twists you tried. Happy baking
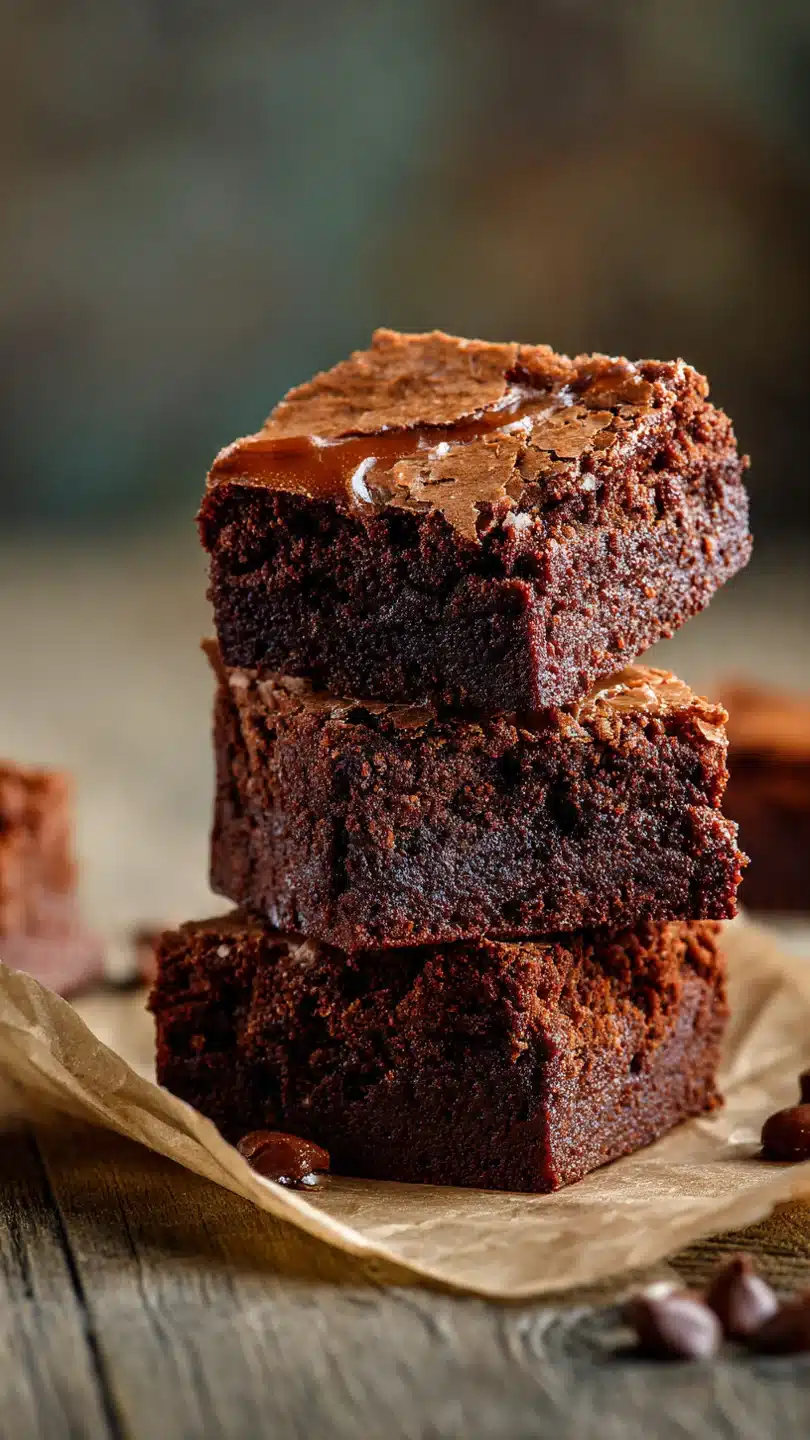
Ultimate Toffee Brownies
Ingredients
Equipment
Method
- Preheat your oven to 350°F (175°C). Line a 9×13 inch metal baking pan with parchment paper, leaving an overhang on two sides for easy removal. Lightly grease any exposed pan. This setup is non-negotiable for perfect, clean-edged brownies.
- In a large mixing bowl, whisk together the melted, cooled butter and granulated sugar for about 1 minute until well combined. Add the room-temperature eggs one at a time, whisking vigorously after each addition until the mixture is thick, smooth, and slightly pale. Whisk in the vanilla extract. This step incorporates air, which helps create that shiny, crackly top.
- Sift the flour, cocoa powder, and salt directly into the wet ingredients. Using a spatula, fold gently until just combined and no dry streaks remain. Overmixing develops gluten, leading to cakey brownies—we want fudgy. Fold in 1 cup of the toffee bits and the chocolate chips, if using.
- Pour the thick batter into your prepared pan, spreading it evenly into the corners. Sprinkle the remaining 1/2 cup of toffee bits evenly over the top. Bake on the center rack for 30-35 minutes. The brownies are done when a toothpick inserted 2 inches from the edge comes out with a few moist crumbs, but the center is set.
- Transfer the pan to a wire cooling rack. This is the hardest part: let the brownies cool completely in the pan, about 2 hours. They continue to set as they cool. Use the parchment overhang to lift the entire slab out before cutting into squares with a sharp knife. Serve and enjoy the perfect blend of fudgy, chewy, and crunchy.


