
Flourless chocolate brownies
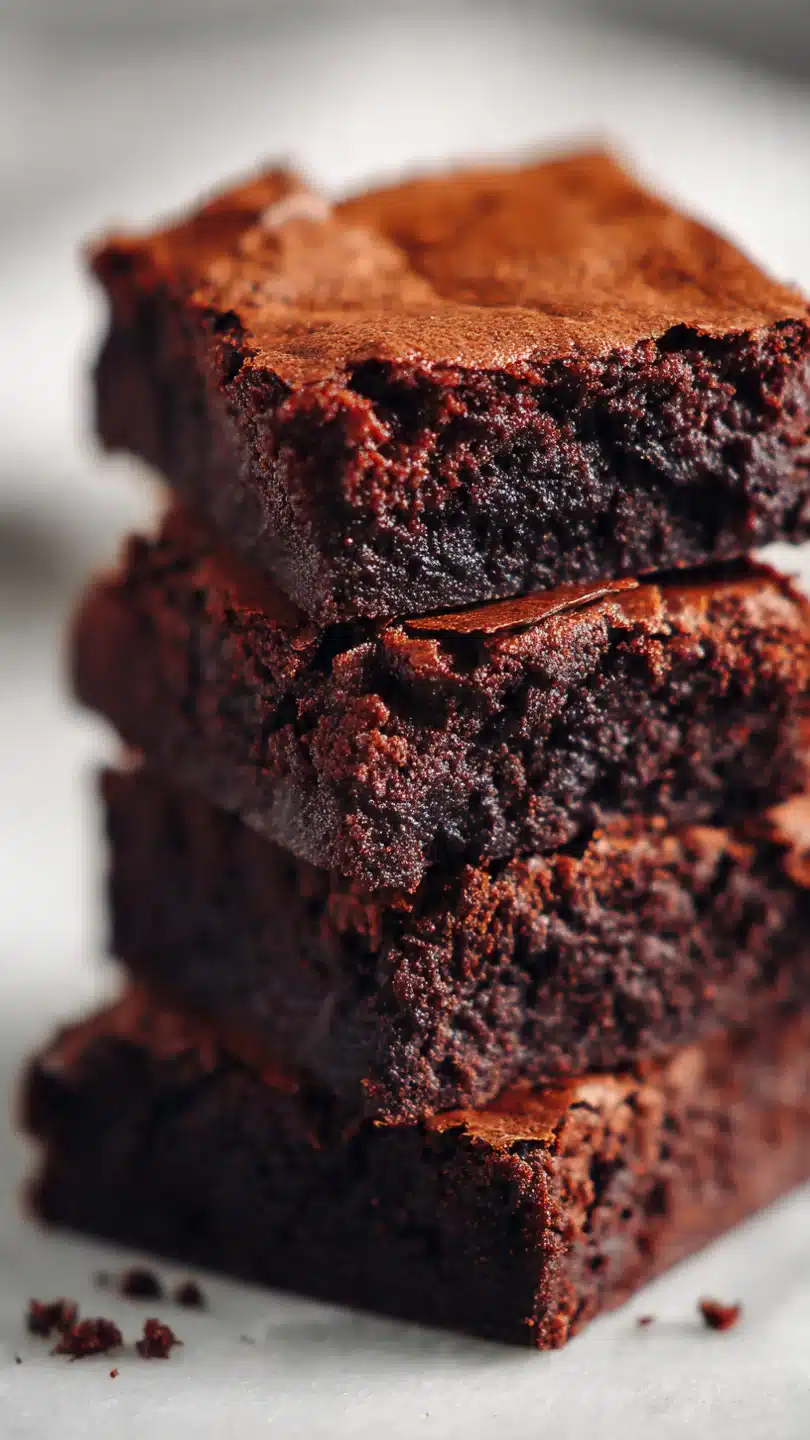
There’s something magical about a brownie that doesn’t rely on flour. It feels like a delicious secret, where the chocolate itself is the star, supported by nothing more than eggs, sugar, and a bit of cocoa. The result is a dessert of pure, unadulterated chocolate intensity—dense, fudgy, and satisfyingly rich with that iconic shiny, crackled top.
As a chef who has tested countless brownie recipes, I can tell you that this flourless version isn’t just a gluten-free alternative; it’s a masterclass in chocolate texture that will become your new go-to. It proves that sometimes, less truly is more.
- Intense Chocolate Flavor: Without flour to dilute it, every bite delivers a powerful, pure chocolate punch that true cocoa lovers crave.
- Naturally Gluten-Free: This recipe is perfect for those with celiac disease or gluten sensitivity, and no one will guess it’s “free-from” anything.
- Foolproof Texture: The method of whipping the eggs guarantees a fudgy, moist interior with that professional-looking crackly top every single time.
- Minimal Ingredients: You likely have everything you need in your pantry right now—just chocolate, butter, eggs, sugar, and cocoa.
- Quick to Make: From bowl to oven in about 15 minutes, with less than 30 minutes of baking time.
- Incredibly Versatile: This is a perfect base recipe. I’ll show you how to easily customize it with nuts, swirls, or different chocolates.
Ingredients You’ll Need
Let’s gather our ingredients—this short list is all you need to create pure chocolate alchemy. The quality of your chocolate is paramount here, as it’s the foundation of the entire recipe.
- Bittersweet Chocolate: I recommend a bar chopped up, around 60-70% cacao. This percentage gives you deep flavor without excessive bitterness. A high-quality brand like Guittard or Valrhona makes a noticeable difference.
- Unsalted Butter: This adds richness and helps create a smooth, melt-in-your-mouth texture. For a dairy-free version, refined coconut oil works beautifully.
- Granulated Sugar: We’ll use it in two stages: most gets whipped with the eggs for structure, and a little is folded in at the end to encourage that shiny top.
- Large Eggs: These are your leavening agent and structural backbone. They must be at room temperature to whip to their full volume. Trust me, cold eggs won’t incorporate enough air.
- Vanilla Extract: A classic flavor enhancer. For a deeper chocolate note, you can substitute half a teaspoon of instant espresso powder.
- Unsweetened Cocoa Powder: Sifting is non-negotiable here. It blends seamlessly into the batter, adding another layer of chocolate depth and helping to stabilize the structure. Use natural or Dutch-processed—both work.
- Fine Sea Salt: A pinch doesn’t make them salty; it makes the chocolate flavor sing by balancing the sweetness.

Note: You’ll find the complete list of ingredients, along with their exact measurements, in the printable recipe card at the bottom of this post.
Kitchen Equipment Needed
You don’t need any specialty gear. An 8×8-inch square baking pan is the ideal size for the perfect thickness. Parchment paper with overhanging edges is essential for clean removal.
A stand mixer or hand mixer is highly recommended for properly aerating the eggs—doing it by hand is a serious arm workout. You’ll also need a heatproof bowl for a double boiler (or a microwave-safe bowl for gentle melting), a spatula for gentle folding, and a fine-mesh sieve for sifting the cocoa powder.
How to Make Flourless Chocolate Brownies Recipe
Step 1: Prep and Melt
Begin by preheating your oven to 350°F (175°C) and lining your pan with parchment paper. Now, gently melt the chocolate and butter together. I prefer the double boiler method—placing a bowl over a pot of simmering water—because it gives you more control and prevents scorching.
Stir occasionally until the mixture is completely smooth and glossy, then set it aside to cool slightly. Tip from me: if the chocolate is too hot when added to the eggs, it will deflate them.
Step 2: Whip to Ribbons
This step is the secret to success. In your mixer bowl, combine the room-temperature eggs, vanilla, and 1/2 cup of the sugar. Whip on high speed for a full 5 to 7 minutes.
Believe me, patience pays off. You’re looking for the mixture to become very pale, thick, and to fall from the whisk in thick ribbons that hold their shape on the surface for a few seconds. This foam is what gives the brownies lift and that beautiful crackled crust.
Step 3: The Gentle Fold
Now, take your slightly cooled chocolate mixture. Using a large flexible spatula, gently fold it into the whipped eggs. Use broad, sweeping motions from the bottom of the bowl up and over.
The goal is to combine them while preserving as much of that precious air as possible. The mixture will deflate and darken, which is exactly what you want to see.
Step 4: Incorporate Dry Ingredients
Sift the cocoa powder and salt directly over the batter. Sprinkle the remaining 1/4 cup of sugar on top as well. This last bit of sugar helps create that shiny, delicate top crust.
Gently fold everything together until just combined and no dry pockets of cocoa remain. The batter will be thick, glossy, and incredibly luxurious.
Step 5: Bake, Cool, and Serve
Pour the batter into your prepared pan, smooth the top, and bake for 22 to 26 minutes. Here’s the critical visual cue: the top should be shiny and set with a network of cracks, but the center should still have a slight jiggle. A toothpick inserted will come out with a few moist crumbs attached, not clean.
Overbaking leads to cakey, dry brownies. Let them cool completely in the pan on a wire rack—this is when they finish setting up into that perfect fudgy texture. Then, lift them out, slice, and step back to admire your work.
- Egg Temperature is Key: Room temperature eggs whip up much higher and more stable than cold ones. To quickly warm cold eggs, place them in a bowl of warm water for 5-10 minutes before cracking.
- Don’t Rush the Whip: Set a timer for 5-7 minutes of whipping. The egg-sugar mixture should triple in volume and be the consistency of a very thick pancake batter. This aeration is non-negotiable for the right texture.
- The Cool-Down: Letting the melted chocolate cool for 5 minutes before folding is crucial. If it’s too hot, it will cook the eggs and collapse your foam, resulting in a dense, greasy brownie.
- Test for Doneness Early: Start checking at 22 minutes. The edges will look set and slightly pulled away from the pan, but the center should look soft-set. Remember, they continue to cook from residual heat as they cool.
- For Clean Slices: For picture-perfect squares, chill the completely cooled brownie block in the pan for 20-30 minutes. Then, use a sharp knife dipped in hot water and wiped clean between each cut.
Recipe Variations
- Salted Caramel Swirl: After pouring the batter into the pan, dollop with 1/3 cup of thick salted caramel sauce and use a knife to swirl it gently through the top layer before baking.
- Nutty Crunch: Fold 3/4 cup of toasted pecans, walnuts, or hazelnuts into the batter just before pouring it into the pan for added texture and flavor.
- Orange Zest Infusion: Add the finely grated zest of one large orange to the egg mixture while whipping for a bright, citrusy note that complements dark chocolate beautifully.
- Mint Chocolate Chip: Add 1/2 teaspoon of peppermint extract with the vanilla and fold in 1/2 cup of dark chocolate chips for a refreshing twist.
- Espresso Double Chocolate: Replace the vanilla with 1 teaspoon of instant espresso powder dissolved in 1/2 teaspoon of hot water. The coffee deepens the chocolate flavor without tasting like coffee.
- Vegan Adaptation: For a plant-based version, use coconut oil, a flax egg substitute (the texture will be denser), and ensure your chocolate is dairy-free. The crackly top may be less pronounced.
What to Serve With This Recipe
These brownies are a star on their own, but they love company. For a decadent dessert, serve a square slightly warm with a scoop of high-quality vanilla bean ice cream and a drizzle of raspberry coulis. For a coffee break, they pair perfectly with a strong espresso or a glass of cold milk.
If you’re building a dessert platter, complement their richness with fresh berries or whipped cream flavored with a touch of bourbon. They’re ideal for potlucks, birthday parties (where dietary restrictions are a concern), or as a deeply satisfying treat after a weeknight dinner.
Storage & Make-Ahead Instructions
- Room Temperature Storage: Once completely cool, store brownies in an airtight container at room temperature for up to 3 days. They are at their fudgy best within 48 hours.
- Refrigerator Storage: For longer storage, up to 5 days, keep them in the fridge. Let them come to room temperature for 30 minutes before serving for the best texture and flavor.
- Freezer-Friendly: These brownies freeze exceptionally well. Wrap the whole block or individual squares tightly in plastic wrap, then place in a freezer bag. They will keep for up to 3 months. Thaw overnight in the refrigerator or at room temperature for a few hours.
- Make-Ahead Strategy: You can bake the brownies 1-2 days in advance. Store them as a whole block, tightly wrapped, and slice just before serving. The flavor often improves after a day.
Frequently Asked Questions
Q: Can I use milk chocolate instead of bittersweet?
A: I don’t recommend it. Milk chocolate has more sugar and dairy, which can throw off the balance of the recipe, making it overly sweet and potentially altering the setting texture. Stick with dark chocolate for the best results.
Q: Why did my brownies turn out cakey and dry?
A: This is almost always due to overbaking or over-whipping the eggs after the chocolate has been added. Remember, you want moist crumbs on your tester, not a clean toothpick. Also, fold gently once the chocolate is incorporated.
Q: My top didn’t get crackly. What happened?
A: The crackly top comes from properly whipped eggs and sugar creating a meringue-like layer. Ensure you whip the eggs and the first portion of sugar for the full 5-7 minutes until very thick and pale. Also, don’t skip sprinkling the reserved sugar on top before the final fold.
Q: Can I make these dairy-free?
A: Absolutely. Simply replace the butter with an equal amount of refined coconut oil. Make sure your chocolate bar is also dairy-free (check the label).
Q: How do I know when they are perfectly done baking?
A: Look for a set, shiny top with cracks, and a center that jiggles just slightly when you gently shake the pan. The internal temperature will be around 195°F (90°C) if you use a thermometer.
Q: Can I double this recipe?
A: Yes, double all ingredients and bake in a 9×13-inch pan. The baking time may increase by 5-10 minutes, so start checking at the 28-minute mark.
Q: Is Dutch-process or natural cocoa powder better?
A: Either works in this recipe because there’s no baking soda to react with. Dutch-processed will give a slightly darker color and milder flavor, while natural cocoa offers a more robust, fruity chocolate note. Use what you have.
Final Thoughts
This flourless chocolate brownie recipe is a testament to the power of simplicity and technique. It delivers a sophisticated, intensely chocolate dessert that happens to be gluten-free, without any compromise on flavor or that dreamy, fudgy texture we all crave. As a professional, I love recipes that rely on understanding a few key principles—whipping eggs properly, not overmixing, and trusting the visual cues for doneness.
This one checks all those boxes. I encourage you to try it exactly as written first, then have fun with the variations. Once you experience the rich, crackly-topped result, I’m confident it will earn a permanent spot in your recipe repertoire.
Please let me know how your batch turns out in the comments below, and don’t forget to share a photo of your beautiful creations!
Flourless Chocolate Brownies
Ingredients
Equipment
Method
- Preheat your oven to 350°F (175°C). Line an 8×8-inch baking pan with parchment paper, leaving an overhang on two sides for easy removal. This is non-negotiable for clean slices.
- Create a double boiler by placing a heatproof bowl over a saucepan of barely simmering water (the bowl should not touch the water). Add the chopped chocolate and butter. Melt gently, stirring occasionally until completely smooth and glossy. Remove from heat and let cool slightly for 5 minutes.
- While the chocolate cools, whip the eggs. In the bowl of a stand mixer fitted with the whisk attachment, or using a hand mixer, beat the eggs, vanilla, and 1/2 cup of the sugar on high speed for 5-7 minutes. Trust me, this is the key to the crackly top. The mixture will be very pale, thick, and form ribbons when the whisk is lifted.
- Gently fold the warm (not hot) melted chocolate mixture into the whipped eggs. Use a large spatula and fold with a gentle, sweeping motion to maintain as much air as possible. You’ll see the mixture deflate slightly, which is normal.
- Sift the cocoa powder and salt over the batter. Sprinkle the remaining 1/4 cup of sugar on top. Gently fold everything together until just combined and no dry streaks remain. The batter will be thick and glossy.
- Pour the batter into your prepared pan and smooth the top with a spatula. Bake for 22-26 minutes. Believe me, the center should look set with a shiny, crackled top, but a toothpick inserted will come out with moist crumbs, not clean. Do not overbake. Let cool completely in the pan on a wire rack before lifting out and slicing.


