
Fourth of July brownies
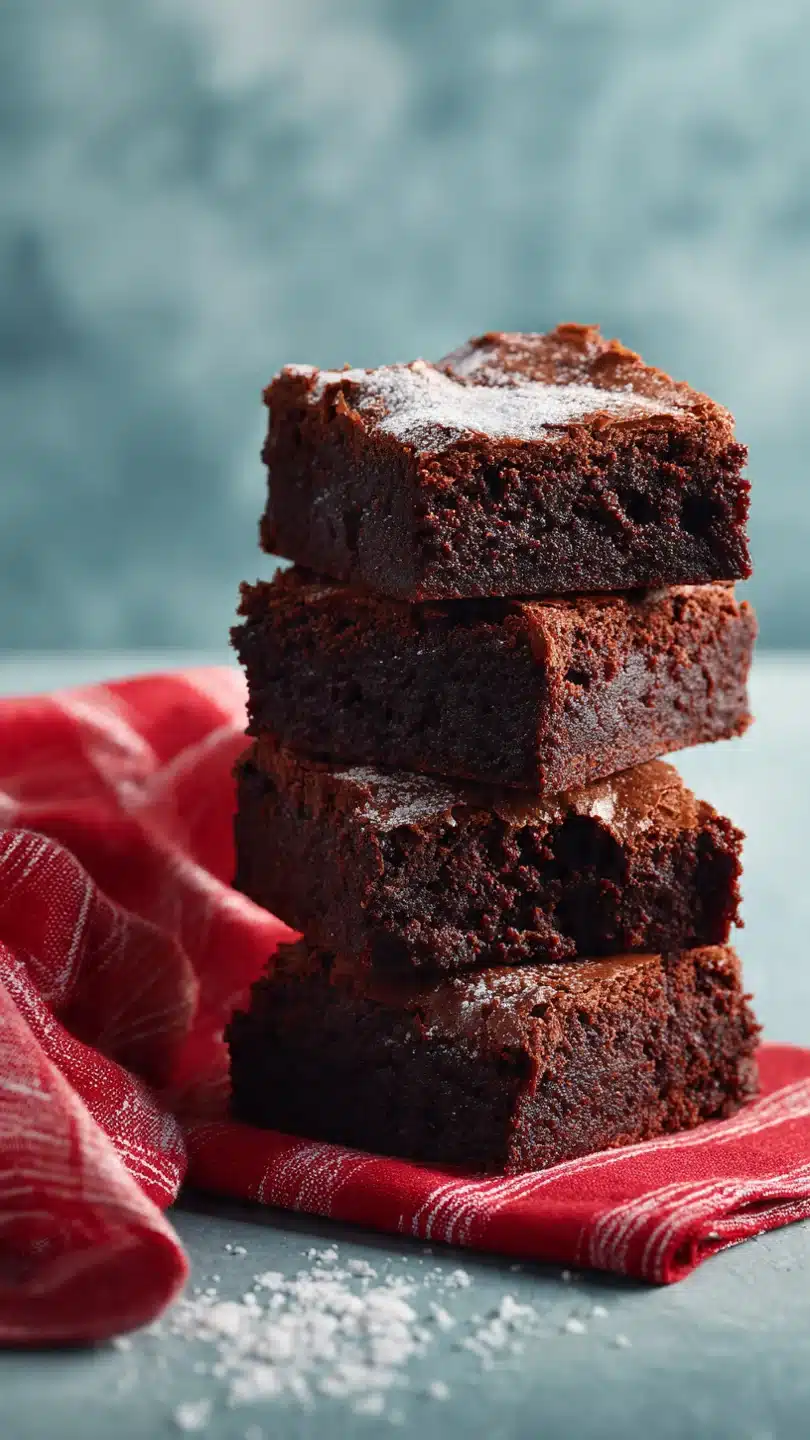
There’s something about the Fourth of July that calls for a dessert that’s both decadent and delightfully festive. While flag cakes are beautiful, they can be fussy. Enter these Fourth of July brownies: a rich, fudgy, one-bowl wonder that delivers on chocolate intensity while sporting a cheerful, patriotic topping with zero stress.
As a professional recipe developer, my goal is always maximum flavor and visual impact with minimum effort, and this recipe is a perfect example. You get a dense, crackly-topped brownie that’s deeply chocolatey, studded with melty chips, and finished with a confetti of red, white, and blue that bakes right into the surface. It’s the dessert that will disappear from your picnic table before the fireworks even begin.
- One-Bowl Simplicity: You mix everything in a single bowl, meaning less cleanup and more time enjoying the holiday.
- Foolproof Fudgy Texture: The precise ratio of butter, sugar, and eggs, combined with the “crumb, not clean” toothpick test, guarantees a dense, moist brownie every time.
- Festive with Zero Fuss: Simply scattering sprinkles on the batter before baking creates instant holiday spirit without the need for intricate decorating skills.
- Crowd-Pleasing Classic: Chocolate brownies are a universal favorite, making this a safe bet for guests of all ages.
- Make-Ahead Friendly: These brownies taste even better the next day and can be baked up to two days before your celebration.
- Endlessly Customizable: The base recipe is a perfect canvas for different mix-ins and toppings beyond the patriotic theme.
Ingredients You’ll Need
Let’s gather our ingredients—this is where simple pantry staples combine to create pure magic. Using quality components makes a noticeable difference in the final product’s depth of flavor and texture.
For the ultimate fudgy brownie base, you’ll need unsalted butter, melted and slightly cooled so it doesn’t cook the eggs. Granulated sugar sweetens and helps create that classic shiny, crackly top. Room temperature eggs are crucial; they incorporate more easily into the batter, creating a smoother emulsion.
Pure vanilla extract rounds out the chocolate flavor. The dry ingredients are all-purpose flour (measured correctly by spooning and leveling!), unsweetened cocoa powder (I prefer Dutch-processed for a deeper, less acidic chocolate note), and a pinch of salt to balance the sweetness.
For texture and festive flair, we add semi-sweet chocolate chips for pockets of melted chocolate and, of course, red, white, and blue sprinkles. Pro tip from my kitchen: Use “jimmies” (the little rod-shaped sprinkles) rather than nonpareils (tiny balls) if possible, as they hold their color and shape better during baking. You can find them in the baking aisle of most grocery stores, especially around the holidays.

Note: You’ll find the complete list of ingredients, along with their exact measurements, in the printable recipe card at the bottom of this post.
Kitchen Equipment Needed
You don’t need any specialty gear for this recipe. A 9×13 inch metal baking pan is ideal for even heating and the perfect brownie thickness. Parchment paper with overhanging edges is my secret weapon for flawlessly removing the entire slab of brownies for clean slicing.
You’ll also need a large mixing bowl, a whisk for combining the wet ingredients, a rubber spatula for folding, and a wire cooling rack. A sifter for the dry ingredients is helpful but not mandatory; you can simply whisk them together in a separate bowl before adding.
How to Make Fourth of July Brownies Recipe
Step 1: Prep Your Pan and Oven
Preheat your oven to 350°F (175°C). This ensures a consistent temperature from the moment the batter goes in. Line your 9×13 inch metal pan with parchment paper, leaving a couple of inches of overhang on the two long sides.
Lightly grease any exposed parts of the pan. This setup isn’t just for easy cleanup; it’s the professional way to get those pristine, sharp-edged brownie squares without any sticking or crumbling.
Step 2: Create the Wet Base
In your large bowl, whisk the melted, slightly cooled butter and granulated sugar together for a good minute. You’re not just mixing; you’re beginning to dissolve the sugar, which contributes to that shiny crust. Add your room-temperature eggs one at a time, whisking vigorously after each until the mixture looks smooth, slightly pale, and well-emulsified.
Tip from me: This vigorous whisking incorporates air, which gives structure. Stir in the vanilla extract.
Step 3: Incorporate Dry Ingredients Gently
Here’s where we avoid toughness. Sift the flour, cocoa powder, and salt directly into the wet ingredients. Sifting prevents lumps of cocoa and aerates the flour.
Now, put the whisk away and grab your rubber spatula. Gently fold the dry ingredients into the wet until you no longer see any dry streaks. A few strokes of overmixing can develop the gluten in the flour, leading to a cakey, tough brownie.
Once combined, fold in the chocolate chips.
Step 4: Pan, Decorate, and Bake
Pour the thick, luxurious batter into your prepared pan, spreading it evenly to the corners. Now for the fun part: immediately and evenly sprinkle the entire 1/2 cup of patriotic sprinkles over the surface. Trust me, adding them now means they’ll bake into the top layer, adhering perfectly without sinking or bleeding their color too much.
Place the pan in the center of your preheated oven.
Step 5: The Perfect Bake and Cool
Bake for 30-35 minutes. Start checking at 30 minutes. The key to fudgy brownies is pulling them out at the right moment.
Look for a set, shiny top. Insert a toothpick into the center—it should come out with a few moist crumbs clinging to it, not coated in wet batter. If it’s clean, they’re overdone.
Let the brownies cool completely in the pan on a wire rack. This patience is vital for setting their texture and making them easy to slice.
- The Pan Matters: Always use a metal baking pan, not glass. Metal heats quickly and evenly, promoting better browning and texture. Glass can lead to over-baked edges and an underdone center.
- Don’t Skip the Sift: Cocoa powder is notoriously clumpy. Sifting it with the flour ensures a perfectly smooth batter without any bitter pockets of dry cocoa.
- The Cooling Commandment: I know it’s tempting, but you must let the brownies cool completely in the pan. Cutting into warm brownies releases steam and causes them to crumble. For the cleanest cuts, you can even chill the cooled slab in the refrigerator for 30 minutes.
- Slice Like a Pro: Use a long, sharp chef’s knife. For sticky, fudgy brownies, wipe the blade clean and run it under hot water between each cut for perfectly clean edges.
- Room Temperature is Key: Using room temperature eggs is non-negotiable for proper emulsification. Cold eggs can cause the melted butter to seize up, resulting in a greasy, separated batter.
Recipe Variations & Customizations
- Blondie Base: For a vanilla version, omit the cocoa powder. Increase the flour to 1 3/4 cups and add 1 cup of white chocolate chips with the sprinkles.
- Peanut Butter Patriotic: After spreading the batter, dollop 1/2 cup of creamy peanut butter over the top and use a knife to swirl it in before adding sprinkles.
- Mint Chocolate Chip: Add 1 tsp of peppermint extract with the vanilla and use Andes mint baking chips instead of semi-sweet chocolate chips.
- S’mores Style: Sprinkle 1 cup of mini marshmallows and 1/2 cup of crushed graham crackers over the batter along with the sprinkles for the last 5 minutes of baking.
- Gluten-Free Adaptation: Substitute the all-purpose flour with a 1:1 gluten-free baking blend. The texture will be slightly more crumbly but still delicious.
- Extra Cheesecake Swirl: Mix 4 oz of softened cream cheese with 1/4 cup sugar and 1 egg yolk. Drop spoonfuls over the brownie batter and swirl before adding sprinkles.
What to Serve With This Recipe
These brownies are a star on their own, but you can easily turn them into a show-stopping dessert station. For a classic Fourth of July BBQ, serve them alongside fresh berry skewers (strawberries, blueberries, marshmallows) and a bowl of whipped cream or vanilla ice cream for DIY sundaes. They pair wonderfully with sparkling drinks—think homemade red, white, and blue punch for kids or a berry-infused sparkling rosé for adults.
If you’re creating a full dessert table, complement these rich brownies with lighter options like lemon bars or fruit salad to balance the palate. They are the perfect handheld sweet for watching fireworks.
Storage & Make-Ahead Instructions
- Room Temperature Storage: Once completely cooled, store brownies in an airtight container at room temperature for up to 4 days. Place parchment paper between layers if stacking.
- Freezing for Later: These brownies freeze exceptionally well. Wrap the whole slab or individual squares tightly in plastic wrap, then place in a freezer bag. They will keep for up to 3 months. Thaw overnight at room temperature.
- Make-Ahead Strategy: This recipe is ideal for making ahead. Bake the brownies 1-2 days before your event. Store the uncut slab, tightly wrapped, at room temperature. Slice just before serving for the freshest appearance.
- Reheating Tip: For a just-baked experience, warm individual squares in the microwave for 10-15 seconds. This will soften them and make the chocolate chips gooey again.
Frequently Asked Questions
Q: Can I use a different size pan?
A: Yes, but baking time will change. For a 9×9 inch pan, the brownies will be thicker. Increase baking time by 5-10 minutes and check for doneness carefully.
For a larger sheet pan, they will be thinner and bake faster.
Q: My sprinkles bled their color! What happened?
A: Some brands of nonpareil sprinkles (the tiny balls) are more prone to bleeding, especially if the batter is very wet. Using “jimmies” and adding them just before baking (not mixing them in) minimizes this. A little color bleed is normal and still tastes great.
Q: Can I make these brownies without eggs?
A: For an egg-free version, you can try using a commercial egg replacer or a flax egg. The texture will be denser and more cake-like, not as fudgy. I have not tested all variations.
Q: How do I know for sure they’re done without overbaking?
A: The toothpick test is your best friend. Look for moist crumbs—not wet batter—clinging to the toothpick. The edges will look set and may have pulled slightly away from the pan, while the center will still look soft but not jiggly.
Q: Can I double this recipe?
A: I don’t recommend doubling and baking in one pan, as it will be too thick and won’t bake evenly. Instead, make two separate batches or divide the doubled batter between two 9×13 pans.
Q: What’s the best way to get clean cuts?
A: Cool completely, then chill. Use a long, sharp knife and clean it with hot water between each cut. Don’t use a sawing motion; press down firmly and cleanly.
Q: Can I use oil instead of butter?
A: Butter provides flavor and contributes to the crisp top crust. You can substitute an equal amount of neutral oil (like vegetable or canola), but the brownies will be denser, chewier, and lack that classic buttery, crisp edge.
Final Thoughts
These Fourth of July brownies truly embody what holiday baking should be: straightforward, reliably delicious, and brimming with festive joy. They leverage a professional, tested formula for the ideal fudgy texture, then top it with the simplest decorative touch that makes everyone smile. As a chef, I love recipes that deliver maximum reward for manageable effort, allowing you to be part of the celebration, not stuck in the kitchen.
Whether you’re hosting a big backyard bash or a quiet family gathering, this dessert is guaranteed to be a hit. I encourage you to give this recipe a try, and when you do, share your patriotic creations with me! Tag me on social media or leave a comment below—I love seeing your baking successes.
Now, go enjoy those fireworks with a brownie in hand
Fourth of July Brownies
Ingredients
Equipment
Method
- Preheat your oven to 350°F (175°C). Line a 9×13 inch metal baking pan with parchment paper, leaving an overhang on two sides for easy removal. Lightly grease any exposed pan. This setup is non-negotiable for clean, perfect brownie squares.
- In a large mixing bowl, whisk together the melted butter and granulated sugar for about 1 minute until well combined. Add the room temperature eggs one at a time, whisking vigorously after each addition until the mixture is smooth and slightly thickened. Stir in the vanilla extract. Trust me, using room temperature eggs prevents the warm butter from solidifying and ensures a silky batter.
- Sift the flour, cocoa powder, and salt directly into the wet ingredients. This prevents lumps and ensures even distribution. Use a rubber spatula to gently fold the dry ingredients into the wet until just combined and no dry streaks remain. Be careful not to overmix. Fold in the chocolate chips.
- Pour the thick, glossy batter into your prepared pan, spreading it evenly into the corners. Immediately sprinkle the 1/2 cup of patriotic sprinkles evenly over the entire surface. Believe me, adding them now—before baking—means they’ll stay on top and won’t bleed their color into the batter.
- Bake for 30-35 minutes. Start checking at 30 minutes. The brownies are done when the top is set and shiny, and a toothpick inserted into the center comes out with a few moist crumbs (not wet batter). Do not overbake for fudgy texture. Let cool completely in the pan on a wire rack before lifting out and slicing.


