
Grain free brownies
There’s a moment of pure bliss when you bite into a brownie that’s just right—crackly top, fudgy center, and a deep chocolate flavor that lingers. Now, imagine achieving that without a speck of traditional flour. As a chef who has spent years perfecting gluten-free baking, I can tell you that grain free brownies are not just a compromise; when done correctly, they are a revelation.
This recipe is the culmination of countless tests in my kitchen, designed to deliver that iconic texture and rich taste using simple, wholesome ingredients. Get ready to change your mind about what a “healthy” brownie can be.
- Intensely Fudgy Texture: Thanks to the perfect ratio of almond flour to fat, these brownies are dense, moist, and melt-in-your-mouth—never dry or cakey.
- Simple Pantry Ingredients: You likely have most of these items in your cupboard right now. No obscure flours or hard-to-find binders.
- One-Bowl Wonder: Minimal cleanup is a beautiful thing. This recipe comes together quickly with just a bowl, a whisk, and a spatula.
- Dietary Friendly: Naturally gluten-free and grain-free, with easy options to make them dairy-free as well. They’re a crowd-pleaser for diverse eaters.
- Professional-Grade Results: I’ve baked these over two dozen times to nail the timing and technique, so you get bakery-quality results at home on your first try.
- Perfect Crackly Top: That shiny, paper-thin crust isn’t just for looks; it’s the sign of a perfectly emulsified batter, and this recipe delivers it every time.
Ingredients You’ll Need
Let’s gather our ingredients—this short list is all you need to create pure chocolate magic. The key here is quality. Since we’re not relying on wheat flour for structure and flavor, each component plays a starring role.
- Unsalted butter or coconut oil: This is your fat base, responsible for that rich mouthfeel. Butter gives a classic flavor, while coconut oil makes these dairy-free and adds a subtle nuance. Make sure it’s melted but not hot.
- Granulated sugar or coconut sugar: Sugar does more than sweeten; it’s crucial for that crackly top and fudgy interior. Coconut sugar creates a deeper, almost caramel-like note.
- Eggs: Use large eggs at room temperature. They are the primary binder, giving structure and lift. Cold eggs can cause the melted butter to seize.
- Pure vanilla extract: A splash enhances the depth of the chocolate. Don’t skip it.
- Unsweetened cocoa powder: This is non-negotiable. Use a natural cocoa powder (not Dutch-processed for this recipe) for that classic, slightly acidic brownie flavor. I prefer brands like Ghirardelli or Hershey’s Special Dark for intense color.
- Blanched almond flour: Not almond meal. Blanched almond flour is made from skinless almonds, ground finely. It provides a tender crumb without grittiness. Bob’s Red Mill or Blue Diamond are reliable choices.
- Fine sea salt: Balances the sweetness and makes the chocolate flavor pop.
- Baking powder: Just a touch gives a slight lift without making the brownies cakey.
- Dark chocolate chips or chopped chocolate: For pockets of molten chocolate throughout. A bar of 70% dark chocolate, chopped, is my top choice for superior flavor.

Note: You’ll find the complete list of ingredients, along with their exact measurements, in the printable recipe card at the bottom of this post.
Kitchen Equipment Needed
You don’t need any fancy gear. An 8×8 inch metal baking pan is ideal for even baking and the right thickness. Parchment paper is essential—it guarantees you’ll get every last crumb out without sticking.
A large mixing bowl, a whisk, and a flexible spatula are your main tools. A wire cooling rack helps the brownies cool evenly. A small offset spatula is optional but fantastic for spreading the thick batter smoothly.
How to Make Grain Free Brownies Recipe
Step 1: Prep and Combine Wet Ingredients
Preheat your oven to 350°F (175°C). Line your pan with parchment, creating a sling for easy lifting later. In your large bowl, whisk the melted (and cooled) butter with the sugar for a full minute.
Trust me, this step is the secret to that shiny, crackly top. You’re dissolving the sugar into the fat. Then, add the eggs one at a time, whisking vigorously after each until the mixture is smooth, slightly pale, and thickened.
This incorporates air for structure. Stir in the vanilla.
Step 2: Incorporate the Dry Ingredients
Here’s where we avoid lumps. Sift the cocoa powder, almond flour, salt, and baking powder directly into the bowl with the wet ingredients. Tip from me: sifting almond flour is worth the extra second—it ensures a perfectly smooth batter.
Use your spatula to gently fold everything together. The batter will be very thick and fudgy, which is exactly what you want. Stop folding as soon as no dry streaks remain.
Overmixing can lead to a tougher texture.
Step 3: Add Chocolate and Pan the Batter
Now for the fun part: fold in your chocolate chips or chopped chocolate. This adds glorious pockets of melted chocolate. Transfer the thick, sticky batter to your prepared pan.
Use the spatula or the back of a spoon to spread it into an even layer. If it sticks, lightly wet your utensil with water. The even layer is key for consistent baking.
Step 4: Bake to Fudgy Perfection
Place the pan in the center of your preheated oven. Bake for 22 to 25 minutes. Believe me, the temptation to overbake is real, but resist it.
You’re looking for the top to be set with a beautiful network of cracks and a glossy sheen. The edges may just begin to pull away from the pan. A toothpick inserted into the center should come out with a few moist crumbs attached, not clean.
A clean toothpick means overbaked, dry brownies.
Step 5: The Crucial Cool and Serve
This is the hardest step: patience. Remove the pan and place it on a wire rack. Let the brownies cool completely in the pan—this will take at least an hour.
They need this time to set their structure and achieve that ideal fudgy, not-gooey texture. Once cool, use the parchment paper to lift the entire slab out. Slice into 9 squares with a sharp knife, wiping it clean between cuts for neat edges.
Step back and admire your perfect, grain-free creation.
- Temperature is Key: Your melted butter should be warm, not hot, when you add the sugar. Hot butter can cook the eggs. Similarly, room-temperature eggs incorporate much more easily for a smooth batter.
- The Sifting Secret: Almond flour can clump. Sifting it with the cocoa powder guarantees a silky, lump-free batter, which translates to a superior mouthfeel in the finished brownie.
- Don’t Fear the Thick Batter: This is a low-moisture, high-fat batter by design. It will be very thick and seem almost paste-like. That’s correct! It bakes into an intensely fudgy texture.
- The Toothpick Test: The classic “clean toothpick” rule does not apply here. You want a few sticky crumbs. If it comes out clean, the brownies are overdone. They will continue to set as they cool.
- For Ultimate Clean Cuts: For picture-perfect squares, once the brownies are completely cool, cover the pan and pop it into the refrigerator for 20-30 minutes. The slight chill firms them up for razor-sharp slices.
Recipe Variations
- Salted Caramel Swirl: After spreading the batter, dollop 1/4 cup of sugar-free or regular salted caramel sauce on top and use a knife to swirl it gently into the batter before baking.
- Espresso Infused: Add 1-2 teaspoons of instant espresso powder to the dry ingredients. It won’t make them taste like coffee but will deepen the chocolate flavor phenomenally.
- Orange Zest: Add the finely grated zest of one large orange to the wet ingredients for a bright, citrusy twist that pairs beautifully with dark chocolate.
- Mint Chocolate Chip: Substitute the vanilla extract with 1/2 teaspoon of pure peppermint extract and use dark chocolate chunks for a refreshing classic.
- Nutty Delight: Fold in 1/2 cup of chopped walnuts, pecans, or even macadamia nuts along with the chocolate chips for added crunch and flavor.
- Dairy-Free & Paleo: Use refined coconut oil instead of butter and ensure your chocolate chips are dairy-free. This makes a fantastic Paleo-friendly dessert.
- Blonde Brownies: Replace the cocoa powder with an additional 1/2 cup of blanched almond flour and use white chocolate chips. You’ll get a rich, butterscotch-like bar.
What to Serve With This Recipe
These brownies are a star on their own, but they love company. For a decadent dessert, serve a square slightly warmed with a scoop of high-quality vanilla bean ice cream or a dollop of whipped coconut cream. A drizzle of raspberry coulis cuts through the richness beautifully.
For a casual gathering, pair them with a pot of strong coffee or a glass of cold almond milk. They’re perfect for potlucks, birthday parties (where dietary needs vary), or as a luxurious afternoon treat with tea.
Storage & Make-Ahead Instructions
- Storage: Once completely cool, store brownies in an airtight container at room temperature for up to 3 days. They are actually at their peak texture on day two! For longer storage, refrigerate for up to a week.
- Freezing: These brownies freeze exceptionally well. Wrap individual squares tightly in plastic wrap, then place them in a freezer bag. They will keep for up to 3 months. Thaw at room temperature or warm gently in the microwave.
- Make-Ahead: You can bake the brownies 1-2 days in advance. Let them cool completely, then store the whole slab (unsliced) tightly wrapped at room temperature. Slice just before serving for the freshest presentation.
- Reheating: To recapture that fresh-from-the-oven feel, warm a square in the microwave for 10-15 seconds. Avoid overheating, as the chocolate can burn.
Frequently Asked Questions
Q: Can I use almond meal instead of blanched almond flour?
A: I don’t recommend it. Almond meal includes the almond skins, is coarser, and absorbs moisture differently. Your brownies will be gritty, denser, and may have a darker, speckled appearance.
Blanched almond flour is essential for a smooth, tender crumb.
Q: My batter is extremely thick—did I do something wrong?
A: No, you’re right on track! A very thick, almost paste-like batter is correct for this grain-free formula. It’s low in liquid and high in fat, which is what gives you that dense, fudgy result.
Just spread it as evenly as you can in the pan.
Q: How do I make these dairy-free?
A: It’s simple. Use refined coconut oil (which has no coconut taste) instead of butter, and ensure your chocolate chips are certified dairy-free. The results are equally rich and delicious.
Q: Why didn’t I get a crackly top?
A: The crackly top comes from properly dissolving the sugar into the fat and eggs. Ensure you whisk the sugar and melted butter vigorously for a full minute, and that your eggs are at room temperature to create a good emulsion. Also, don’t overmix once you add the dry ingredients.
Q: Can I double this recipe?
A: Absolutely. Double all ingredients and bake in a 9×13 inch pan. The baking time may increase by 5-10 minutes.
Always rely on the visual and toothpick tests for doneness rather than the timer alone.
Q: Are these brownies keto or low-carb?
A: This specific recipe is grain-free and gluten-free, but not strictly keto due to the sugar content. For a keto version, you would need to use a granulated erythritol/monk fruit blend and sugar-free chocolate chips, and adjust the almond flour ratio slightly.
Q: Can I use a different nut flour, like hazelnut or cashew?
A: Hazelnut flour can be a delicious substitution for a Nutella-like flavor, but it’s oilier. You may need to reduce the butter by 1-2 tablespoons. Cashew flour is very soft and may make the brownies too delicate.
Almond flour is the most reliable for structure and texture.
Final Thoughts
After 15 years of professional cooking, I believe a great recipe is one that delivers consistent joy and becomes a trusted favorite. These grain free brownies have earned a permanent spot in my repertoire because they truly satisfy that deep chocolate craving without compromise. They prove that mindful baking can be every bit as indulgent as the classic.
I hope this recipe brings as much happiness to your kitchen as it has to mine. Give it a try, share it with friends who thought they had to give up desserts, and don’t forget to let me know how it turned out! Tag me on social media—I love seeing your creations.
Happy baking
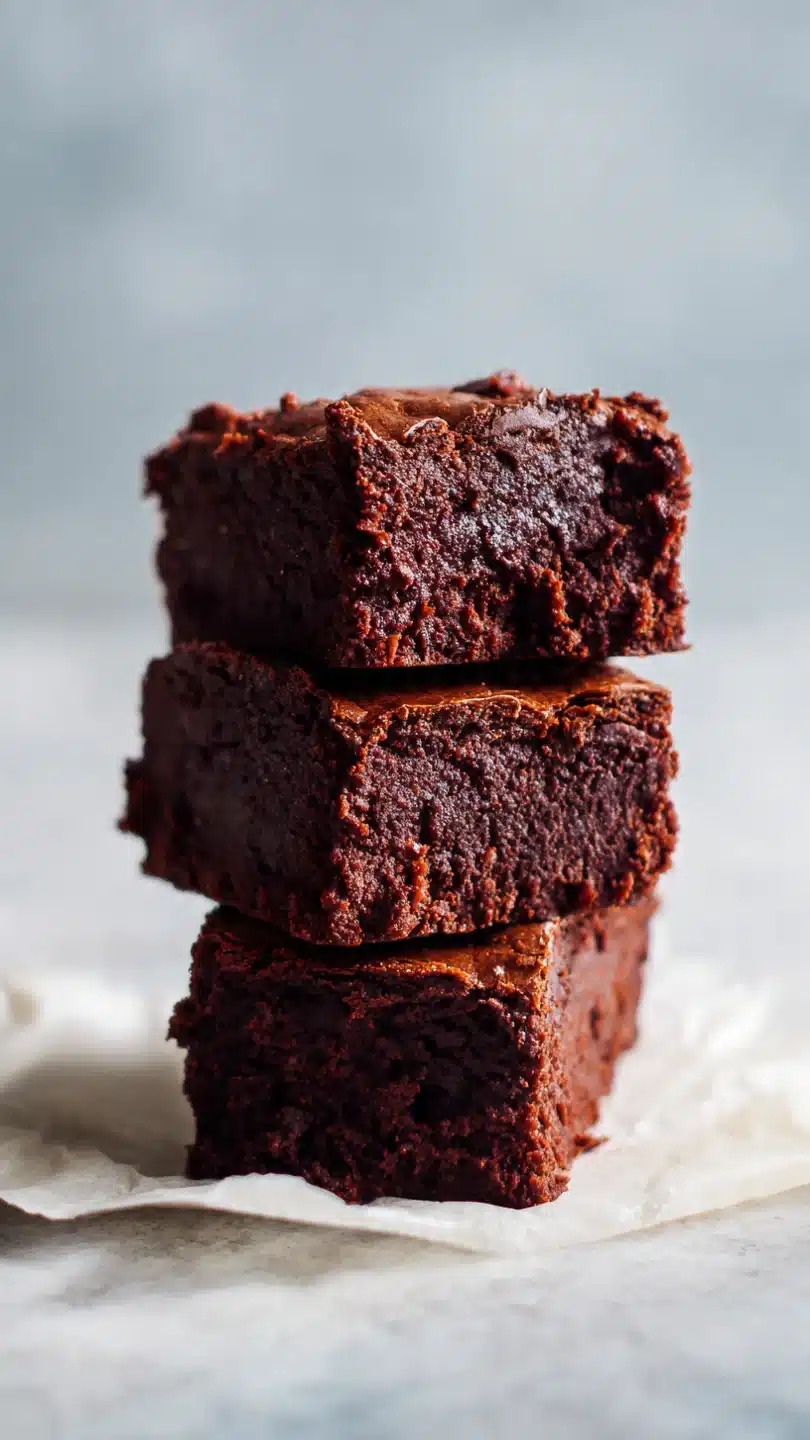
Ultimate Fudgy Grain Free Brownies
Ingredients
Equipment
Method
- Preheat your oven to 350°F (175°C). Line an 8×8 inch baking pan with parchment paper, leaving an overhang on two sides for easy removal. This is non-negotiable for clean cuts.
- In a large bowl, whisk together the melted (and cooled) butter and sugar for a full minute until well combined and slightly glossy. Whisk in the eggs, one at a time, beating vigorously after each until the mixture is smooth and slightly thickened. Stir in the vanilla extract.
- Sift the cocoa powder, almond flour, salt, and baking powder directly into the wet ingredients. This prevents lumps. Use a spatula to fold the dry ingredients into the wet until just combined and no dry streaks remain. The batter will be very thick. Fold in the chocolate chips.
- Spread the thick batter evenly into your prepared pan. It will be sticky; a small offset spatula or the back of a spoon lightly wet with water helps immensely. Bake for 22-25 minutes. The top should be set and have a beautiful crackly sheen. A toothpick inserted into the center will come out with a few moist crumbs, not clean.
- Let the brownies cool completely in the pan on a wire rack. This is the hardest but most crucial step—it allows them to set into that perfect fudgy texture. Use the parchment paper to lift them out, then slice into 9 squares with a sharp knife wiped clean between cuts.


