
Brownies food photography
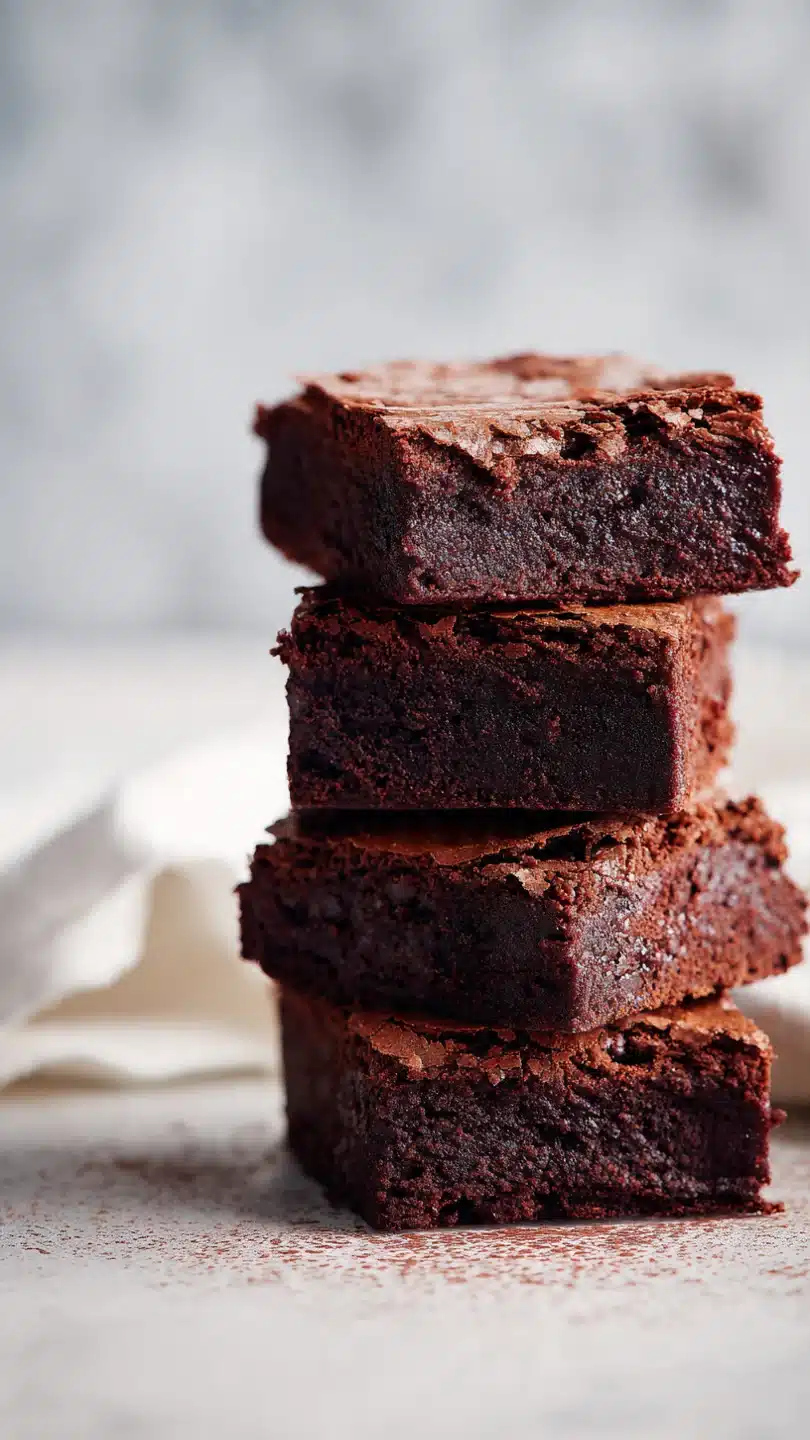
There’s a particular magic to a perfectly photographed brownie. It’s not just a dessert; it’s a textural promise. The eye is drawn first to that signature, paper-thin crust, shimmering with a mosaic of cracks.
Then, it imagines the dense, fudgy interior that should offer just the slightest resistance before giving way. As a chef turned food photographer, I’ve learned that capturing this promise requires as much technique in styling as it does in baking. This guide will walk you through creating a brownie that’s engineered for the camera and the actionable photography steps to make it shine.
This recipe and the accompanying techniques are designed to give you consistently stunning results, both in taste and in your photos.
- Engineered for the Camera: Every step, from whipping eggs to precise baking time, is calibrated to produce the glossy top and fudgy center that photographs beautifully.
- Simple, Reliable Technique: No fancy equipment or hard-to-find ingredients—just foundational baking science applied for visual perfection.
- Maximum Texture Contrast: Achieve the holy grail of brownie photography: a crisp, shiny crust against a moist, almost gooey interior.
- Versatile Styling Canvas: These brownies hold their shape when cut cleanly, making them perfect for everything from overhead stacks to intimate close-ups of a single, crumb-dusted bite.
- Forgiving for Beginners: The method is straightforward, with clear visual cues to prevent over-baking, the most common pitfall for dry, unphotogenic brownies.
Ingredients You’ll Need
- Let’s gather our ingredients. This is a classic list, but the quality and handling of each component are what elevate these brownies from simply tasty to photographically stunning. Using high-fat European-style butter and a good bittersweet chocolate isn’t just snobbery; it creates a richer sheen and deeper color that the camera loves.
- Unsalted butter: High-quality butter has a lower water content, which contributes to a fudgier texture and better sheen.
- Bittersweet chocolate: Opt for a bar you enjoy eating, chopped, rather than chips. Chips contain stabilizers that can inhibit a smooth melt and glossy finish.
- Granulated sugar: This combines with the whipped eggs to create that essential crackly top through caramelization.
- Eggs: Must be room temperature. Cold eggs will cause the melted chocolate to seize, resulting in a greasy, dull surface.
- Pure vanilla extract: A flavor enhancer that supports the chocolate.
- All-purpose flour: The structural backbone; measure by weight or the spoon-and-level method for accuracy.
- Fine sea salt: Balances the sweetness and intensifies the chocolate flavor.
- Dutch-process cocoa powder: This alkalized cocoa has a darker, richer color and smoother flavor than natural cocoa, making it ideal for deep, appetizing photos.

Note: You’ll find the complete list of ingredients, along with their exact measurements, in the printable recipe card at the bottom of this post.
Kitchen Equipment Needed
Beyond standard baking tools, a few items will make your photography process smoother. You don’t need a studio, but thoughtful tools help.
Essential items include your 8×8-inch metal baking pan (light-colored to prevent dark edges), parchment paper for the all-important clean removal, and a heatproof bowl for a gentle double boiler. A digital scale ensures ingredient precision, which translates to consistent texture. For styling, have a sharp chef’s knife for clean cuts, a small offset spatula for positioning, and a pastry brush to gently remove stray crumbs.
A simple wire cooling rack is non-negotiable for allowing air circulation so the bottom doesn’t steam and become soggy.
How to Make Classic Fudgy Brownies Recipe
Step 1: Prep and Melt with Precision
Start by preheating your oven and meticulously lining your pan. Trust me, the parchment paper sling isn’t just for easy cleanup; it’s your ticket to removing the entire brownie slab intact for pristine, crumb-free side shots. For the chocolate and butter, use a double boiler.
Gentle, indirect heat prevents the chocolate from burning or seizing, ensuring a velvety, glossy mixture that forms the foundation of your batter’s sheen. Let it cool slightly before the next step.
Step 2: Whip to the Ribbon Stage
This is the most crucial step for that photogenic crust. In a large bowl, vigorously whisk the room-temperature eggs and sugar for a full 2-3 minutes. You’re looking for the mixture to become pale, thick, and fall from the whisk in a slow, dissolving ribbon that holds its shape for a second on the surface.
This incorporates air and dissolves the sugar, which will caramelize into that iconic shiny, crackly top during baking. Don’t rush this.
Step 3: Combine and Fold Gently
Slowly stream the cooled chocolate mixture into the whipped eggs while whisking constantly. You’ll see it transform into a thick, luxurious, and shiny batter. Believe me, this gloss in the bowl is a direct preview of the gloss on your baked top.
Now, sift in the dry ingredients. Using a flexible spatula, fold gently until just combined. Overmixing develops gluten, leading to a cakey, porous texture that looks dry in photos.
Step 4: Bake to Visual Perfection
Pour the batter into your prepared pan, smoothing the top. Bake until the center is puffed and set, and that beautiful web of cracks has formed across the surface. The visual test is key: a toothpick inserted about an inch from the edge should come out with a few moist crumbs attached.
It’s better to slightly under-bake than over-bake for that dense, fudgy interior that appears moist in close-ups.
Step 5: Cool, Cut, and Style
Resist all temptation! Let the brownies cool completely in the pan on a wire rack. This sets the structure and makes clean cutting possible.
For photography, chill the whole slab for 20 minutes. Then, using a sharp knife warmed under hot water and dried, make decisive cuts straight down. Now comes the fun part: styling your masterpiece for its close-up.
Applying professional kitchen and photography knowledge will take your images from good to “I need to bake these right now.”
- The Lighting Rule: Soft, indirect natural light is your best friend. Shoot near a large window, but never in direct sunlight, which creates harsh shadows and can melt your chocolate sheen. A white foam board on the shadow side acts as a simple reflector to fill in details.
- Texture is King: Showcase the contrast. Capture the craggy top, the sharp edge of a cut piece, and the dense, moist crumb inside. Sprinkle a few coarse sea salt flakes or dust with powdered sugar just before shooting to add visual interest and dimension.
- Angle Strategy: Use a 45-degree angle to show both the top crust and the interior height of a stacked brownie. Get directly overhead for a graphic, clean shot of a whole slab or pattern. Move in for a tight close-up on a gooey bite or a chocolate-drizzled corner.
- Styling for Story: Use simple, complementary props. A rustic wooden board, a crumpled linen napkin, a vintage fork, or a cold glass of milk suggest context and warmth. Keep the background uncluttered so the brownie remains the hero.
- The Clean Cut: Wipe your knife clean between each cut for the sharpest edges. A crumb-covered knife drags crumbs and ruins the clean lines essential for a polished look.
Recipe Variations
- This classic recipe is a perfect canvas. Here are some tested variations that add visual and flavorful interest while maintaining photogenic qualities.
- Salted Caramel Swirl: Before baking, drizzle 1/3 cup of thick salted caramel sauce over the batter and use a knife to swirl it gently. This creates beautiful marbled patterns in the final cut piece.
- Espresso Chip: Dissolve 1 tablespoon of instant espresso powder into the vanilla extract. Fold in 3/4 cup of dark chocolate chips after the dry ingredients. The espresso deepens the chocolate color and the chips add texture.
- Peanut Butter Pocket: Drop dollops of 1/2 cup of smooth peanut butter onto the batter in the pan and swirl gently. The peanut butter will sink slightly, creating pockets of contrasting color and flavor.
- Mint Chocolate: Replace the vanilla extract with 1 tsp of pure peppermint extract. After baking and cooling, top with a simple mint glaze (powdered sugar, milk, peppermint extract) for a bright white contrast.
- Gluten-Free Adaptation: Substitute the all-purpose flour with a 1:1 gluten-free baking blend. The texture may be slightly more delicate, but it will remain fudgy and visually appealing.
What to Serve With This Recipe
Styling your shot with complementary elements tells a more enticing story and gives viewers serving ideas.
For a classic pairing, place a scoop of high-quality vanilla bean ice cream slowly melting on a warm brownie square. The contrast of temperatures and colors is irresistible. A drizzle of warm chocolate ganache or caramel sauce adds movement and shine to your photo.
For a beverage shot, style with a glass of cold milk, a cup of black coffee, or a glass of port wine. In overhead spreads, include elements like whole walnuts, a scattered pile of chocolate curls, or the wrapper from your chocolate bar to add context and depth to the narrative.
Storage & Make-Ahead Instructions
- Proper storage ensures your brownies (and your photo subjects) stay fresh.
- Room Temperature Storage: Once completely cool, store brownies in an airtight container at room temperature for up to 3 days. Place parchment between layers if stacking to preserve the glossy tops.
- Freezing for Later: These brownies freeze exceptionally well for up to 3 months. Wrap the whole slab or individual portions tightly in plastic wrap, then in foil or a freezer bag. Thaw overnight in the refrigerator. This is perfect for planning a photoshoot.
- Make-Ahead Strategy: You can bake the brownies 1 day ahead. Store the uncut slab at room temperature, tightly wrapped. Cut and style the next day. The flavor often improves, and the texture becomes even more fudgy.
- Reviving Shine: If the glossy top dulls slightly overnight, a very brief pass with a culinary torch (held at a distance) or a few seconds under a broiler can bring back the sheen—be extremely careful not to burn.
Frequently Asked Questions
Q: Why didn’t my brownies get the shiny, crackly top?
A: This almost always traces back to the eggs and sugar. Ensure your eggs are truly room temperature and that you whisk them with the sugar vigorously enough to reach the thick, ribbon stage. This dissolves the sugar, which recrystallizes on the surface during baking to create the shine.
Q: How do I get perfectly clean, crumb-free cuts?
A: Cool completely, then chill. Use a very sharp knife (a chef’s knife or a bench scraper works well). Run the blade under very hot water, wipe it completely dry, and make a single, confident cut straight down.
Clean the blade after each cut.
Q: Can I use cocoa powder instead of bar chocolate?
A: For these photography-optimized brownies, I don’t recommend it. Melted bar chocolate provides the fat structure and cocoa butter that gives the brownies their fudgy texture, rich mouthfeel, and superior sheen. Cocoa powder-only recipes tend to be cakier.
Q: My brownies are too cakey. What went wrong?
A: The usual culprits are overmixing the batter after adding the flour (which develops gluten) or over-baking. Remember to fold until just combined and use the toothpick test for doneness, aiming for moist crumbs.
Q: What’s the best time of day to photograph food?
A: The “golden hour”—the hour after sunrise or before sunset—provides beautifully soft, warm, directional light. However, bright indirect light from a north-facing window (in the Northern Hemisphere) is a fantastic and consistent option throughout the day.
Q: How can I make the chocolate look extra glossy in photos?
A: A very light, fine mist of water from a spray bottle can add temporary dew-like droplets. For a drizzle shot, warm your ganache slightly so it pours in a shiny stream. A tiny dab of neutral oil (like canola) on a paper towel can also be gently applied to highlight edges.
Q: Can I double this recipe?
A: Yes, for a thicker brownie or to bake in a 9×13-inch pan. Double all ingredients. The baking time will increase; start checking at 40 minutes.
Note that in a larger pan, you may get slightly less of the coveted crackly top crust proportionally.
Final Thoughts
Mastering brownie photography is a delightful blend of precise baking and artistic styling. It starts with a reliable recipe that delivers on texture and visual appeal—the glossy top, the fudgy center, the clean cuts. From there, it’s about observing the light, playing with angles, and styling with intention to tell a simple, delicious story.
Remember, the goal is to make the viewer not just see the brownie, but to almost taste its rich, chocolatey depth and feel its tender crumb.
I encourage you to bake this recipe, play with these photography tips, and don’t be afraid to take dozens of shots. Find what angle makes your brownies look most irresistible to you. Share your creations, and if you have any questions, reach out.
Now, go preheat that oven and get ready to capture something truly sweet.
Classic Fudgy Brownies (Photography-Ready)
Ingredients
Equipment
Method
- Preheat your oven to 350°F (175°C). Line an 8×8-inch metal baking pan with parchment paper, leaving an overhang on two opposite sides. This creates a ‘sling’ for easy, clean removal—essential for getting that perfect, uncut square shot. Lightly grease the exposed sides of the pan.
- Create a double boiler by placing a heatproof bowl over a saucepan of barely simmering water, ensuring the bowl doesn’t touch the water. Add the chopped chocolate and butter. Melt gently, stirring occasionally until completely smooth and glossy. Remove from heat and let cool for 5 minutes. This cooling step is vital; adding hot chocolate to eggs will cook them and ruin the texture.
- In a large bowl, whisk the sugar and room-temperature eggs together vigorously for a full 2-3 minutes until the mixture is pale, thick, and falls from the whisk in a ribbon. This step incorporates air and is the secret to that shiny, paper-thin crust. Whisk in the vanilla extract.
- Slowly pour the slightly cooled chocolate-butter mixture into the egg-sugar mixture, whisking constantly until fully combined and glossy. Sift the flour, cocoa powder, and salt directly into the bowl. Using a spatula, fold gently until just combined and no dry streaks remain. Overmixing leads to tough, cakey brownies that don’t photograph as fudgy.
- Pour the thick batter into your prepared pan, smoothing the top with the spatula. Bake for 30-35 minutes. The key visual cue? A set, puffed center with that glorious crackly top, and a toothpick inserted 1-inch from the edge should come out with a few moist crumbs. Under-baking slightly is better for photography than over-baking. Cool completely in the pan on a wire rack before lifting out and slicing with a hot, clean knife for sharp edges.


