
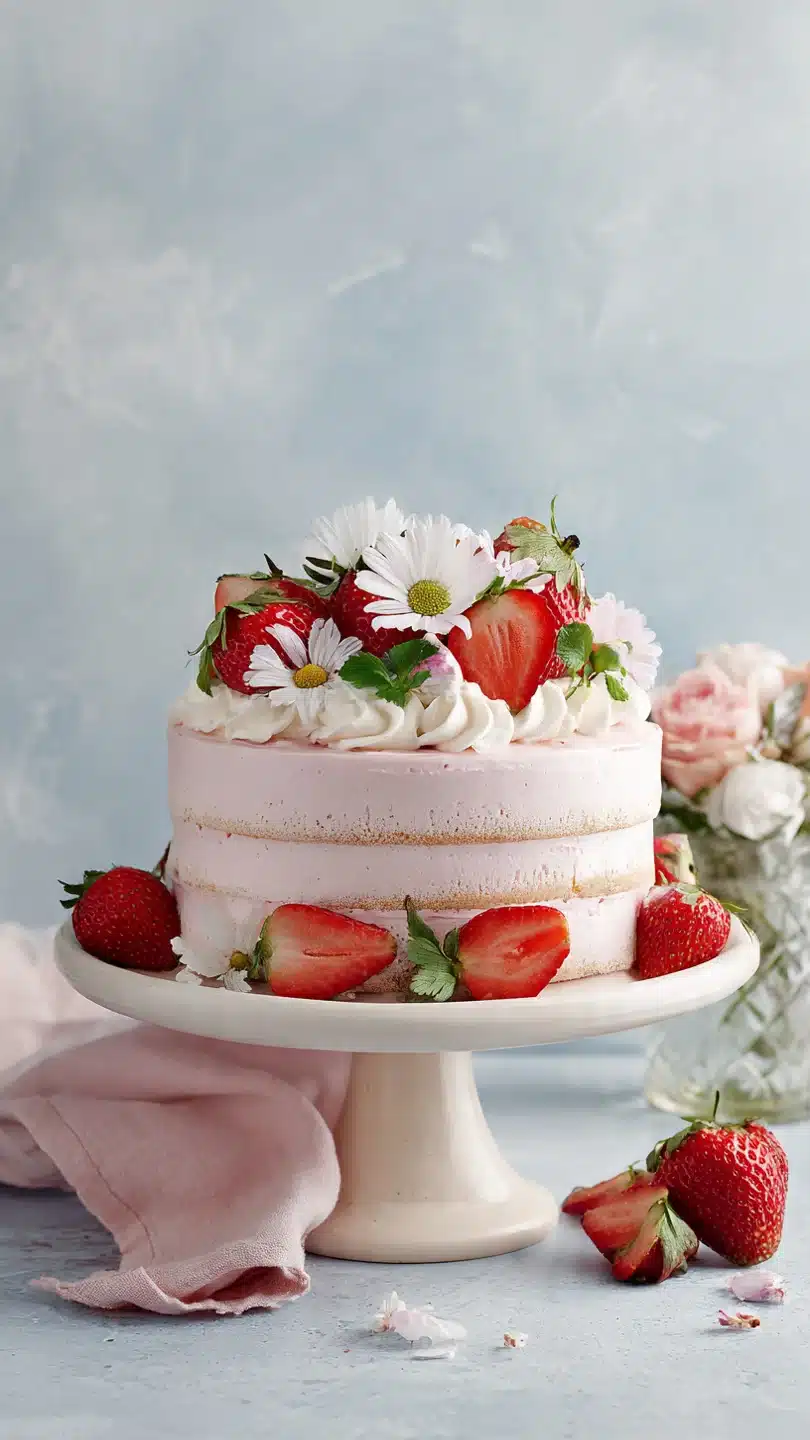
Vintage strawberry cake
There’s a certain magic to a classic strawberry cake that modern, artificially-flavored versions just can’t capture. It’s the taste of a tender, pink-flecked crumb that smells like a sun-warmed berry patch, paired with a frosting that tastes genuinely of strawberries, not just sugar and dye. This vintage strawberry cake recipe is the one I’ve refined over years of professional baking, designed to deliver that authentic, nostalgic flavor using real fruit and reliable techniques.
It’s the perfect centerpiece for a birthday, a spring celebration, or any day that calls for a truly special dessert.
This cake stands out because it’s built on technique, not tricks. Here’s what makes it worth the effort:
- Authentic Strawberry Flavor: We use a reduced strawberry puree in both the cake and frosting, creating a deep, true berry taste without artificial extracts.
- Exceptionally Moist & Tender Crumb: The combination of sour cream and the creaming method ensures a cake that stays soft for days.
- Professional-Grade Frosting: The cream cheese frosting is stabilized with a reduced strawberry syrup, so it’s flavorful, pipeable, and won’t become runny.
- Visually Stunning: The natural pink hue (enhanced with just a touch of optional gel color) and classic layered presentation make it a showstopper.
- Tested & Reliable: Every step, from puree reduction to mixing time, is specified to guarantee your success, even if you’re new to layer cakes.
Ingredients You’ll Need
- Let’s gather our ingredients—this is where the magic starts. Using high-quality, room-temperature components is non-negotiable for the perfect texture. For the strawberry puree, you’ll need about one pound of fresh, ripe strawberries. Hull them, blend until smooth, then simmer the puree in a saucepan for 20-25 minutes until reduced by about half to 1 1/2 cups. This concentrates the flavor and removes excess water that would weigh down the cake. Cool it completely before using. For the frosting, you’ll make a smaller, separate reduction from another 1/2 cup of puree, cooked down to about 3 tablespoons of thick syrup.

Note: You’ll find the complete list of ingredients, along with their exact measurements, in the printable recipe card at the bottom of this post.
Kitchen Equipment Needed
You don’t need specialized tools, but the right equipment makes the process smoother. Two 9-inch round cake pans are essential. I highly recommend light-colored aluminum pans for even baking; dark pans can cause over-browning.
A stand mixer is ideal for properly creaming the butter and sugar, but a sturdy hand mixer will work. You’ll also need a fine-mesh sieve for sifting powdered sugar, parchment paper to guarantee easy cake release, a wire cooling rack, and an offset spatula for frosting. A small saucepan is necessary for reducing the strawberry puree.
How to Make Vintage Strawberry Cake Recipe
Step 1: Prepare Your Components
Before you even turn on the mixer, success is in the prep. Preheat your oven to 350°F (175°C). Grease your cake pans with butter or baking spray, dust lightly with flour, and tap out the excess.
Then, cut parchment paper circles to line the bottoms—this is your insurance policy for perfect release. In a medium bowl, whisk together the flour, baking powder, baking soda, and salt. Trust me, taking the extra 30 seconds to whisk these ensures your leaveners are evenly distributed for a uniform rise.
Step 2: Cream the Butter & Sugar
This is the most critical step for texture. In your stand mixer bowl, beat the room-temperature butter on medium speed until it’s pale and creamy, about 1 minute. Gradually add the sugar while the mixer is running.
Now, beat on medium-high for a full 3 to 4 minutes. Believe me, this isn’t optional. The mixture should become very light in color and fluffy, almost like whipped cream.
This process incorporates air, which is the foundation of your cake’s tender structure.
Step 3: Build the Batter
With the mixer on medium, add the room-temperature eggs one at a time, beating for a full 30 seconds after each to fully incorporate. Beat in the vanilla. Scrape down the bowl.
Now, with the mixer on low, you’ll add the dry ingredients and wet ingredients in alternating batches: start with 1/3 of the flour mixture, then half of the sour cream, another 1/3 of flour, the remaining sour cream and all of the cooled strawberry puree, and finish with the last of the flour. Mix just until the streaks of flour disappear after each addition. Overmixing here is the enemy of tenderness.
Step 4: Bake to Perfection
Divide the batter evenly between your prepared pans—a kitchen scale is handy here for precision. Smooth the tops with a spatula. Bake on the center rack for 28 to 32 minutes.
Tip from me: rotate the pans halfway through for even baking. The cakes are done when the tops are set and spring back lightly when touched, and a toothpick inserted into the center comes out with a few moist crumbs, not wet batter. Let them cool in the pans for exactly 15 minutes before turning them out onto a wire rack.
Step 5: Frost, Garnish, and Serve
While the cakes cool completely, make the frosting. Beat the cream cheese and butter until perfectly smooth and lump-free. Gradually add the sifted powdered sugar on low speed to avoid a cloud of sugar dust.
Then, beat in the cooled strawberry reduction, vanilla, and salt. Increase the speed to medium-high and beat for 2-3 minutes until noticeably fluffier. Place one cake layer on your serving plate, spread with frosting, top with the second layer, and frost the top and sides.
Step back and admire your work, then garnish the top with fresh strawberry slices. For the best experience, let the frosted cake sit for about an hour before slicing to allow the flavors to meld.
My years in pastry kitchens taught me that details make the difference. Here are my top tips for this recipe:
- Ingredient Temperature is Key: Your butter, eggs, and sour cream must be at a true 65-70°F room temperature. Cold ingredients won’t emulsify properly, leading to a dense or curdled batter. Take them out at least 1-2 hours ahead.
- Don’t Skimp on Reducing the Puree: Simmering the strawberry puree is essential. It removes water that would steam in the oven and create gummy pockets. The reduction should be the consistency of thick applesauce and completely cool before mixing.
- The “Just Combined” Rule: Once you start adding flour, mix only until you no longer see dry streaks. Overmixing develops gluten, resulting in a tough, chewy cake instead of a tender, delicate one.
- Cool Cakes Completely Before Frosting: Even slightly warm cakes will melt the frosting, creating a slippery, messy layer. Patience here ensures a beautiful, stable finish.
Recipe Variations
- This classic recipe is wonderfully adaptable. Here are some tested variations to make it your own:
- Lemon-Strawberry Twist: Add the zest of one lemon to the cake batter and use lemon juice instead of vanilla in the frosting for a bright, tangy contrast.
- Strawberry Shortcake Style: Skip the frosting between layers. Instead, split the cooled cake layers horizontally to create four thin layers, and fill them with lightly sweetened whipped cream and sliced fresh strawberries.
- Almond Accent: Substitute 1/2 teaspoon of pure vanilla extract with 1 teaspoon of pure almond extract in the batter. Garnish the frosted cake with toasted sliced almonds.
- Dairy-Free Adaptation: Use plant-based butter and sour cream, and for the frosting, use a thick, tangy vegan cream cheese alternative. The strawberry puree reduction remains the same.
- Mini Layer Cakes: Bake the batter in three 6-inch round pans for an adorable, tall mini-cake. Reduce baking time to 22-26 minutes.
- Strawberry-Rhubarb Fusion: Replace 1/2 cup of the strawberry puree in the cake with an equal amount of cooked, pureed rhubarb for a classic, tangy flavor pairing.
What to Serve With This Recipe
This vintage strawberry cake is a celebration in itself, but it can be part of a beautiful dessert spread. For a classic afternoon tea, serve thin slices alongside a pot of Earl Grey or a light, floral herbal tea. For a summer party, offer it with a scoop of vanilla bean ice cream or a dollop of lightly sweetened whipped cream.
To create a full dessert menu, pair it with lighter options like fresh fruit skewers or lemon sorbet. It’s perfect for birthdays, Mother’s Day brunch, bridal showers, or as the grand finale to a spring or summer dinner party.
Storage & Make-Ahead Instructions
- Proper storage keeps this cake tasting fresh. For short-term storage: Cover the frosted cake with a cake dome or invert a large bowl over it. It can sit at cool room temperature for up to 2 hours. For longer storage, refrigerate it in an airtight container for up to 4 days. For freezing: Freeze unfrosted cake layers tightly wrapped in plastic wrap and then aluminum foil for up to 2 months. Thaw overnight in the refrigerator. Frosting can be made ahead and refrigerated in an airtight container for up to 3 days; let it come to room temperature and re-whip briefly before using. To make the entire cake ahead: Bake and cool the layers, wrap them well, and freeze. Make the frosting and store it separately in the fridge. The day before serving, thaw the layers in the fridge, then assemble and frost.
Frequently Asked Questions
Q: Can I use frozen strawberries to make the puree?
A: I do not recommend it for the cake batter. Frozen berries release a tremendous amount of water when thawed, even after reducing, which can compromise the cake’s structure. For the best, most reliable results, fresh is best.
Q: My frosting seems too soft. What did I do wrong?
A: This usually happens if the strawberry reduction wasn’t cooked down enough or if it was still warm when added. Also, ensure your butter and cream cheese are cool, not overly soft. If your frosting is too soft, simply chill it in the refrigerator for 20-30 minutes, then re-whip.
Q: How can I tell if my cake layers are fully baked?
A: Use the visual and tactile tests: the edges will pull slightly away from the pan, the top will be springy to the touch, and a toothpick inserted into the thickest part will come out clean or with a few dry crumbs. If you see wet batter, it needs more time.
Q: Can I make this into cupcakes?
A: Absolutely! Line a muffin tin with cupcake liners and fill each 2/3 full. Bake at 350°F for 18-22 minutes.
This recipe will yield about 24 cupcakes.
Q: Why did my cake sink in the middle?
A: Sinking is typically caused by underbaking, opening the oven door too early (before the structure has set), or using expired or incorrectly measured leavening agents (baking powder/soda). Ensure your oven is properly preheated and avoid peeking before the 25-minute mark.
Q: Is the pink gel food coloring necessary?
A: Not at all. The reduced strawberry puree gives the cake a lovely natural pinkish-tan hue. The gel color is purely for visual appeal if you desire a more vibrant, classic “strawberry cake” pink.
Q: Can I use a different type of frosting?
A: Yes. A Swiss meringue buttercream or a simple vanilla buttercream would also be delicious. If using a buttercream, you can incorporate 2-3 tablespoons of the strawberry reduction for flavor.
Final Thoughts
This vintage strawberry cake is more than just a dessert; it’s a testament to the beauty of baking from scratch with real ingredients. The process of reducing the strawberries, carefully creaming the butter, and watching the layers rise in the oven is deeply satisfying. The result is a cake with a tender, moist crumb and a strawberry flavor that’s genuine and rich, not cloying or artificial.
It’s the kind of cake that creates memories.
I encourage you to give this recipe a try. Follow the tips on ingredient temperature and puree reduction, and trust the process. When you slice into that beautiful pink layer and taste the difference that real fruit makes, you’ll understand why this vintage version is a classic worth preserving.
I’d love to hear how it turns out for you—share your creation and any questions in the comments below. Happy baking
Vintage Strawberry Cake
Ingredients
Equipment
Method
- Preheat oven to 350°F (175°C). Grease and flour two 9-inch round cake pans, then line the bottoms with parchment paper. In a medium bowl, whisk together the flour, baking powder, baking soda, and salt. Set aside.
- In the bowl of a stand mixer fitted with the paddle attachment, beat the room-temperature butter on medium speed until creamy, about 1 minute. Gradually add the sugar and beat on medium-high for 3-4 minutes until very light and fluffy. Scrape down the bowl. Add eggs one at a time, beating well after each addition. Beat in the vanilla.
- With the mixer on low, add the dry ingredients in three parts, alternating with the sour cream and strawberry puree, beginning and ending with the dry ingredients. Mix just until combined after each addition. If using, stir in the gel food coloring until evenly distributed. Do not overmix.
- Divide the batter evenly between the prepared pans. Smooth the tops. Bake for 28-32 minutes, or until a toothpick inserted into the center comes out clean and the tops spring back when lightly pressed. Let cakes cool in pans for 15 minutes, then turn out onto a wire rack to cool completely.
- While cakes cool, prepare the frosting. In a stand mixer, beat the cream cheese and butter until completely smooth. Gradually add the sifted powdered sugar on low speed. Add the strawberry reduction, vanilla, and salt, then beat on medium-high for 2-3 minutes until fluffy. Frost the cooled cake layers, then garnish with fresh strawberry slices.


