
Small Batch Cinnamon Rolls (Makes 6 Rolls)
There’s something incredibly comforting about the aroma of cinnamon rolls baking in the oven. This small batch recipe is perfect for those cozy weekend mornings when you want a delicious treat without the commitment of a large batch. These cinnamon rolls are soft, fluffy, and packed with the warm flavors of cinnamon and brown sugar, all topped with a sweet glaze.
Why You’ll Love This Recipe- Easy to Make: No yeast required, so you can enjoy fresh cinnamon rolls in under an hour.
- Perfect Portion Size: Makes just 6 rolls, ideal for small families or a personal indulgence.
- Quick Prep: Minimal kneading and simple ingredients make this recipe a breeze.
- Flavorful and Warm: The combination of cinnamon and brown sugar creates a comforting taste that’s perfect for any morning.
- Customizable: Easily adaptable to different dietary preferences and flavor variations.
Let’s gather our ingredients—these simple pantry staples create magic together. For the dough, you’ll need all-purpose flour, granulated sugar, salt, baking powder, whole milk, and unsalted butter. The filling consists of brown sugar and ground cinnamon.
Finally, for the glaze, you’ll need powdered sugar and milk.
When choosing your ingredients, opt for high-quality cinnamon for the best flavor. If you’re looking for a substitution, you can use non-dairy milk like almond or oat milk for the dough and glaze. For a richer dough, consider using some heavy cream in place of some of the milk.

Note: You’ll find the complete list of ingredients, along with their exact measurements, in the printable recipe card at the bottom of this post.
To make these cinnamon rolls, you’ll need a few essential pieces of equipment: a large mixing bowl, a rolling pin, an 8-inch round baking pan, measuring cups and spoons, and a whisk. If you don’t have a rolling pin, a wine bottle or similar cylindrical object can work in a pinch.
How to Make Small Batch Cinnamon Rolls Recipe
Step 1: Mix the Dough
In a large bowl, combine the flour, granulated sugar, salt, and baking powder. Mix well to ensure even distribution of the dry ingredients. Add the milk and melted butter to the dry ingredients.
Stir until a soft dough forms. You might need to use your hands to bring the dough together. Trust me, this dough comes together quickly and easily.
Step 2: Knead and Roll
Turn the dough out onto a lightly floured surface and knead gently for about 1 minute until smooth. Roll the dough into a rectangle about 8×10 inches. Believe me, the key here is not to overwork the dough; it should remain soft and pliable.
Step 3: Add the Filling
In a small bowl, mix the brown sugar and cinnamon. Spread this mixture evenly over the rolled-out dough, leaving a small border around the edges. Tip from me: use your hands to press the filling into the dough for better adhesion.
Step 4: Roll and Cut
Starting from one of the longer sides, roll the dough tightly into a log. Cut the log into 6 equal pieces. Place the rolls cut side up in a greased 8-inch round baking pan.
Now comes the fun part—watching your rolls take shape!
Step 5: Bake and Glaze
Bake at 375°F (190°C) for 18-20 minutes, or until the rolls are golden brown and the filling is bubbling. While the rolls are baking, prepare the glaze by whisking together the powdered sugar and milk until smooth. Once the rolls are out of the oven, let them cool for a few minutes before drizzling with the glaze.
Step back and admire your delicious creation before serving warm and enjoying!
Professional Tips & Techniques Pro tip: To ensure the rolls are evenly sized, use a sharp knife or dental floss to cut the dough log. Dental floss creates a clean cut without squishing the dough. Temperature matters: Use room temperature milk for the dough; it helps the ingredients blend smoothly and ensures the dough is easy to work with. Timing is key: Keep an eye on the rolls as they bake. They should be golden brown on top and the filling should be bubbling. If they start to brown too quickly, cover with foil for the remaining baking time. Common mistake to avoid: Don’t overfill the rolls with the cinnamon-sugar mixture, as it can cause the filling to leak out during baking. A light, even layer is all you need. Visual cues for doneness: Look for a golden brown color on the top of the rolls and a bubbling filling. When you gently press the top of a roll, it should feel firm but spring back slightly. Recipe Variations & Customizations Nutty Crunch: Add a handful of chopped pecans or walnuts to the filling for a delightful crunch. Citrus Zest: Incorporate some orange or lemon zest into the dough for a fresh twist on the classic flavor. Chocolate Swirl: Mix in some mini chocolate chips with the cinnamon-sugar filling for a decadent treat. Gluten-Free Option: Use a gluten-free all-purpose flour blend in place of regular flour. Make sure to check the package instructions for any adjustments to liquid ratios. Vegan-Friendly: Substitute the milk with a non-dairy alternative and use vegan butter for both the dough and filling. Seasonal Spice: During the holiday season, add a pinch of nutmeg or ginger to the filling for a festive flavor. What to Serve With This RecipeThese cinnamon rolls are perfect on their own but can be paired with a variety of beverages and sides. Serve them with a hot cup of coffee or tea for a classic breakfast pairing. For a more substantial meal, consider adding fresh fruit like berries or sliced bananas on the side.
They also make a great addition to a brunch spread alongside scrambled eggs, bacon, and fresh orange juice.
Storage & Make-Ahead InstructionsStore any leftover cinnamon rolls in an airtight container at room temperature for up to 2 days. For longer storage, refrigerate them for up to a week or freeze for up to 3 months. To reheat, wrap the rolls in foil and warm them in a 350°F (175°C) oven for about 10 minutes.
If you want to make these rolls ahead of time, you can prepare the dough and filling, roll and cut the rolls, then place them in the baking pan. Cover tightly with plastic wrap and refrigerate overnight. In the morning, let the rolls sit at room temperature for 30 minutes before baking as directed.
Nutritional BenefitsCinnamon rolls provide a quick source of energy from the carbohydrates in the dough and sugar. The milk in the recipe adds a small amount of calcium, which is beneficial for bone health. While these rolls are a treat, enjoying them in moderation can fit into a balanced diet.
Frequently Asked Questions Q: Can I make this ahead of time?A: Yes, you can prepare the rolls the night before, refrigerate them, and bake in the morning. Let them sit at room temperature for 30 minutes before baking.
Q: Can I use a different type of milk?A: Absolutely, you can use non-dairy milk like almond, oat, or soy milk for both the dough and the glaze.
Q: How do I know when the rolls are done?A: The rolls are done when they are golden brown on top and the filling is bubbling. They should feel firm but spring back slightly when gently pressed.
Q: Can I freeze these cinnamon rolls?A: Yes, you can freeze the baked rolls for up to 3 months. Wrap them tightly in plastic wrap and then foil before freezing. Thaw at room temperature and reheat in the oven.
Q: Can I add nuts or raisins to the filling?A: Yes, you can add chopped nuts or raisins to the cinnamon-sugar filling for added texture and flavor.
Q: What if I don’t have baking powder?A: Baking powder is essential for this recipe as it helps the dough rise without yeast. If you don’t have it, you’ll need to use a different recipe that includes yeast.
Q: How can I adjust the sweetness of the glaze?A: To make the glaze less sweet, reduce the amount of powdered sugar. For a sweeter glaze, add more powdered sugar or a touch of vanilla extract.
Q: Can I use whole wheat flour instead of all-purpose flour?A: You can use whole wheat flour, but the texture will be denser. A 50/50 mix of whole wheat and all-purpose flour might yield better results.
Recipe Origin or HistoryCinnamon rolls have a long history, with roots in Sweden and Denmark, where they are known as kanelbullar and kanelsnegle, respectively. Over time, they’ve become a beloved breakfast treat in the United States, often enjoyed on special occasions or lazy weekend mornings. This small batch version is perfect for those who want to enjoy the comfort of homemade cinnamon rolls without the hassle of a large recipe.
Final ThoughtsThese small batch cinnamon rolls are a delightful treat that’s easy to make and perfect for any weekend morning. The combination of a quick dough, flavorful filling, and sweet glaze makes them irresistible. I encourage you to try this recipe and enjoy the warmth and comfort it brings to your kitchen.
Let me know how your rolls turn out in the comments below, and don’t forget to rate the recipe and share it on social media. Happy baking!
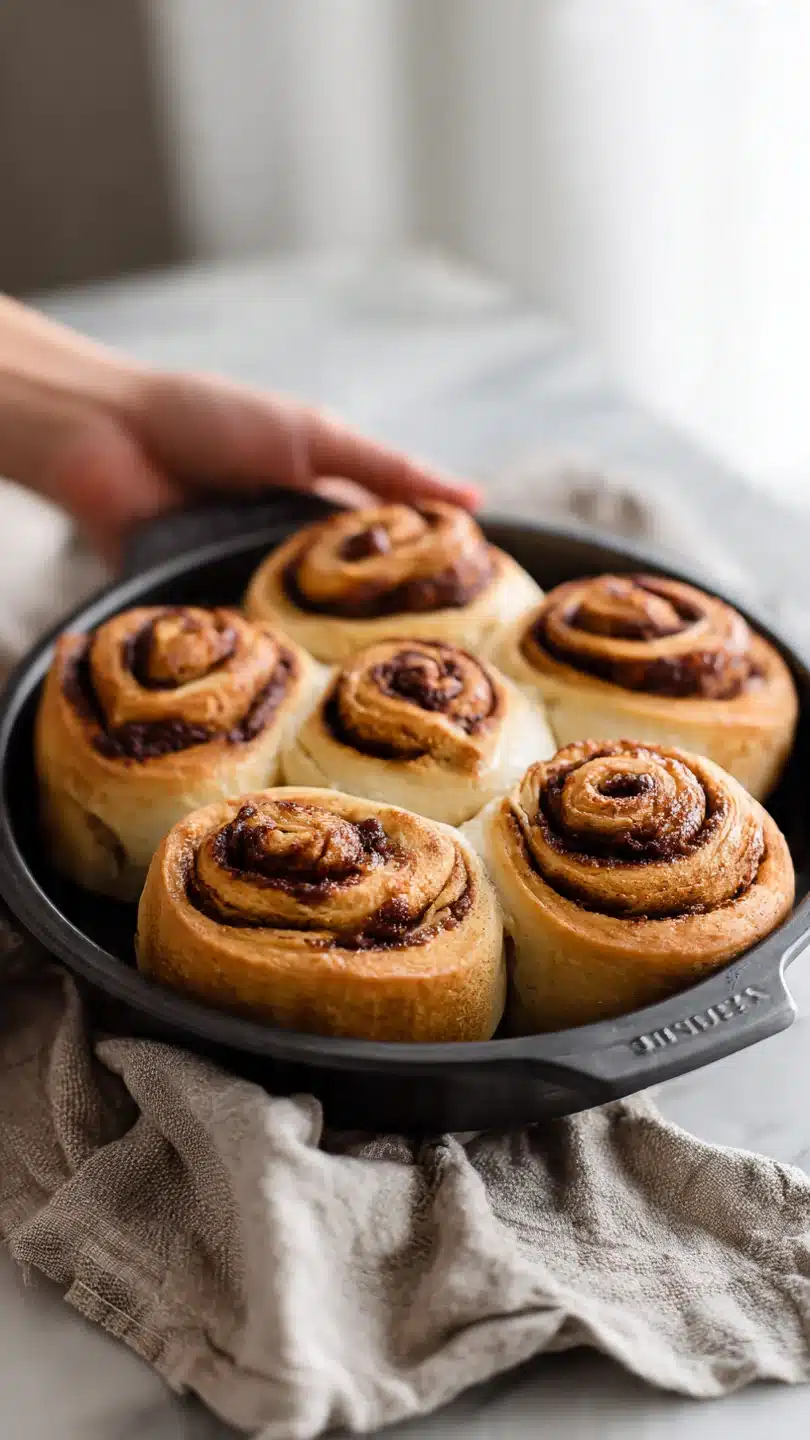
Small Batch Cinnamon Rolls
Ingredients
Equipment
Method
- In a large bowl, combine the flour, granulated sugar, salt, and baking powder. Mix well to ensure even distribution of the dry ingredients.
- Add the milk and melted butter to the dry ingredients. Stir until a soft dough forms. You might need to use your hands to bring the dough together.
- Turn the dough out onto a lightly floured surface and knead gently for about 1 minute until smooth. Roll the dough into a rectangle about 8×10 inches.
- In a small bowl, mix the brown sugar and cinnamon. Spread this mixture evenly over the rolled-out dough, leaving a small border around the edges.
- Starting from one of the longer sides, roll the dough tightly into a log. Cut the log into 6 equal pieces. Place the rolls cut side up in a greased 8-inch round baking pan.
- Bake at 375°F (190°C) for 18-20 minutes, or until the rolls are golden brown and the filling is bubbling. While the rolls are baking, prepare the glaze by whisking together the powdered sugar and milk until smooth.
- Once the rolls are out of the oven, let them cool for a few minutes before drizzling with the glaze. Serve warm and enjoy!


