
No knead cinnamon raisin bread – The Delicious plate
- Easy to Make: The no knead method simplifies the bread-making process, making it accessible for everyone.
- Flavorful and Aromatic: The combination of cinnamon and raisins creates a deliciously sweet and fragrant loaf.
- Moist and Tender: The long fermentation process ensures a moist crumb and a tender texture.
- Versatile: Perfect for breakfast, snacks, or as a base for French toast.
- Minimal Ingredients: You likely already have most of the ingredients in your pantry.
Ingredients You’ll Need
Let’s gather our ingredients—these simple pantry staples create magic together. For this no knead cinnamon raisin bread, you’ll need:
- All-purpose flour: The base of our bread, providing structure and texture.
- Salt: Enhances flavor and helps control yeast activity.
- Instant yeast: Essential for fermentation, helping the dough rise.
- Water: Room temperature water activates the yeast and hydrates the flour.
- Raisins: Adds sweetness and a chewy texture to the bread.
- Cinnamon: Brings a warm, spicy flavor that pairs perfectly with the raisins.
- Sugar: A small amount to balance the flavors and feed the yeast.
When selecting your ingredients, opt for high-quality all-purpose flour for the best results. If you prefer, you can use golden raisins for a milder sweetness. For the cinnamon, Ceylon cinnamon offers a more delicate flavor compared to the more common Cassia variety.

Note: You’ll find the complete list of ingredients, along with their exact measurements, in the printable recipe card at the bottom of this post.
Kitchen Equipment Needed
To make this no knead cinnamon raisin bread, you’ll need a few essential pieces of equipment:
- Large mixing bowl: For mixing and fermenting the dough.
- Dutch oven: A heavy, lidded pot that helps create a steamy environment for baking.
- Plastic wrap: To cover the dough during fermentation.
- Oven mitts: For safely handling the hot Dutch oven.
If you don’t have a Dutch oven, you can use a heavy, lidded pot that can withstand high temperatures. A 4-6 quart size works best for this recipe.
How to Make No Knead Cinnamon Raisin Bread Recipe
Step 1: Mix the Dough
In a large bowl, combine the flour, salt, yeast, cinnamon, and sugar. Mix well to ensure even distribution of the dry ingredients. Add the water and raisins, stirring until a sticky dough forms.
Trust me, this dough will be wet and shaggy, but that’s exactly what you want. Cover the bowl with plastic wrap and let it rest at room temperature for 12-18 hours. The long fermentation time allows the flavors to develop and the gluten to form naturally.
Step 2: Shape the Dough
After the resting period, you’ll notice the dough has doubled in size and become bubbly. Turn it out onto a floured surface and gently shape it into a ball. Believe me, this is the fun part where you can really feel the dough come together.
Let the shaped dough rest for about 30 minutes. This step helps the dough relax and makes it easier to handle when transferring to the Dutch oven.
Step 3: Preheat and Bake
Preheat your oven to 450°F (230°C) and place a Dutch oven with the lid on inside to heat up. Once hot, carefully remove the Dutch oven and place the dough inside. Cover with the lid and bake for 30 minutes.
Tip from me: the steam trapped inside the Dutch oven creates a perfect environment for a crusty exterior and a soft interior. After 30 minutes, remove the lid and bake for an additional 15 minutes until the bread is golden brown.
Step 4: Cool and Enjoy
Once baked, carefully remove the bread from the Dutch oven and let it cool on a wire rack. Now comes the satisfying moment when you can finally slice into your freshly baked no knead cinnamon raisin bread. Step back and admire your handiwork before enjoying a warm slice with your favorite spread.
Pro tip: To ensure the best flavor, use room temperature water. Cold water can slow down the fermentation process, while hot water can kill the yeast. Temperature matters: The long fermentation time at room temperature is crucial. It allows the dough to develop a complex flavor and a tender crumb. Visual cues: The bread is done when it’s golden brown and sounds hollow when tapped on the bottom. If you have a thermometer, check that the internal temperature is at least 190°F (88°C). Common mistake to avoid: Don’t rush the fermentation process. The dough needs time to develop its flavor and texture.Recipe Variations & Customizations
- Nutty Twist: Add a cup of chopped walnuts or pecans to the dough for a crunchy texture and nutty flavor.
What to Serve With This Recipe
This no knead cinnamon raisin bread is perfect for breakfast with a spread of butter or your favorite jam. Pair it with a cup of coffee or tea for a cozy morning treat. For a more substantial meal, use it as a base for French toast or serve it alongside a hearty soup or stew.
It’s also a great addition to a brunch spread or a snack with cheese and fruit.
Storage & Make-Ahead Instructions
- Store any leftover bread in an airtight container at room temperature for up to 3 days. For longer storage, wrap the cooled bread tightly in plastic wrap and freeze for up to 3 months. To reheat, thaw at room temperature and warm in a 350°F (175°C) oven for 10-15 minutes.
To make this bread ahead of time, prepare the dough as instructed and let it ferment in the refrigerator for up to 24 hours. When ready to bake, let the dough come to room temperature for about an hour before shaping and baking.
Nutritional Benefits
- This bread contains cinnamon, which is known to help regulate blood sugar levels. Raisins provide a good source of fiber and antioxidants, contributing to overall health. The bread is also a good source of carbohydrates, providing energy for your day.
Frequently Asked Questions
Q: Can I make this bread ahead of time?
Yes, you can prepare the dough and let it ferment in the refrigerator for up to 24 hours before baking.
Q: Can I use active dry yeast instead of instant yeast?
Yes, but you’ll need to activate it in warm water before adding it to the dough.
Q: How can I tell when the bread is done baking?
The bread is done when it’s golden brown and sounds hollow when tapped on the bottom. You can also use a thermometer to check for an internal temperature of at least 190°F (88°C).
Q: Can I freeze this bread?
Yes, wrap the cooled bread tightly in plastic wrap and freeze for up to 3 months. Thaw at room temperature before reheating.
Q: What can I substitute for raisins?
You can use dried cranberries, chopped dates, or even chocolate chips for a different flavor.
Q: Can I add nuts to the bread?
Yes, add a cup of chopped walnuts or pecans to the dough for a nutty flavor and texture.
Q: How can I make this bread gluten-free?
Use a high-quality gluten-free flour blend in place of all-purpose flour, adjusting the water content as needed.
Q: Can I make this bread without a Dutch oven?
Yes, you can use a heavy, lidded pot that can withstand high temperatures. A 4-6 quart size works best.
Recipe Origin or History
Cinnamon raisin bread has roots in American cuisine, often enjoyed as a sweet breakfast or snack. The no knead method, popularized by Jim Lahey, revolutionized home bread baking by making it more accessible and less labor-intensive.
Final Thoughts
This no knead cinnamon raisin bread recipe is a testament to the beauty of simplicity in baking. The long fermentation process develops a rich flavor and tender texture, making it a joy to bake and eat. Whether you’re a seasoned baker or a beginner, this recipe is easy to follow and yields delicious results every time.
Give it a try and share your creations with us. We’d love to hear how it turns out and see your photos on social media. Enjoy your baking journey, and don’t forget to savor each warm, delicious slice!
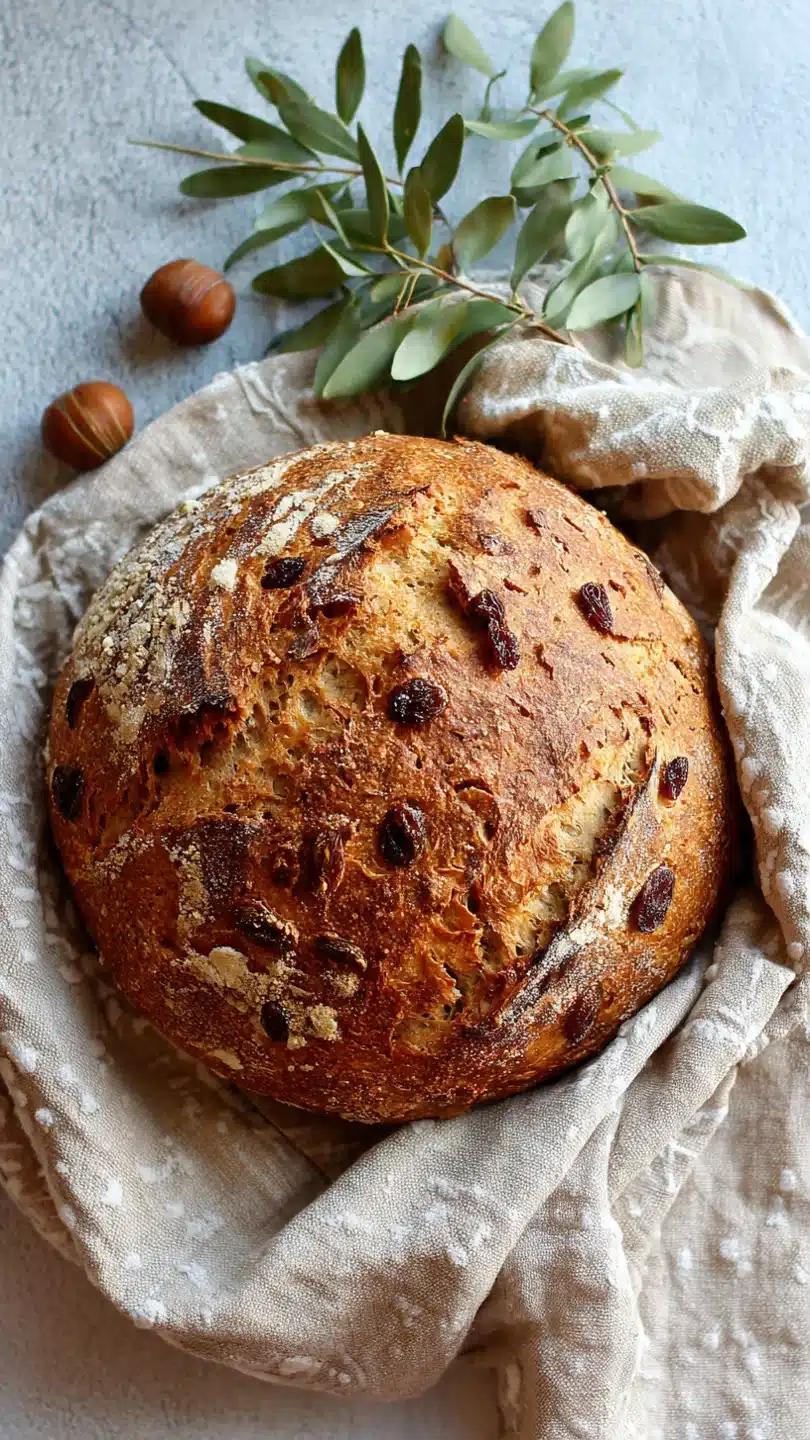
No Knead Cinnamon Raisin Bread
Ingredients
Equipment
Method
- In a large bowl, combine the flour, salt, yeast, cinnamon, and sugar. Mix well to ensure even distribution of the dry ingredients.
- Add the water and raisins to the dry mixture. Stir until a sticky dough forms. Cover the bowl with plastic wrap and let it rest at room temperature for 12-18 hours.
- After the resting period, preheat your oven to 450°F (230°C) and place a Dutch oven with the lid on inside to heat up.
- While the oven is heating, turn the dough out onto a floured surface and shape it into a ball. Let it rest for about 30 minutes.
- Carefully remove the hot Dutch oven from the oven, place the dough inside, and cover with the lid. Bake for 30 minutes, then remove the lid and bake for an additional 15 minutes until the bread is golden brown.


