
Aesthetic brownies
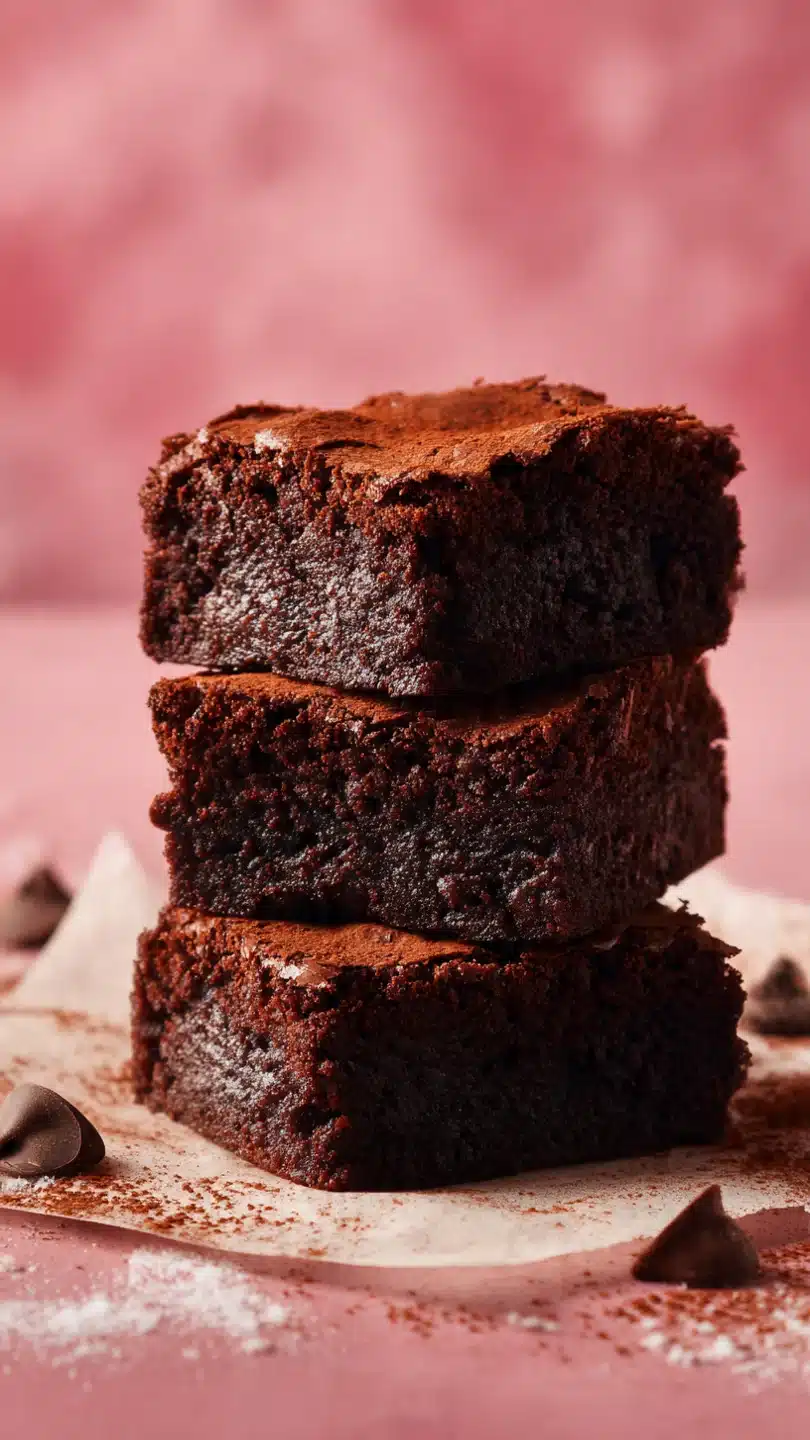
There’s something magical about a perfect brownie. It’s not just a dessert; it’s a textural experience—a dense, fudgy interior contrasted by that elusive, paper-thin, shiny crust. Now, imagine that perfect brownie, but designed to stop a scroll.
That’s the goal of an aesthetic brownie: a treat that delivers on every sensory promise, from its deep chocolate aroma to its stunning visual appeal. As a chef, I’ve tested countless brownie formulas. This one combines professional technique with an eye for presentation, giving you a reliable base that’s as customizable as it is delicious.
Let’s create a batch that’s worthy of both your taste buds and your camera roll.
- Guaranteed Crackly Top: The detailed whipping technique dissolves the sugar perfectly, creating that iconic, shiny, paper-thin crust every baker dreams of.
- Professional-Grade Fudginess: We use a high ratio of chocolate and butter to flour, and a precise baking time, ensuring an intensely moist, dense, and melt-in-your-mouth texture.
- Endlessly Customizable: This rich, balanced base is the perfect canvas for stunning toppings, swirls, and mix-ins, making it ideal for themed events, gifts, or social media.
- Scientifically Tested: Every step, from tempering the chocolate to the cooling time, is explained with the “why” behind it, so you understand the process and can replicate success.
- Clean, Beautiful Slices: The parchment sling and chilling tip ensure you get sharp, photogenic edges on every single brownie square.
- Balanced Flavor Profile: Using both granulated and brown sugar, plus a touch of salt, creates a complex sweetness that highlights the deep chocolate without being cloying.
Ingredients You’ll Need
Let’s gather our ingredients—this is where quality truly matters. Using premium chocolate and real butter isn’t just snobbery; it’s the foundation of flavor and texture. The fat and cocoa solids in good chocolate create a smoother, richer base, while European-style butter has a higher fat content that contributes to that luxurious mouthfeel.
Don’t skip the Dutch-process cocoa; its milder acidity and darker color give these brownies a profound chocolate depth and a beautiful dark hue.
- Unsalted butter: 1 cup (2 sticks). I prefer a high-fat, European-style butter like Kerrygold or Plugrá for unparalleled richness.
- High-quality dark chocolate: 8 ounces, chopped. Aim for 60-70% cacao from a brand like Guittard, Valrhona, or Callebaut. The chocolate bar you use will define the brownie’s soul.
- Granulated sugar: 1 1/2 cups. This fine sugar is key for dissolving into the eggs to create our shiny top.
- Light brown sugar: 3/4 cup, packed. This adds moisture and a subtle molasses note for deeper flavor complexity.
- Eggs: 4 large, room temperature. Non-negotiable! Cold eggs won’t whip properly with the sugar.
- Pure vanilla extract: 2 teaspoons. Use the real stuff, not imitation.
- All-purpose flour: 1 cup, spooned and leveled. This small amount is what keeps them fudgy, not cakey.
- Dutch-process cocoa powder: 1/2 cup, sifted. This provides intense color and a smooth chocolate flavor.
- Fine sea salt: 1 teaspoon. Balances and elevates all the sweetness.
- Espresso powder: 1/2 teaspoon (optional). This is my secret weapon—it won’t make your brownies taste like coffee, but it will amplify the chocolate flavor tenfold.
Kitchen Equipment Needed
You don’t need specialized gear, but the right tools make the process smoother and the results more consistent. A digital kitchen scale is my top recommendation for baking; measuring flour by weight (125g) is far more accurate than by volume. An 8×8-inch metal pan is ideal for even heat conduction, leading to consistent baking.
Glass or ceramic pans often require a longer bake time and can affect the edges. A fine-mesh sieve is essential for sifting the cocoa and flour to prevent lumps. Finally, a sharp chef’s knife run under hot water and dried will give you those pristine, clean-cut edges that define an aesthetic brownie.
How to Make Aesthetic Brownies Recipe
Step 1: Prepare Your Pan and Melt the Chocolate
First, don’t just grease your pan—create a parchment paper sling. Butter the entire 8×8-inch metal pan, then press in a sheet of parchment paper with at least 2 inches of overhang on two opposite sides. This sling is your ticket to flawless, crumb-free removal.
Now, set up a double boiler: place a heatproof bowl over a saucepan with an inch of simmering water, ensuring the bowl doesn’t touch the water. Add the chopped butter and chocolate. Stir gently and occasionally until the mixture is completely smooth and glossy.
Believe me, this gentle, indirect heat protects the chocolate’s delicate structure, preventing it from becoming grainy. Remove it from the heat and let it cool for about 5 minutes; you don’t want to scramble the eggs in the next step.
Step 2: Whip the Eggs and Sugar to Perfection
This step is the heart of the crackly top. In a large bowl, combine the granulated and brown sugars. Crack in your room-temperature eggs one at a time.
Now, whisk with serious vigor. After adding each egg, whisk for a full 30 seconds. You’re not just mixing; you’re dissolving the sugar granules into the eggs and incorporating tiny air bubbles.
The mixture will transform from grainy to thick, pale, and almost ribbon-like as it falls from the whisk. This dissolution of sugar is the scientific key to that shiny, crisp crust. Whisk in the vanilla extract at the end.
Step 3: Combine Wet Ingredients and Fold in Dry
Slowly pour the warm (not hot) chocolate-butter mixture into the egg-sugar mixture while whisking constantly. It will thicken into a luxurious, pudding-like base. Now, sift your dry ingredients—the flour, Dutch-process cocoa, salt, and espresso powder (if using)—directly over the batter.
Tip from me: sifting is crucial here to avoid lumps of cocoa in your finished brownies. Using a flexible rubber spatula, gently fold the dry ingredients into the wet. Use a broad, sweeping motion and turn the bowl until just combined and no dry streaks remain.
Overmixing at this stage develops gluten in the flour, which can lead to a tougher, cakier texture. We want fudgy.
Step 4: Bake to Fudgy Perfection
Pour the incredibly thick batter into your prepared pan. Use the spatula to spread it evenly into all the corners. Now, the hardest part: trust the timing.
Bake in the center of your preheated 350°F (175°C) oven for 30-35 minutes. Start checking at 30 minutes. The brownies are done when the top is shiny and crackly, the edges are slightly pulled away from the pan, and a toothpick inserted into the center comes out with a few moist crumbs clinging to it.
If it comes out clean, they’re overbaked. This crumb test is the ultimate guide to perfect fudginess.
Step 5: Cool, Slice, and Admire Your Creation
Resist all temptation! Let the brownies cool completely in the pan set on a wire rack. This can take 2-3 hours.
They continue to set as they cool. For the absolute cleanest, most aesthetic slices, once they’re at room temperature, I recommend covering the pan and chilling them in the refrigerator for an hour. This firms up the fat, allowing you to cut without crumbs.
Use the parchment sling to lift the entire slab onto a cutting board. Wipe a sharp knife clean with a hot towel between each cut for pristine squares. Step back and admire your work—you’ve just made bakery-level aesthetic brownies.
Temperature is Everything: Room-temperature eggs whip to a greater volume and incorporate sugar more effectively than cold ones. Take them out at least an hour before baking. Similarly, let your melted chocolate mixture cool slightly so it doesn’t cook the eggs when combined. The Whisking Work: Don’t shortcut the 30-second whisk after each egg. You should hear the sound of the whisk change from a gritty swish to a smooth, fluid swoosh as the sugar dissolves. This effort pays off in that signature glossy, crackled landscape on top. The Toothpick Truth: The visual cue for doneness is subtle. The center should look set, not jiggly like liquid, but a toothpick test is your best friend. A few sticky, gooey crumbs are perfect. A clean toothpick means you’ve crossed into cakey territory. Chill for Clean Cuts: For those magazine-worthy sharp edges, chilling the cooled brownie slab is a game-changer. It solidifies the butter and chocolate, allowing the knife to glide through without dragging and tearing. Sifting Non-Negotiables: Cocoa powder is notoriously clumpy. Sifting it with the flour ensures a perfectly smooth, lump-free batter and an even rise in the oven.Recipe Variations
- Salted Caramel Swirl: After spreading the batter in the pan, dollop 1/2 cup of thick salted caramel sauce over the top. Use a knife or skewer to swirl it dramatically into the batter before baking for a gorgeous marbled effect.
What to Serve With This Recipe
These rich brownies are a star on their own, but thoughtful pairings can elevate them into a complete dessert experience. For a classic diner-style treat, serve a warm square à la mode with a scoop of high-quality vanilla bean ice cream—the hot/cold contrast is divine. For a dinner party, plate a small brownie square with a berry coulis (raspberry or strawberry) and a dollop of whipped crème fraîche for a touch of sophistication.
Beverage pairings are key: the bitterness of a dark roast coffee or an espresso cuts through the sweetness beautifully, while a glass of tawny port or a Cabernet Sauvignon with notes of dark fruit makes for an indulgent adult pairing. They also make exceptional gifts—package them in a clear cellophane bag with a ribbon for a simple, yet stunning present.
Storage & Make-Ahead Instructions
- Storage: Once completely cooled, store brownies in an airtight container at room temperature for up to 3 days. For longer storage, they freeze exceptionally well. Wrap the whole slab or individual squares tightly in plastic wrap, then place in a freezer bag for up to 3 months. Thaw at room temperature.
Frequently Asked Questions
Q: Why didn’t I get a shiny, crackly top?
A: This almost always comes down to the sugar not being fully dissolved into the eggs. Ensure your eggs are truly room temperature and whisk vigorously for the full 30 seconds after each addition. Also, avoid overmixing once the flour is added.
Q: Can I use milk chocolate instead of dark?
A: I don’t recommend it for this recipe. Milk chocolate has more sugar and dairy solids and less cocoa solids, which will throw off the balance of fat, sugar, and structure, likely resulting in a greasy, overly sweet brownie that may not set properly.
Q: My brownies are too cakey. What went wrong?
A: Cakey texture usually comes from overmixing the batter after adding the flour (developing gluten), using too much flour (always spoon and level!), or overbaking. Remember the toothpick test with moist crumbs.
Q: Can I make these gluten-free?
A: Yes, with a tested blend. Replace the all-purpose flour with 120g (about 3/4 cup plus 2 tbsp) of a 1:1 gluten-free baking flour blend that contains xanthan gum (like Bob’s Red Mill). The texture will be slightly more delicate but still delicious.
Q: How do I get my swirls (like for caramel or cheesecake) to look defined and not sink?
A: Ensure your swirl element (cheesecake batter, caramel) is thick, not runny. Dollop it on top of the brownie batter and only swirl 2-3 times with a knife. Over-swirling will cause it to disappear into the batter during baking.
Q: Can I double this recipe?
A: Absolutely. Double all ingredients and bake in a 9×13-inch metal pan. The bake time will increase to approximately 40-45 minutes.
Always rely on the toothpick test for doneness.
Q: What’s the best way to cut brownies cleanly?
A: Chill the cooled brownies, then use a long, sharp knife. Clean the knife with a hot, damp cloth between each cut. For a grid of perfect squares, cut the slab in half, then cut each half into portions, rather than cutting row by row.
Final Thoughts
Mastering the aesthetic brownie is about embracing the intersection of science and art. This recipe gives you the reliable, fudgy foundation—the product of tested techniques and quality ingredients. From there, your creativity is the limit.
Whether you keep them classically simple with a dusting of cocoa powder or transform them into a marbled masterpiece, the result is a deeply satisfying, shareable treat that delights all the senses. Remember, the signature crackly top is your badge of honor, proof you nailed the technique. I encourage you to make this recipe your own, experiment with the variations, and most importantly, share the results.
Tag me on social media—I love seeing your creations. Happy baking
Ultimate Aesthetic Brownies
Ingredients
Equipment
Method
- Preheat your oven to 350°F (175°C). Generously butter an 8×8-inch metal baking pan, then line it with parchment paper, leaving an overhang on two opposite sides. This creates a sling for easy removal, which is crucial for clean, aesthetic slices.
- In a heatproof bowl set over a saucepan of barely simmering water (double boiler), melt the butter and chopped dark chocolate together. Stir gently until completely smooth and glossy. Remove from heat and let cool for 5 minutes. This gentle melting prevents the chocolate from seizing and ensures a silky base.
- In a large bowl, whisk together both sugars. Add the room-temperature eggs one at a time, whisking vigorously for a full 30 seconds after each addition. This is the secret to the crackly top—you’re dissolving the sugar and incorporating air. Whisk in the vanilla extract.
- Slowly pour the warm (not hot) chocolate mixture into the egg-sugar mixture, whisking constantly until fully combined and thick. Sift the flour, cocoa powder, salt, and espresso powder (if using) directly into the bowl. Use a rubber spatula to fold the dry ingredients in until just combined and no streaks of flour remain; do not overmix.
- Pour the thick batter into your prepared pan, spreading it evenly into the corners. Bake for 30-35 minutes. The brownies are done when a toothpick inserted into the center comes out with a few moist crumbs attached, not wet batter. Trust me, this is the key to fudginess. Let cool completely in the pan on a wire rack.


