
Christmas brownies ideas
The scent of rich chocolate and peppermint filling your kitchen is one of the purest joys of the holiday season. As a chef, I’ve always believed that the best Christmas desserts balance spectacular presentation with approachable execution. Brownies are the perfect canvas for festive creativity—they’re forgiving, universally loved, and can be transformed with a few simple ingredients into a show-stopping centerpiece for your holiday table.
This guide isn’t just one recipe; it’s your toolkit for creating the most decadent, fudgy, and visually stunning Christmas brownies that will have your guests asking for the secret.
- Festive & Impressive: These aren’t ordinary brownies. With swirls, layers, and festive toppings, they look like they came from a professional bakery with minimal effort.
- Perfect Texture Guaranteed: My tested method ensures a crackly top and an intensely fudgy, moist interior every single time—no cakey brownies here.
- Make-Ahead Friendly: All these recipes taste even better the next day, making them a stress-free dessert you can prepare well before guests arrive.
- Endlessly Customizable: Start with the master fudgy brownie base, then choose your festive adventure from five distinct flavor profiles.
- Crowd-Pleasing: They cater to all ages and solve the “what dessert to bring” dilemma for every holiday party from cookie exchanges to Christmas dinner.
Ingredients You’ll Need
Let’s gather our ingredients—this master list forms the foundation for all the festive variations. Using quality chocolate is non-negotiable for the best flavor; I recommend a bittersweet bar between 60-70% cacao. The fat content in European-style butter also contributes to that luxurious mouthfeel.
For the peppermint version featured in the recipe card, you’ll need pure peppermint extract, not imitation, for a clean, cool flavor that doesn’t taste medicinal. Crushing your own candy canes gives you better control over the size of the pieces, from a fine dust to chunky shards.
- Unsalted Butter: 1 cup, plus extra for greasing. High-quality European-style is recommended for its richer flavor and higher fat content.
- Bittersweet Chocolate: 8 ounces, chopped. Use a bar, not chips, for smoother melting and superior taste.
- Granulated Sugar: 2 cups. This creates the signature shiny, crackly top as it caramelizes.
- Large Eggs: 4, at room temperature. This is crucial for proper emulsification and a fudgy, not cakey, crumb.
- Pure Vanilla Extract: 1 teaspoon. Enhances the depth of the chocolate flavor.
- All-Purpose Flour: 1 cup, spooned and leveled. This small amount is key to the fudgy texture.
- Fine Sea Salt: 1/2 teaspoon. Balances the sweetness and intensifies the chocolate.
- White Chocolate: 6 ounces, chopped, for the peppermint bark layer. Check the label to ensure it’s real cocoa butter-based.
- Pure Peppermint Extract: 1/2 teaspoon. A little goes a long way for that festive kick.
- Candy Canes: 3 large, crushed, for the classic holiday topping and crunch.

Note: You’ll find the complete list of ingredients, along with their exact measurements, in the printable recipe card at the bottom of this post.
Kitchen Equipment Needed
You don’t need specialty tools to make exceptional brownies. A standard 9×13-inch metal baking pan is ideal because it heats evenly; glass or ceramic can alter baking times. Parchment paper with overhanging edges is your best friend for flawless removal.
A heatproof bowl that fits snugly over a saucepan creates an effective double boiler for gently melting chocolate. A rubber spatula is perfect for folding without deflating the batter, and a fine mesh sieve ensures your flour and salt are evenly incorporated without lumps.
How to Make Christmas Brownies Recipe
Step 1: Prepare Your Pan and Melt the Chocolate
Preheat your oven to 350°F (175°C). Generously butter your 9×13-inch pan and line it with parchment paper, leaving an overhang on the two long sides. This isn’t just for easy cleanup—it guarantees you can lift the entire slab of brownies out for pristine, crumb-free cutting.
For the chocolate, create a double boiler. Place your chopped bittersweet chocolate and butter in a heatproof bowl over a pot of barely simmering water. Stir occasionally until the mixture is completely smooth and glossy.
This gentle heat prevents the chocolate from seizing and gives you ultimate control.
Step 2: Build the Base Batter
Remove the melted chocolate mixture from the heat and immediately whisk in the granulated sugar. The residual heat will begin to dissolve the sugar. Let this cool for about 5 minutes—this is a critical step.
If the mixture is too hot, it will cook the eggs when you add them. After it has cooled, whisk in the eggs and vanilla extract, one egg at a time, beating well after each addition. Believe me, you’ll see the batter transform into a thick, shiny, and pale mixture.
This emulsion is the heart of a fudgy texture.
Step 3: Incorporate Dry Ingredients and Create Swirls
Sift the flour and salt directly over the chocolate batter. Using a rubber spatula, fold gently until the last streaks of flour disappear. Overmixing develops gluten, leading to tough, cake-like brownies.
For the peppermint swirl, pour about two-thirds of the plain batter into your prepared pan. Melt the white chocolate gently, stir in the peppermint extract, and dollop it over the base layer. Top with the remaining brownie batter.
Now comes the fun part: use a butter knife to swirl the layers together in a marbled pattern. Don’t overdo it—5-6 passes is plenty.
Step 4: Bake to Fudgy Perfection
Place the pan in the center of your preheated oven. Bake for 30-35 minutes. Here’s my professional tip: start checking at 30 minutes.
The brownies are done when the edges are set and pulled slightly away from the pan, and a toothpick inserted about 2 inches from the edge comes out with a few moist crumbs attached. The center should still have a slight wobble. Trust me, they will continue to set as they cool.
Overbaking is the number one cause of dry brownies.
Step 5: Cool, Decorate, and Serve
Let the brownies cool completely in the pan set on a wire rack. This can take 2-3 hours, but it’s essential for clean slicing. Once completely cool, lift them out using the parchment paper overhang.
Sprinkle the crushed candy canes evenly over the top, pressing gently so they adhere. For picture-perfect squares, use a large, sharp chef’s knife. Wipe it clean with a hot, damp cloth between each cut.
Step back and admire your beautiful, festive creation before serving.
- Temperature is Key: Using room-temperature eggs is non-negotiable. Cold eggs can cause the melted chocolate and butter to seize, resulting in a grainy batter. Take your eggs out at least 30 minutes before you start.
- The Doneness Test: Ignore the “clean toothpick” rule for cakes. For fudgy brownies, you want a toothpick with a few sticky, moist crumbs. If it comes out completely clean, the brownies are overbaked.
- Cutting for Clean Edges: For absolutely flawless, professional-looking squares, chill the entire slab of brownies in the refrigerator for 30 minutes before cutting. Use a long, sharp knife and cut with a gentle sawing motion, cleaning the blade after each cut.
- Flavor Development: While they’re hard to resist, brownies actually taste best the day after they’re baked. This resting time allows the flavors to meld and the texture to become uniformly fudgy throughout.
Recipe Variations & Customizations
The master recipe is your launchpad. Here are four more tested Christmas variations that each bring a unique festive flair.
- Gingerbread Swirl Brownies: Add 1 tsp ground ginger, 1/2 tsp cinnamon, and 1/4 tsp cloves to the flour mixture. Before swirling, mix 1/4 cup of molasses into 1/3 of the brownie batter for a spiced marbled effect.
- Eggnog White Chocolate Blondies: Replace the bittersweet chocolate with 10 oz of chopped white chocolate. Add 1 tsp rum extract and 1/2 tsp of freshly grated nutmeg to the batter. Top with a simple glaze made from powdered sugar and a splash of real eggnog.
- Cranberry Orange Dark Chocolate: Fold 3/4 cup of dried cranberries (soaked in orange juice for 10 minutes, then drained) and the zest of one orange into the finished batter. The tart cranberries cut through the rich chocolate beautifully.
- Salted Caramel Pecan: After pouring the batter into the pan, drizzle 1/2 cup of thick salted caramel sauce over the top and swirl gently. Sprinkle with 1 cup of toasted pecan halves before baking for a sophisticated, nutty crunch.
- Gluten-Free Adaptation: Successfully tested using a 1:1 gluten-free all-purpose flour blend. The texture remains wonderfully fudgy, making it an inclusive option for all your guests.
What to Serve With This Recipe
These brownies are a star on their own, but they can be elevated into a full dessert experience. For a festive platter, offer a selection of the different variations—a square of peppermint, a slice of gingerbread, and a piece of cranberry orange. They pair wonderfully with a scoop of vanilla bean ice cream or a dollop of lightly sweetened whipped cream flavored with a hint of bourbon.
Beverage pairings include cold milk for the kids, a rich hot chocolate for a cozy treat, or a glass of tawny port or a coffee liqueur for the adults. They’re perfect for your Christmas dinner dessert table, as a homemade food gift packaged in a festive box, or as the centerpiece for a holiday cookie exchange.
Storage & Make-Ahead Instructions
- Room Temperature Storage: Once completely cooled, store brownies in an airtight container at room temperature for up to 4 days. Place a sheet of parchment between layers if stacking.
- Freezing for Later: These brownies freeze exceptionally well. Wrap the whole slab or individual squares tightly in plastic wrap, then in foil or a freezer bag. They will keep for up to 3 months. Thaw overnight in the refrigerator.
- Make-Ahead Strategy: Brownies are the ultimate make-ahead dessert. Bake them 1-2 days before you need them. Their flavor and texture improve as they sit. Decorate with toppings like crushed candy canes or a drizzle just before serving to maintain texture and color.
- Reheating Tip: For a just-baked experience, warm individual squares in the microwave for 10-15 seconds. This gently softens the chocolate and makes them incredibly gooey.
Frequently Asked Questions
Q: Can I use cocoa powder instead of bar chocolate?
A: I don’t recommend it for this specific fudgy recipe. Bar chocolate provides cocoa butter, which is essential for the dense, rich texture and shiny top. A cocoa powder-based recipe will yield a cakier, different result.
Q: My brownies are too cakey. What went wrong?
A: This usually has two causes: overmixing the batter after adding the flour (which develops gluten), or overbaking. Next time, fold the flour until just combined and pull the brownies from the oven when the center still looks slightly underdone.
Q: Can I make these brownies vegan or egg-free?
A: For an egg-free version, a tested substitution is to use 1/2 cup of plain applesauce or 1/2 cup of yogurt for every 2 eggs. The texture will be more dense but still delicious. Use vegan butter and dairy-free chocolate.
Q: How do I prevent the candy cane topping from getting sticky and melting?
A: Apply the crushed candy canes only after the brownies are completely cool. The moisture from warm brownies will dissolve the candy. Storing them in a cool, dry place also helps.
Q: Can I double this recipe?
A: Absolutely. Double all ingredients and bake in two separate 9×13-inch pans. Do not try to bake a double batch in one larger pan, as the center will not bake through properly.
Q: What’s the best way to cut brownies without crumbling?
A: Use a sharp, thin-bladed knife. Run it under very hot water, wipe it dry, and make a clean cut. Repeat the heating and wiping for each cut.
Chilling the brownies first also makes cutting cleaner.
Q: My white chocolate swirl disappeared into the batter. How can I get defined swirls?
A: Ensure your white chocolate mixture is thick. Let it cool slightly after melting so it’s not too runny. Also, don’t over-swirl.
A few figure-eight motions are enough to create a pattern without fully blending the layers.
Final Thoughts
Creating these Christmas brownies is about more than just baking; it’s about crafting edible holiday joy. The process is wonderfully simple, but the result feels special and celebratory. Whether you choose the classic peppermint bark, the spiced gingerbread, or another variation, you’re giving your family and friends a gift of homemade decadence.
Remember, the hallmark of a great brownie is that fudgy, moist interior—don’t be afraid to pull them from the oven early. I encourage you to try one recipe, then get creative with your own festive mix-ins and toppings. Please share your creations with me online by tagging me.
From my kitchen to yours, I wish you a delicious and joyful holiday season filled with wonderful treats and even better memories. Happy baking
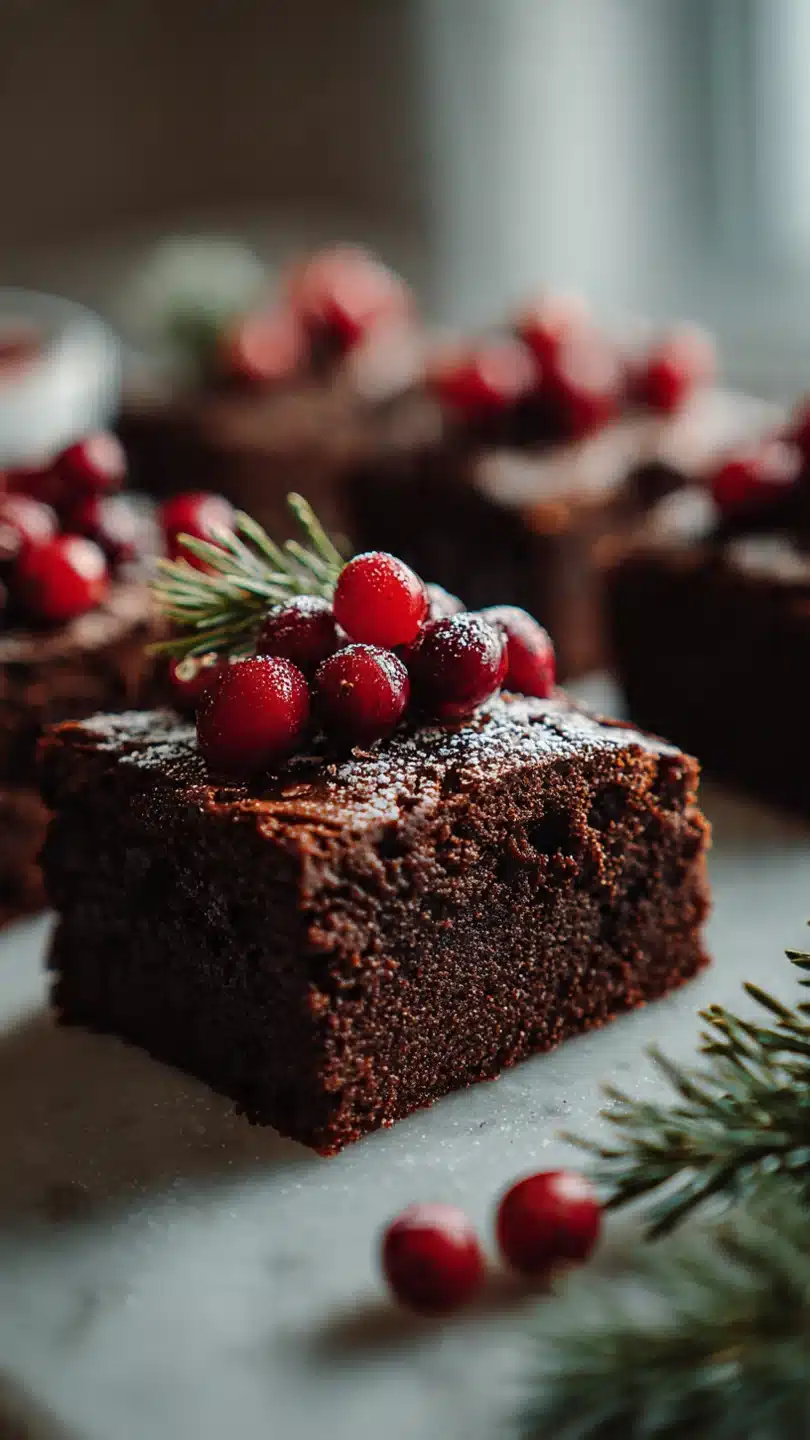
Peppermint Bark Brownies
Ingredients
Equipment
Method
- Preheat your oven to 350°F (175°C). Generously butter a 9×13-inch baking pan and line it with parchment paper, leaving an overhang on two sides for easy removal. This is a non-negotiable step for clean cuts later.
- Create a double boiler by placing a heatproof bowl over a saucepan of gently simmering water. Add the bittersweet chocolate and butter, stirring occasionally until completely melted and smooth. Remove from heat and whisk in the sugar until fully combined. Let cool for 5 minutes.
- Whisk the eggs and vanilla into the chocolate mixture, one egg at a time, until the batter is glossy and thick. Sift the flour and salt directly over the bowl and fold gently with a spatula until just combined. Overmixing here leads to cakey brownies, and we want fudgy.
- Pour 2/3 of the brownie batter into your prepared pan and spread evenly. In a separate bowl, melt the white chocolate gently. Stir in the peppermint extract. Dollop this over the brownie base, then top with the remaining brownie batter. Use a knife to create dramatic swirls.
- Bake for 30-35 minutes, until the edges are set and a toothpick inserted 2 inches from the edge comes out with moist crumbs. The center will still look slightly underdone—trust me, this is the secret to fudgy texture. Let cool completely in the pan before sprinkling with crushed candy canes and cutting.


