
Japanese strawberry shortcake
There’s a specific magic to a perfectly executed Japanese strawberry shortcake. It’s not just a dessert; it’s an experience of contrasting textures and subtle sweetness. Imagine slicing into a cloud-like sponge, so tender it practically dissolves, to reveal layers of fresh, bright strawberries and the pure, clean taste of whipped cream.
Unlike its denser American cousin, this cake is an exercise in delicacy and balance. Having spent years in professional pastry kitchens, I can tell you that mastering this cake is a rite of passage. It teaches you about air, temperature, and a gentle touch.
The result is a stunning centerpiece that’s surprisingly light, making it the perfect finale to any meal.
- Feather-Light Texture: The secret is in the meringue-based sponge, which bakes up incredibly soft and airy, melting on your tongue.
- Not Too Sweet: This cake highlights the natural flavor of strawberries and cream with just the right amount of sugar, pleasing both adults and kids.
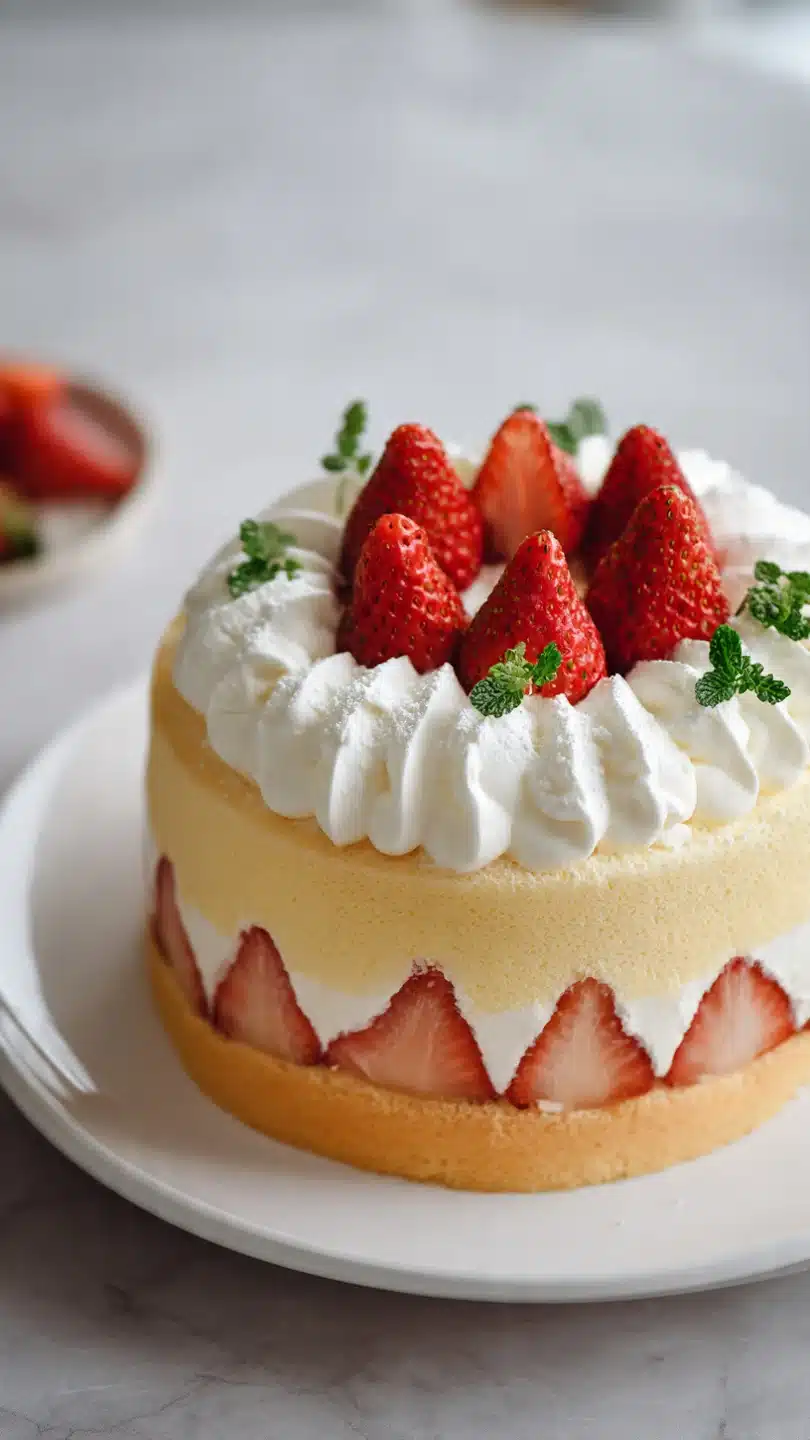
- Elegant & Impressive: With its clean, white frosting and jewel-like strawberry topping, it looks like it came from a professional patisserie.
- A Technical Foundation: Mastering this sponge cake technique opens the door to countless other Japanese and European-style desserts.
- Seasonally Adaptable: While strawberries are classic, the basic framework works beautifully with other fruits like peaches, raspberries, or mandarin oranges.
- Crowd-Pleasing: Its delicate nature makes it a universal favorite for birthdays, holidays, or afternoon tea.
Ingredients You’ll Need
Let’s gather our ingredients—this is where precision meets simplicity. The magic of this cake lies in the quality and treatment of just a few key components. Using a kitchen scale is highly recommended for accuracy, especially with the flour and sugar, as it guarantees the perfect cake structure every time.
- Cake Flour: This lower-protein flour is essential for that tender, fine crumb. If you must substitute with all-purpose flour, remove 2 tablespoons from each cup and replace it with cornstarch.
- Eggs, room temperature: This is non-negotiable. Room temperature egg whites whip up higher and more stable, providing the cake’s lift. Separate them cold, then let them sit on the counter for 30 minutes.
- Granulated Sugar: We’ll divide it between the meringue and the yolks. The sugar in the meringue stabilizes the foam.
- Heavy Whipping Cream, very cold: Look for a cream with at least 36% milk fat. Chill your bowl and beaters in the freezer for 15 minutes before whipping for the best, stiffest peaks.
- Fresh Strawberries: Choose berries that are fragrant, bright red, and firm. Their quality directly defines the cake’s flavor. Avoid any that are mushy or have white shoulders.

Note: You’ll find the complete list of ingredients, along with their exact measurements, in the printable recipe card at the bottom of this post.
Kitchen Equipment Needed
You don’t need specialized patisserie tools, but a few key items will make the process smoother. An 8-inch round cake pan is the ideal size. Parchment paper for the bottom is a must, but do not grease the sides—the batter needs to cling to the pan to rise properly.
An electric mixer is essential for achieving the proper meringue consistency. A large flexible spatula is your best friend for gentle folding. A serrated knife or cake leveler will help you split the sponge evenly.
Finally, an offset spatula makes frosting the cake neatly much easier.
How to Make Japanese Strawberry Shortcake Recipe
Step 1: Build the Foundation with Meringue
Preheat your oven to 340°F (170°C)—this slightly lower temperature is key for a slow, even rise without browning the top too quickly. Line your cake pan. Now, in a spotlessly clean bowl, start beating the egg whites.
Any trace of fat (like yolk) will prevent them from whipping properly. Trust me, I’ve learned this the hard way. Gradually add the sugar as the foam builds, and beat until you have stiff, glossy peaks that don’t slump when you lift the whisk.
This meringue is the architectural support for your entire cake.
Step 2: Create the Velvety Yolk Base
In another bowl, whisk the yolks and remaining sugar. You’re looking for the mixture to become pale, thick, and form a “ribbon” that holds its shape for a moment when you lift the whisk. This step incorporates air and dissolves the sugar.
Whisk in the milk, oil, and vanilla. Now, sift the dry ingredients directly over this mixture. Sifting is not just for removing lumps; it aerates the flour, making it easier to incorporate without over-mixing.
Fold gently until just combined.
Step 3: The Delicate Marriage of Batter and Meringue
Here’s the most critical technique. Take a large scoop of the meringue and whisk it vigorously into the yolk batter. This first addition lightens the dense batter.
Now, add the remaining meringue in two parts. Using your spatula, cut down through the center, sweep along the bottom, and fold over the top, rotating the bowl as you go. Tip from me: stop folding the moment no white streaks remain.
Over-mixing deflates the precious air bubbles.
Step 4: Bake and Cool with Care
Pour the billowy batter into the pan and smooth the top. Bake it on a center rack. The cake is done when it’s golden and springs back.
Now, the unconventional but crucial step: immediately invert the pan onto a cooling rack. Believe me, this allows gravity to work in your favor, preventing the delicate structure from collapsing under its own weight as it cools. Let it hang out like this until completely cold.
Step 5: Assemble with a Pastry Chef’s Touch
Once cool, run a knife around the edge and release the cake. Use a serrated knife with a gentle sawing motion to split it into two even layers. Whip your cold cream and powdered sugar to firm peaks.
Brush the first layer with a little syrup to keep it moist. Spread a layer of cream, add a ring of sliced strawberries, and cover with more cream. Top with the second layer.
Apply a thin “crumb coat” of cream over the whole cake and chill it. This seals in crumbs for a flawless final coat.
Step 6: Final Decoration and Serving
Now for the satisfying part. Apply the final, thick, and smooth layer of whipped cream. Decorate the top with your prettiest strawberry halves.
For that classic bakery look, pipe shells or rosettes around the base. Chill the assembled cake for at least two hours before serving. This sets the cream and allows the flavors to meld.
Step back and admire your creation. Use a hot, dry knife (wiped clean between cuts) to slice perfect, clean pieces.
- The Meringue Test: To check for stiff peaks, lift the whisk straight up. The peak should stand upright without curling over at the tip. The meringue should also not slide when you tilt the bowl.
- Folding Motion: Imagine you are gently turning the batter over onto itself from the bottom of the bowl. A few small streaks of white are better than a completely homogenous, deflated batter.
- Temperature is Key: Cold cream whips better because the fat crystals are firm. Warm egg whites won’t achieve the same volume. Plan your ingredient temperatures ahead of time.
- The Crumb Coat: Don’t skip the initial thin layer of cream before the final frosting. It traps loose crumbs, ensuring your beautiful white frosting stays pristine.
- Slicing Strawberries: For the filling, slice berries vertically so they lay flat. For the top, halve them from stem to tip for the most attractive presentation.
Recipe Variations
- Matcha Shortcake: Add 1 1/2 tablespoons of high-quality matcha powder to the dry ingredients. Pair the cream with sweet red bean paste or fresh raspberries for a stunning green-and-red dessert.
- Chocolate Twist: Replace 30g of the cake flour with unsweetened cocoa powder (sifted). Fill with chocolate shavings or a layer of chocolate pastry cream alongside the strawberries.
- Citrus Zest: Add the finely grated zest of one lemon or orange to the yolk mixture for a bright, fragrant sponge. Complement with a citrus syrup brush and berries macerated in a little liqueur.
- Berry Medley: Use a mix of raspberries, blueberries, and sliced strawberries for a summer fruit celebration. The varied colors look beautiful in the layers and on top.
- Adult Elegance: Brush the cake layers with a syrup made from equal parts sugar, water, and a tablespoon of Grand Marnier, Chambord, or sake for a sophisticated note.
- Mini Cakes: Bake the batter in a sheet pan (jelly roll pan) for about 12-15 minutes. Once cool, use a round cutter to stamp out individual cake rounds and assemble personal-sized shortcakes.
What to Serve With This Recipe
Japanese strawberry shortcake is a celebration in itself, best served as the grand finale. It pairs wonderfully with a cup of lightly brewed green tea or hojicha (roasted green tea), which cuts through the creaminess beautifully. For coffee lovers, a smooth, mild pour-over coffee is an excellent match.
For a special occasion menu, start with light, umami-forward dishes like a clear soup, grilled fish, or a delicate chicken dish. Since the cake is so light, it can follow a relatively substantial meal without feeling overwhelming. It’s the quintessential birthday cake in Japan but is equally perfect for anniversaries, Mother’s Day, or any gathering where you want to offer something impressively elegant yet comforting.
Storage & Make-Ahead Instructions
- Refrigeration: The assembled cake must be stored in the refrigerator, covered with a cake dome or loosely tented with plastic wrap, for up to 2 days. The sponge may start to dry out slightly after that.
- Freezing Components: The unfrosted sponge cake layers wrap well in plastic and then foil and can be frozen for up to 1 month. Thaw overnight in the refrigerator. The whipped cream and assembled cake do not freeze well, as the cream will separate and become grainy upon thawing.
- Make-Ahead Strategy: You can bake the sponge cake layers 1 day in advance. Store them wrapped tightly at room temperature. Wash, hull, and slice your strawberries up to a day ahead and keep them in a sealed container in the fridge. Whip the cream and assemble the cake the day you plan to serve it for the absolute best texture and appearance.
- Serving Leftovers: Cover any cut edges with plastic wrap pressed directly against the cake to prevent drying. Consume within 24 hours.
Frequently Asked Questions
Q: Can I use all-purpose flour instead of cake flour?
A: Yes, but with a modification. For every 120g (1 cup) of all-purpose flour, remove 2 tablespoons and replace it with 2 tablespoons of cornstarch. Sift this mixture several times to mimic the tenderness of cake flour.
Q: My sponge cake collapsed in the center. What went wrong?
A: This usually points to under-baking or under-whipped meringue. Ensure your meringue reaches stiff peaks and bake until a skewer comes out completely clean. Also, avoid opening the oven door during the first 20 minutes of baking.
Q: How do I prevent the whipped cream from becoming runny or weeping?
A: Ensure everything is cold—bowl, beaters, and cream. Don’t over-whip. Stabilize it by adding 1/2 teaspoon of cream of tartar or a tablespoon of instant pudding mix (vanilla or white chocolate flavor) to the cream before whipping.
Q: Can I make this cake dairy-free?
A: The sponge can be made dairy-free by using a plant-based milk. For the cream, coconut cream (the thick part from a can of full-fat coconut milk, chilled) can be whipped, but it will impart a coconut flavor. Commercial plant-based “heavy creams” are also worth testing.
Q: Why shouldn’t I grease the sides of the pan?
A: The batter needs to cling to the sides of the pan as it rises. A greased side would cause it to slide down, inhibiting its upward climb and potentially leading to a denser cake.
Q: My cake is difficult to slice cleanly. Any tips?
A: Chill the cake thoroughly. Dip a long, sharp knife in hot water, wipe it completely dry with a towel, and make a single, confident cut. Repeat the hot-water wipe between each slice for perfect, clean layers.
Q: Is there a substitute for fresh strawberries?
A: While fresh is ideal, you can use high-quality frozen strawberries that have been completely thawed and thoroughly patted dry. They will be softer but still flavorful. Do not use them frozen, as they will release too much water.
Final Thoughts
Mastering this Japanese strawberry shortcake is more than just following a recipe; it’s about embracing a philosophy of lightness and precision. The reward is a dessert that feels special without being heavy, sweet without being cloying, and impressive without being fussy. It’s the cake that will have your guests asking, “You made this?” with genuine awe.
Remember, your first attempt might not be bakery-perfect, and that’s okay. Each time you make it, you’ll learn more about the feel of the meringue and the gentle touch needed for folding. I encourage you to try it, share your results, and make it your own.
Once you have this foundational sponge in your repertoire, a world of elegant desserts opens up. Now, go preheat that oven and whip up something beautiful.
Japanese Strawberry Shortcake
Ingredients
Equipment
Method
- Preheat your oven to 340°F (170°C). Line the bottom of an 8-inch (20cm) round cake pan with parchment paper. Do NOT grease the sides. In a large, impeccably clean bowl, beat the egg whites with an electric mixer on medium speed until foamy. Gradually add half the granulated sugar (60g) and beat on high until you achieve stiff, glossy peaks that hold their shape when the whisk is lifted. This meringue is the foundation of your cake’s lift, so don’t rush it.
- In a separate bowl, whisk the egg yolks with the remaining 60g of sugar until pale, thick, and ribbon-like, about 3-4 minutes. Whisk in the milk, oil, and vanilla until fully combined. Sift the cake flour, baking powder, and salt over the yolk mixture. Gently fold with a spatula until just combined—a few streaks of flour are okay at this stage.
- Now, take one-third of the meringue and vigorously whisk it into the yolk batter to lighten it. This initial mix helps equalize the densities. Then, using a large flexible spatula, gently fold in the remaining meringue in two additions. Use a cutting and folding motion, rotating the bowl, until no white streaks remain. The batter should be voluminous and airy. Pour immediately into the prepared pan and smooth the top.
- Bake for 23-25 minutes. The cake is done when the top is golden, springs back lightly to the touch, and a skewer inserted comes out clean. Immediately invert the pan onto a wire rack. Let it cool completely upside down—this prevents collapse. Once cool, run a thin knife around the edge to release. Slice horizontally into two even layers with a serrated knife.
- For the filling, whip the cold cream and powdered sugar until you reach firm, spreadable peaks. Be careful not to over-whip into butter. Place one cake layer on a serving plate. Brush lightly with simple syrup if using. Spread a layer of whipped cream, then arrange a ring of sliced strawberries in the center. Add more cream to cover the berries. Top with the second cake layer, brush with syrup, and apply a thin ‘crumb coat’ of cream over the entire cake. Chill for 20 minutes.
- Apply the final, smooth layer of whipped cream. Decorate the top with halved strawberries. For the classic look, pipe remaining cream using a star tip around the base and top edge. Dust lightly with powdered sugar just before serving. Chill for at least 2 hours before slicing with a hot, clean knife for pristine pieces.


